How to :: use and customize the additional panel
Overview
At Toucan we believe in sharing more than data, we share stories. Stories need content and explanation.
Good stories push you to take action! So let’s discover the additional panel that you can customize for your users to enhance their data storytelling experience.
This panel is available from the right-hand side of the application, both on mobile and desktop.
This tutorial will be split in three parts:
- How to use the additional panel? 🧐
- How to customize it? 💅
- Other ways to share in Toucan 📮
How to use the additional panel?
Above all, the additional panel helps users better understand and share stories. To do so, it offers three tabs that we will see together.
- The Glossary is the first tab. It allows to align all users on the same data definition. 📚
- Share is the second tab. It proposes to empower external users with stories. Sharing and communication are at the heart of Toucan Toco. 📩
- Last but not least: the Comment tab. A feature to share comments & insights to the other users. 💬
Glossary
You can specify a glossary for each story from the story edition menu, or for the whole SmallApp. ✍️
Learn more about it right here.
Share
Sharing is caring 👐 In this tab, you are enabling the full power of Toucan. We are a media made for action.
Each user has the possibility to share the insights accessible in Toucan Toco to anyone!
With this Share tab you can reach anyone inside and outside your organization and provide meaningful data visualization 🌐.
Once the Share panel is added, you can activate or deactivate some options. (See customization part)
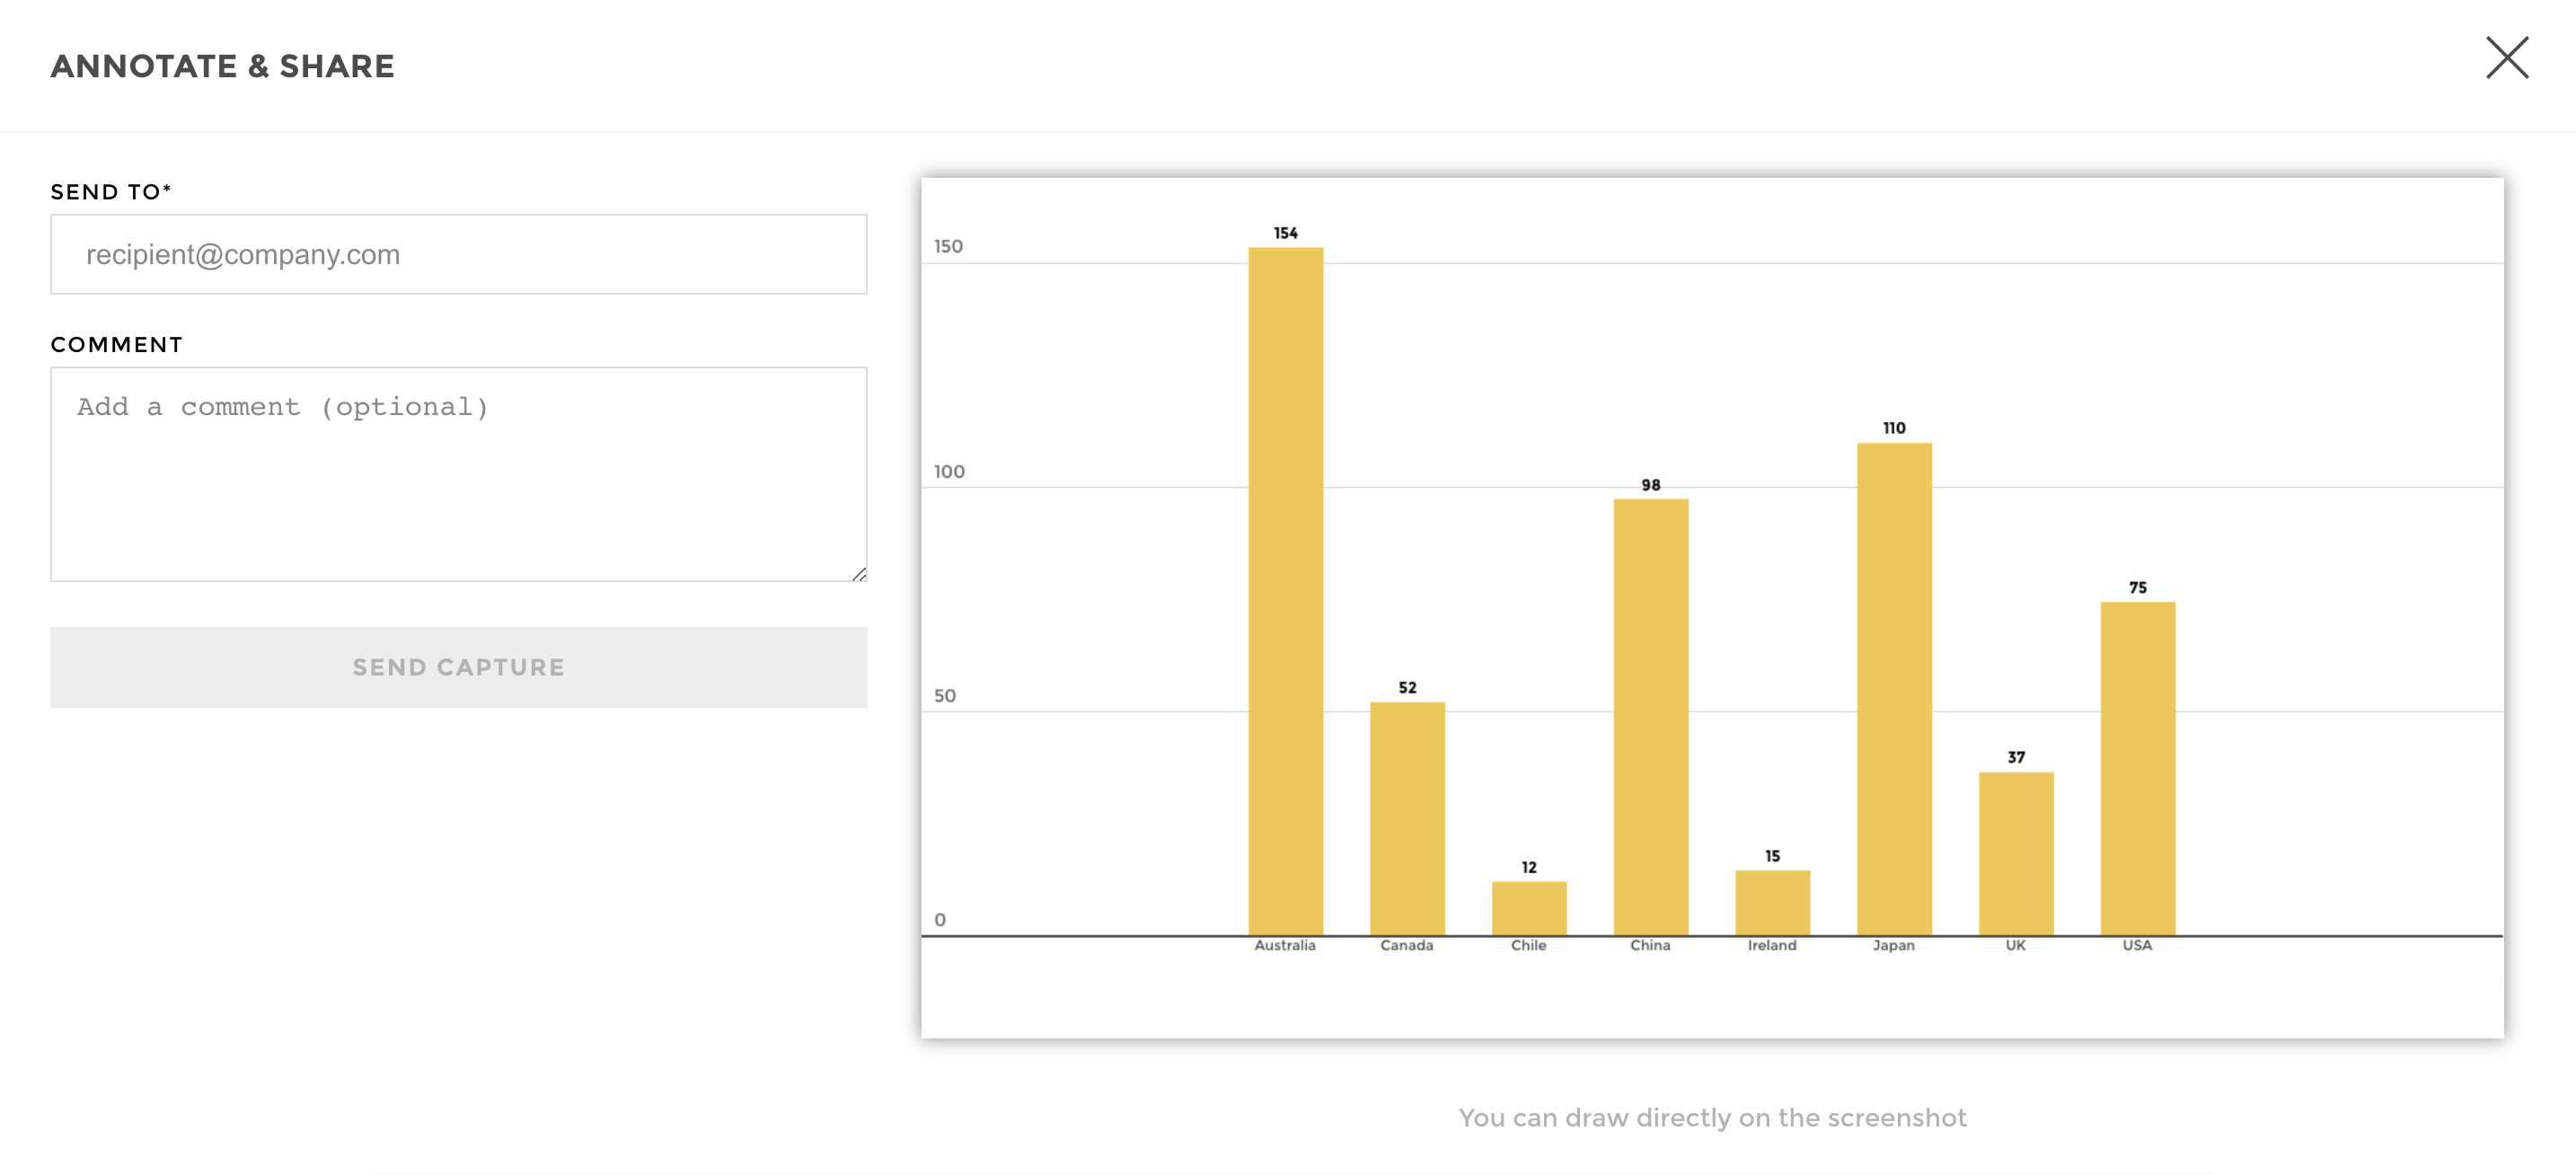
Annotate and share
This option allows your user to annotate a screenshot of a chart (without the header giving some context about the current report/date) ✍️ and share it to any email address with a custom message ✉️.
Export data
This will allow your user to download the data used in your viz 🔢.
It will match the result of your query.
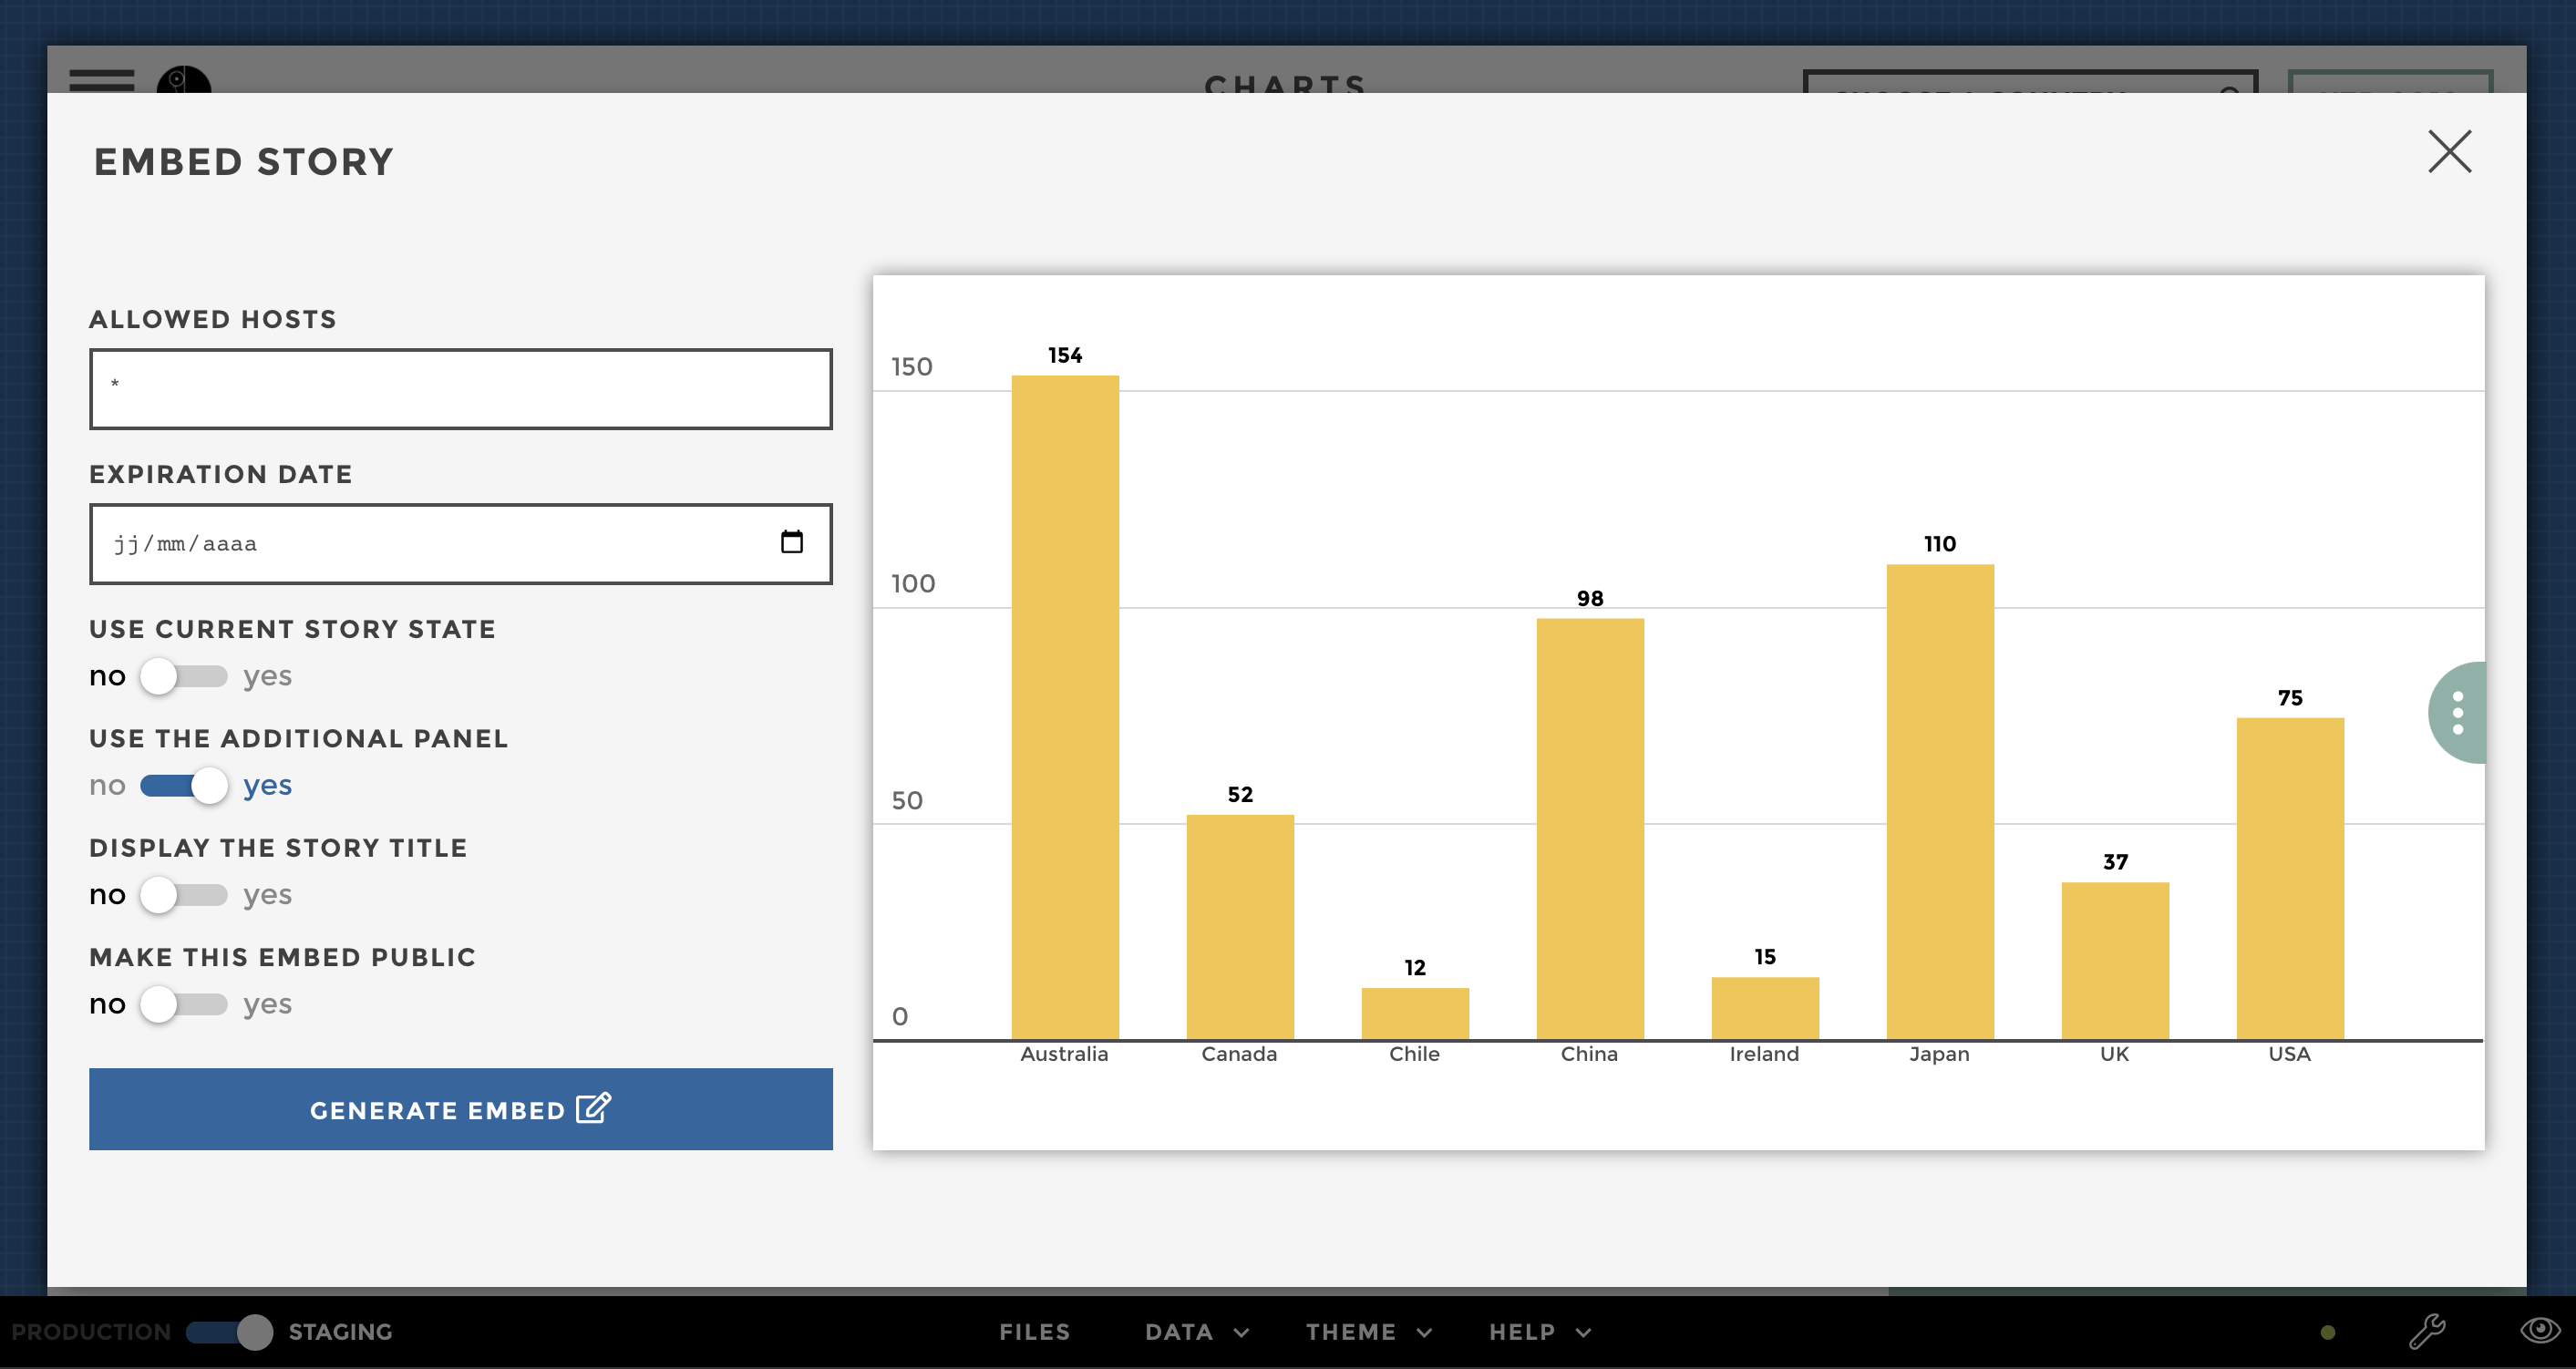
Embed story
This option is only available in Staging Mode, if you are a conceptor. ✍️
What if you could insert a Toucan viz anywhere, yes anywhere… 🔥
As easy as a pie with our Embed option. 🍰
This option generates a HTML Tag, iFrame or Web Component, to insert anywhere in your Intranet, Web Application, or SaaS Software ! 🔗📊
Learn more about our embedded analytics offer.
Send by email
Comment
The comment tab offers your users a real chat made for action 💬.
For each story, users can exchange on what is displayed on the screen.
All comments are tied up to report and date selection if configured.
To notify a user, simply type his/her username (usually the email address) before your message.
New comments will appear in the notification menu 🔔. Users will be notified on the home, and by clicking on the link displayed, they will be automatically redirected to the commented story.
Note that a user can’t delete its own message, only an admin can delete messages.
How to customize it?
Warning
This is only available while editing the front config in code mode.
This additional panel can be customized according to your needs and requirements.
We will see what modifications can be made below. To do this you will
need to edit the front_config configuration file available in the
File tab in Staging mode. By editing this file in “code mode” you will
be able to enable or disable the features of the additional panel.
Here’s a concrete example: a customer may want to display the How tab by default, rather than the Glossary, in order to invite users to comment. Another example: a customer might want to disable data export for security reasons.
Here is the list of the different possible customizations and how to make them.
- Enable the hidden “Filters” tab
- Display a default tab when opening the additional panel
- Hide a tab
- Enable or disable Annotate & Share
- Enable or disable data export
- Enable or disable email sending
Display a default tab when opening the additional panel
When you open the additional panel, you will see multiple tabs (Glossary, Share and Comment).
You can customize which tab will be the default opened tab with the
option defaultSettingsTab in the front_config:
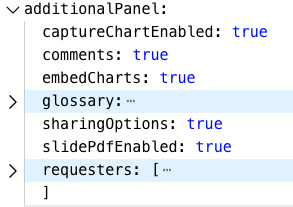
additionalPanel:
  defaultSettingsTab: 'glossary'  # can be "glossary", "filters", "share" or "comment"
Hide a tab
You can decide to completely hide the sharing tab (sure you want to?)
In the front_config.cson you can delete this line to hide the tab.
If you want to activate the option just set it to true:
additionalPanel:
  sharingOptions: true
Comments are referenced with the variable comments (true or false).
In the front_config.cson you can delete this line to hide the tab.
If you want to activate the option just set it to true:
additionalPanel:
  comments: true
and the glossary with the whole glossary block.
Enable or disable data export
You can disable this feature with the exportCSVDisabled option
(true/false).
In the front_config.cson you can manually deactivate the csv export
:
additionalPanel:
  exportCSVDisabled: true
Enable or disable email sending
You can disable this feature with the slidePdfEnabled option
(true/false).
In the front_config.cson you can manually activate the send by email
:
additionalPanel:
  slidePdfEnabled: true