Configuring the Snowflake OAuth2 connector
In order to connect using the OAuth2 connector, you will need to:
- Create a security integration in Snowflake
- (2) Configure the oauth2 connector in Toucan and authenticate the connection
(1) How to create a security integration
Note: You’ll need ACCOUNTADMIN or SECURITYADMIN roles to do the steps in this guide.
- Connect to your Snowflake interface with a user that has
ACCOUNTADMINorSECURITYADMINroles - In a Snowflake worksheet type the following:
USE ROLE ACCOUNTADMIN;
// or you can use:
// USE ROLE SECURITYADMIN;

CREATE SECURITY INTEGRATION MY_TOUCANTOCO_INTEGRATIION
  TYPE = OAUTH
  ENABLED = TRUE
  OAUTH_CLIENT = CUSTOM
  OAUTH_CLIENT_TYPE = 'CONFIDENTIAL'
  OAUTH_REDIRECT_URI = 'https://api-<your-instance>.toucantoco.com/<small-app-id>/oauth/redirect?connector_name=<connector-name>'
  OAUTH_ISSUE_REFRESH_TOKENS = TRUE
  OAUTH_REFRESH_TOKEN_VALIDITY = 86400
  PRE_AUTHORIZED_ROLES_LIST = ('TOUCAN_ROLE')
  BLOCKED_ROLES_LIST = ('SYSADMIN');
- Have a look at the
OAUTH_REDIRECT_URIparameter, you’ll need to replace some of the values here. <connector-name>: this will allow us to link the connector in Toucan to Snowflake. Later in our guide, we’ll usemy_snowflake_connector<your-instance>: this is the name of your Toucan instance. For example, if you connect to Toucan Toco using the following url: “my-company.toucantoco.com”, the identifier of your instance ismy-company<small-app-id>: the identifier of your Toucan app where you’ll add the connector, we’ll usemy-small-app
In the Toucan interface, here’s where you’ll see this:

To summarize, if you’re going to create a Snowflake connector called
my_snowflake_connector on the Toucan Toco app located at the url
https://my-company.toucantoco.com/my-small-app, you’ll write the
following oauth_redirect_uri:
OAUTH_REDIRECT_URI = 'https://api-my-company.toucantoco.com/my-small-app/oauth/redirect?connector_name=my_snowflake_connector'
- Another parameter that you want to take a look at is the
PRE_AUTHORIZED_ROLES_LIST = ('TOUCAN_ROLE')line. Here we’re referencing the TOUCAN_ROLE that was created in the steps 1/ of this documentation. - Tip: If you’ve made a mistake, no worries, you can simply change a
value by running
ALTER SECURITY INTEGRATION MY_TOUCANTOCO_INTEGRATIION. For instance to change theOAUTH_REDIRECT_URIparameter:
ALTER SECURITY INTEGRATION MY_TOUCANTOCO_INTEGRATIION SET
     OAUTH_REDIRECT_URI = 'https://api-corrected.toucantoco.com/my-small-app/oauth/redirect?connector_name=my_snowflake_connector';
- Now you can get the client id and client secret for this security integration. They are like application login/password and will be used in Toucan to authenticate the connection.
In the Snowflake worksheet, run:
select system$show_oauth_client_secrets('MY_TOUCANTOCO_INTEGRATIION')
This will return a result of the form:
{"OAUTH_CLIENT_SECRET_2":"some_secret_code_xyz123","OAUTH_CLIENT_SECRET":"some_secret_code123123","OAUTH_CLIENT_ID":"some_identifier123456789"}
Keep the tab open, or copy the values for OAUTH_CLIENT_ID and
OAUTH_CLIENT_SECRET somewhere, you’ll need those in the next step.
(2) Configure the oAuth2 connector
- Go into Toucan’s connector interface
- Add a connector
- Choose “Snowflake OAuth2” in the list
- Fill the form with the following info:
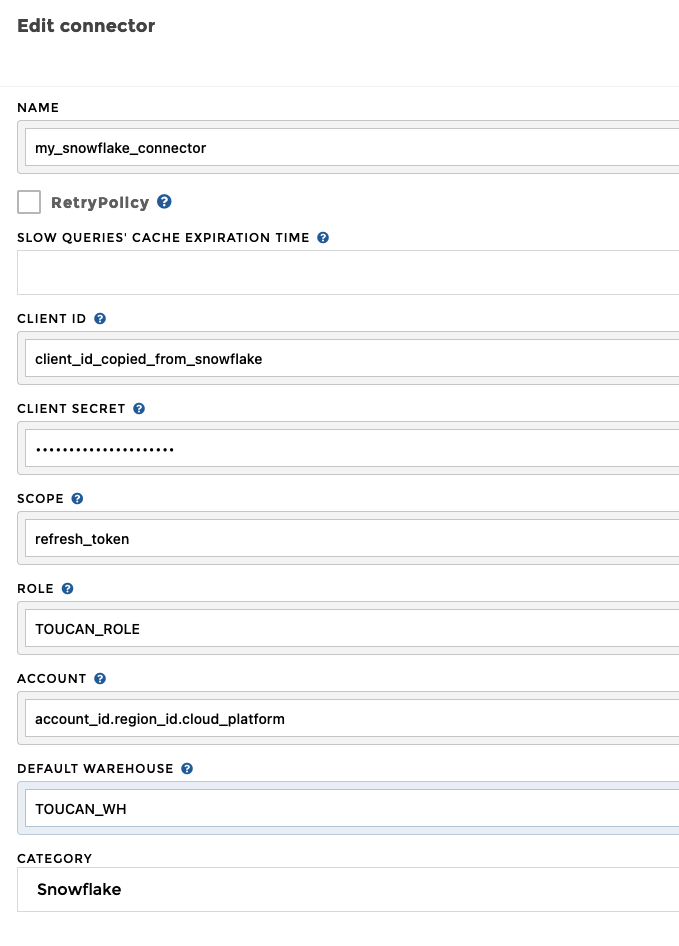
- name: give a name, it should match the
connector_namefrom theOAUTH_REDIRECT_URIof your Snowflake security integration. In our example: “my_snowflake_connector” - Retry policy: leave unchecked
- Slow queries’ cache expiration time: leave empty
- Client ID: use the
OAUTH_CLIENT_IDfrom step (1) - Client Secret: use the
OAUTH_CLIENT_SECRETfrom step (1) - Scope: write
refresh_token - Role:
TOUCAN_ROLE - Account: usually of the form
account_id.region_id.cloud_platform. When you connect to your snowflake UI, it is the first part of the url<account_identifier>.snowflakecomputing.com. You can read more about it here - Default Warehouse:
TOUCAN_WH - Category: leave “Snowflake”
- Then click on “save”
You should see an authentication window.
- Login with a user that has
TOUCAN_ROLE. In this documentation, we’ve usedTOUCAN_APP_USER:
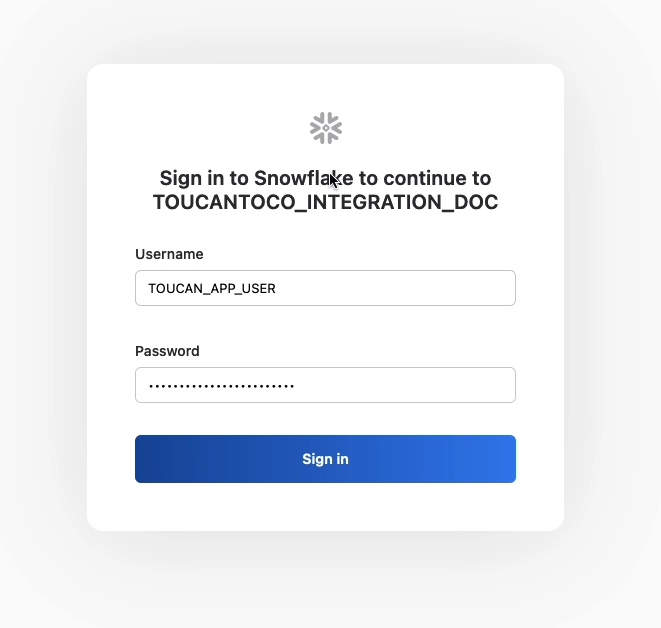
Once you’ve successfully logged in, you can save the connector form, and voilà! Now you can configure a Snowflake query :)