How to use the Http Connector
Overview
This is a generic connector to get data from any HTTP APIs (REST style APIs). It’s really customizable and versatile but it implies a more complex configuration. Optionality comes with a cost.
This type of data source combines the features of Python’s requests library to get data from any API with the filtering langage jq for flexible transformations of the responses. Optionally, an xpath string can be provided to first parse the XML response and then the jq filter is be applied to get the data in tabular format.
How to configure the connector
⚠️ to configure this connector it’s recommended to read the documentation of the HTTP API you want to query
Responsetype
Baseroute URL
Retrypolicy
Defines how the connector should behave when the network is unreachable:
MAX ATTEMPTS: number of attempts to do before aborting the connexionMAX DELAY: total time to wait before aborting the connexionWAIT TIME: time to wait between each attempt
Certificate
Auth
The authentication method that the connector should use to query the
data. AUTHTYPE Can be:
basic: username password, you can provide them inpositional arguments: input your username and password in the right ordernamed arguments: input them this way {“username”:”myusername”, “password”:”mypassword”}
digest: same as aboveoAuth1:positional arguments: input client_id (sometimes named client_key) and client_secret. Both are provided by the service you are trying to accessnamed arguments: input {“client_id”:your_client_id, “client_secret”: your_client_secret}.
oAUth2(oauth2_backend):positional arguments: enter one by one (in the right order), the URL to access to the authentication endpoint (e.g. https://login.mywebsite.com/oauth2/token), the “client_ID” (sometimes named “client_key”) and the “client_secret”. These informations are provided by the service you are trying to accessnamed arguments: input {“client_id”:your_client_id, “client_secret”: your_client_secret}.
Template
You can use this object to avoid repetition in data sources. The values of the three attributes will be used or overridden by all data sources using this connector.
json: a JSON object of parameters to send in the body of every HTTP request made using the configured connector. Example: { “offset”: 100, “limit”: 50 }headers: a JSON object of parameters to send in the header of every HTTP request made using the configured connector. Example: { “content-type”: “application/xml” }params: a JSON object of parameters to send in the query string of every HTTP request made using the configured connector. Example: { “offset”: 100, “limit”: 50}proxies: JSON object expressing a mapping of protocol or host to corresponding proxy. Example {“http”: “foo.bar:3128”, “http://host.name”: “foo.bar:4012”}
How to configure the data source
parameters: A JSON object that will be used for variables interpolation in the query string. For testing purpose only. In production mode, it should be left blank as variable interpolation will be handled by the app requester.url: The API’s endpoint you want to query, it will be appended to the baseroute URL defined in the connector ⚠️ as it cannot be empty in the case when the API doesn’t have endpoint, you can split the baseroute url defined in the connector and put the last part in the datasource. Ex: https://example.com/API in connector and /v1 in datasourceMethod: Defines the http method you want the datasource to perfom, GET, POST or PUT. Default is GET. You can find the method you need in the documentation of the API you want to queryheaders: a JSON object of parameters to send in the header of every HTTP request made using the configured connector. Example: { “content-type”: “application/xml” }. Overwrites the header’s parameter in Templateparams: a JSON object of parameters to send in the query string of every HTTP request made using the configured connector. Example: { “offset”: 100, “limit”: 50} Overwrites the params parameter in Templatejson: a JSON object of parameters to send in the body of every HTTP request made using the configured connector. Example: { “offset”: 100, “limit”: 50 } Overwrites the JSON parameter in Templateproxies: JSON object expressing a mapping of protocol or host to corresponding proxy. Example {“http”: “foo.bar:3128”, “http://host.name”: “foo.bar:4012”} Overwrites the proxies parameter in Templatedata: Two options, Type1 for a simple string, Type2 for a JSON field. 💡 you can send XML data with Type1 optionxpath: If the reply from the API contains XML data you can parse it with an xpath string. See documentation: xpath Example:xpath: "/bookstore/book"
<?xml version="1.0" encoding="UTF-8"?>
<result>
<bookstore>
    <book>
        <title>Harry Potter</title>
        <price>29.99</price>
    </book>
    <book>
        <title>Learning XML</title>
        <price>39.95</price>
    </book>
</bookstore>
</result>
In the connector we’ll have a response like this:
{"bookstore": {"book": [{"title":"Harry Potter", "price": "29.99"}, {"title": "Learning XML", "price":"39.95"}]}}
And we can then apply a:
filter: String containing a jq filter applied to the data to get them in tabular format. See documentation: jq Example:filter: ".bookstore.book[]"
Let’s take the JSON defined above
{"bookstore": {"book": [{"title":"Harry Potter", "price": "29.99"}, {"title": "Learning XML", "price":"39.95"}]}}
We apply the filter “.bookstore.book[]” which means that it will extract
the book list from the bookstore So we end up with a table of
results looking like this:
| title | price |
|---|---|
| Harry Potter | 29.99 |
| Learning XML | 39.95 |
Note: the reason to have a filter option is to allow you to take any
API response and transform it into something that fits into a column
based data frame.
An example with xml response
Let’s create a simple Http Connector withe ‘xml’ responsetype
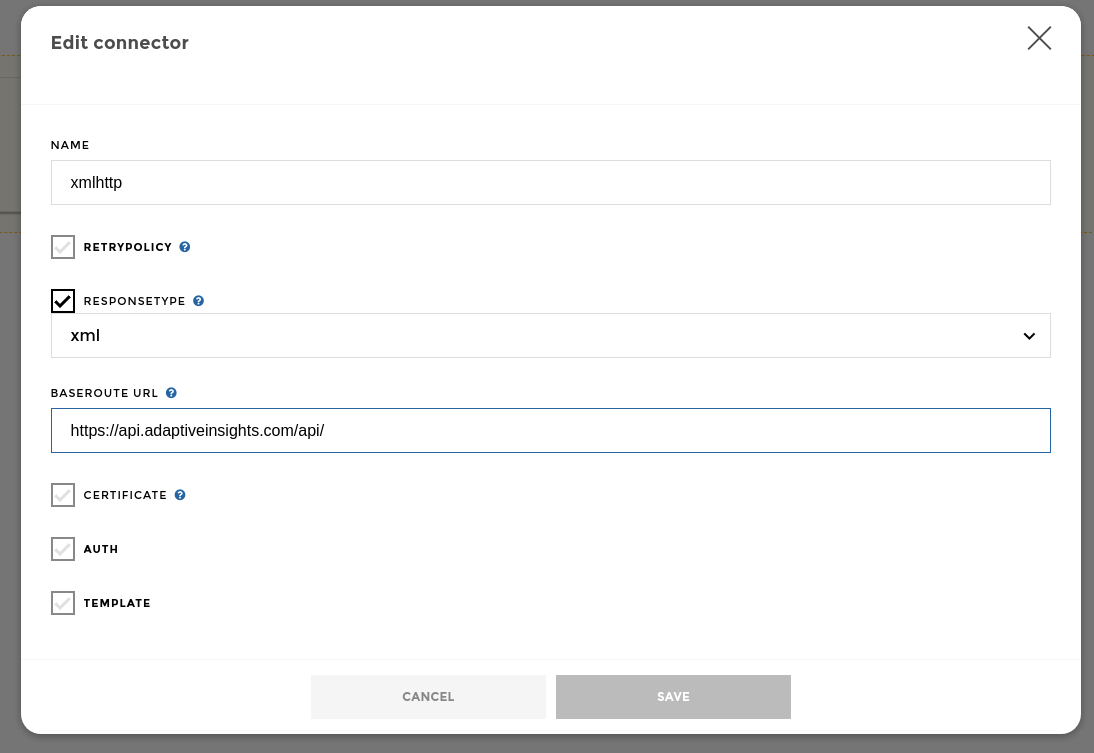
XML connector
We can now set the first data source parameters:
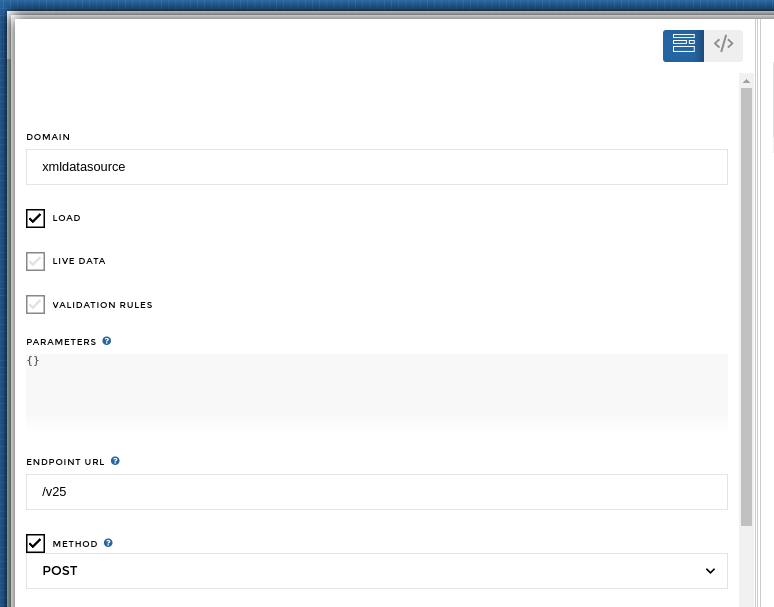
XML Data Source 1
We can then provide the xml string in the data:type-1 field, set the xpath and jq values:
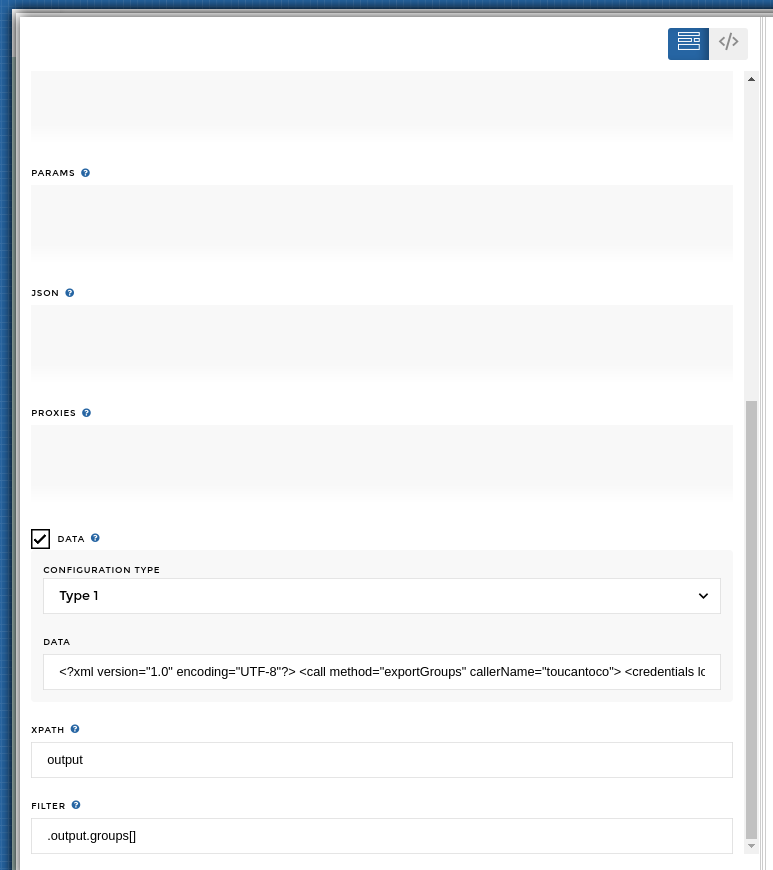
XML Data Source 2
and 🎉 we have our results in a DataFrame

XML results