How to use the ROK Connector
Overview
This connector allows to create a connection with ROK’s GraphQL API (https://www.rok-solution.fr/).
Two authentication methods are available:
- username with password
- username and a specific JWT, signed by the secret shared with the ROK instance
In the first case, ROK provides you with a username and password. In that case you will not benefit from data permissions defined in ROK as all the queries will be executed in the name of the provided user. But keep in mind that you can add permissions in Toucan Toco if needed
In the second case ROK has to provide you with a secret key associated to your username (email) and your ROK Database. The data will be retrieved in live data mode. It won’t be stored in the Toucan Data Store and queries will rely on data permissions defined at ROK level, meaning that any user will be able to retrieve only the data that he has permissions for as defined in ROK.
Connector’s creation with username and password
Create a ROK connector
Add a ROK connector:
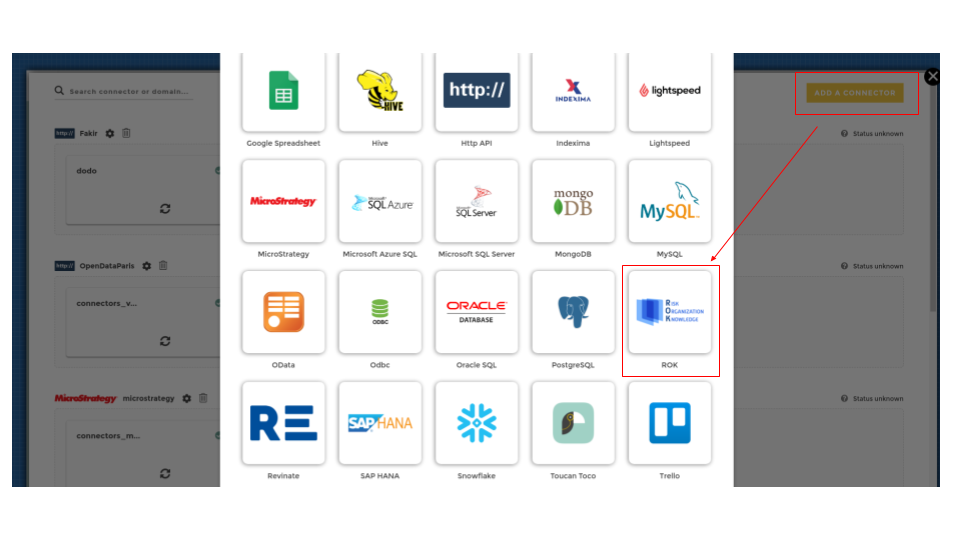
Add ROK Connector
Configure it by providing your username and password. ⚠️ do not tick the “Authenticated with token” box.
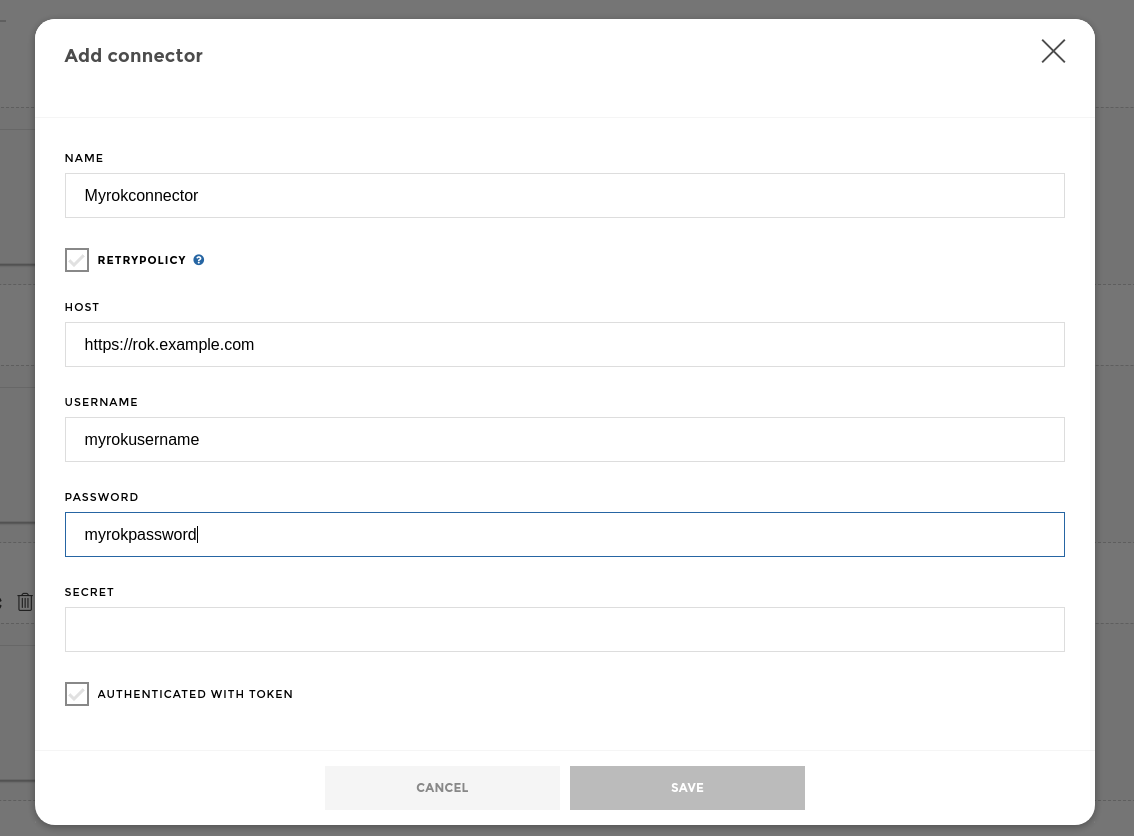
ROK Connector with password
Create the associated Data Source
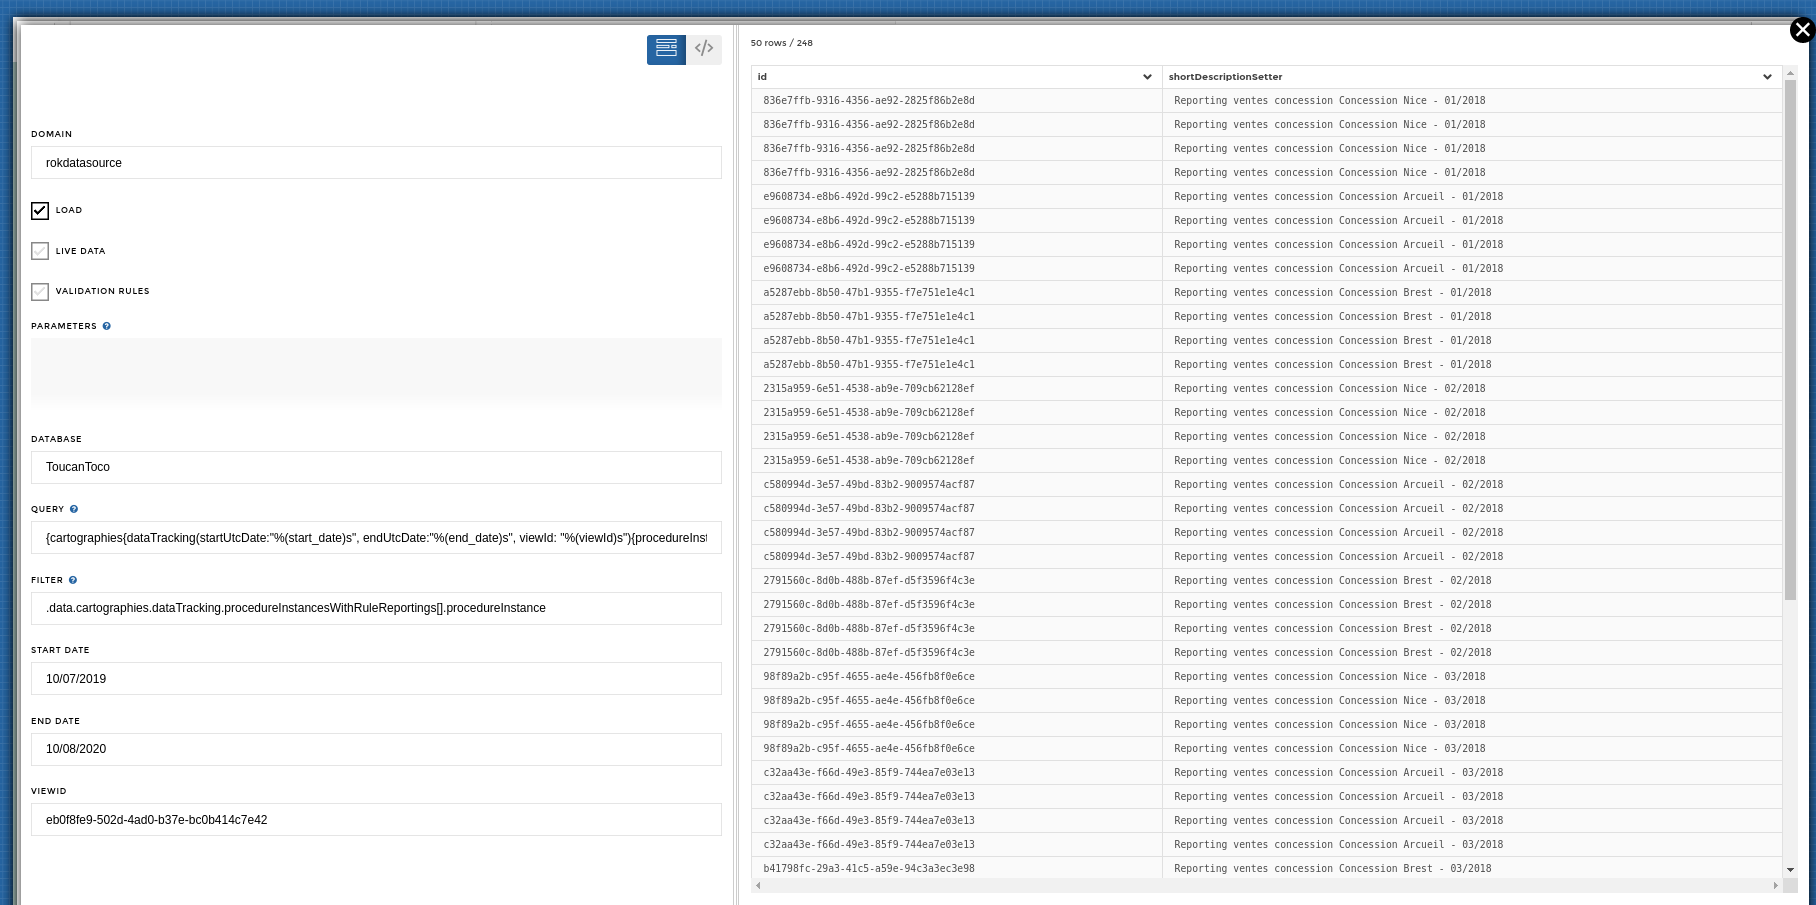
ROK Data source with password
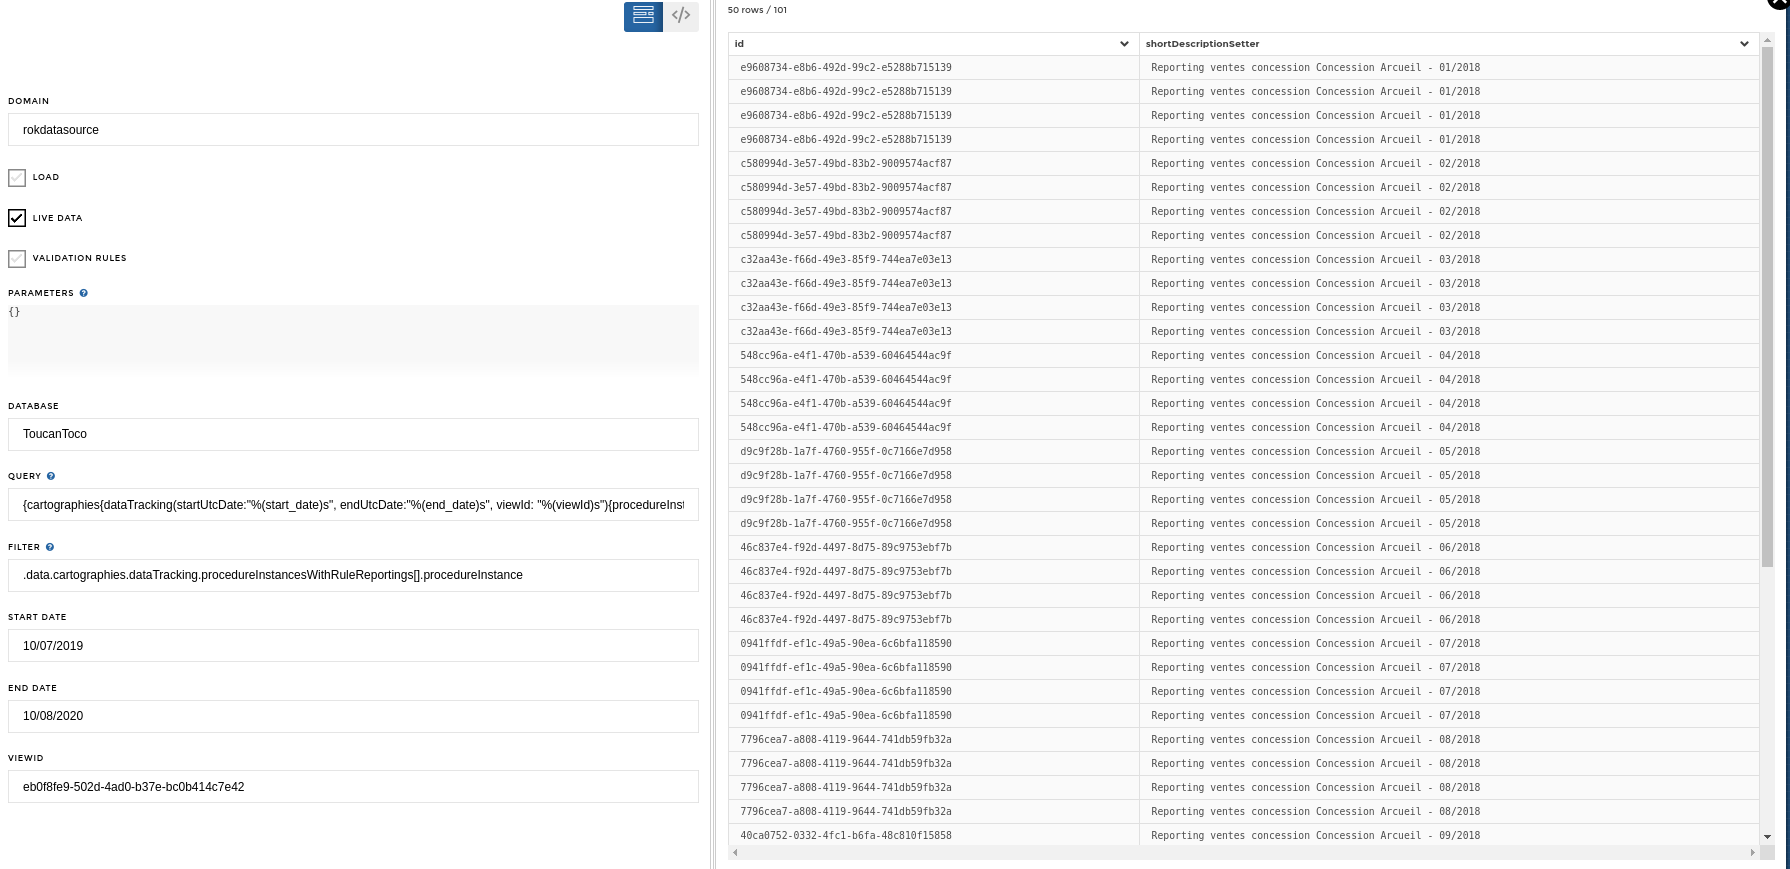
⚠️ Do not tick the “Live Data” box.
- Start Date, End Data & ViewId are optional fields allowing the use of dynamic queries.
💡 Make sure your query has the correct placeholders in order to have the
interpolation working:
startUtcDate:"%(start_date)s", endUtcDate:"%(end_date)s", viewId: "%(viewId)s"
- Additional parameters are allowed in the Parameters field
- The query field must be filled with a GraphQL query
- The filter field must be filled with a jq filter, please refer to the documentation
Connector’s creation with username and secret key
Create a ROK connector
Add a ROK connector as described above
Configure it with {{ user.username }} in the username field and {{ secrets.extra.rok_token }} in the secret field. It will dynamically retrieve the username of the authenticated user (which is an email address) and the secret shared with ROK from the instance config.
⚠️ An admin will have to add the secret to your instance.
⚠️ The Authenticated With Token checkbox must be ticked in this authentication mode
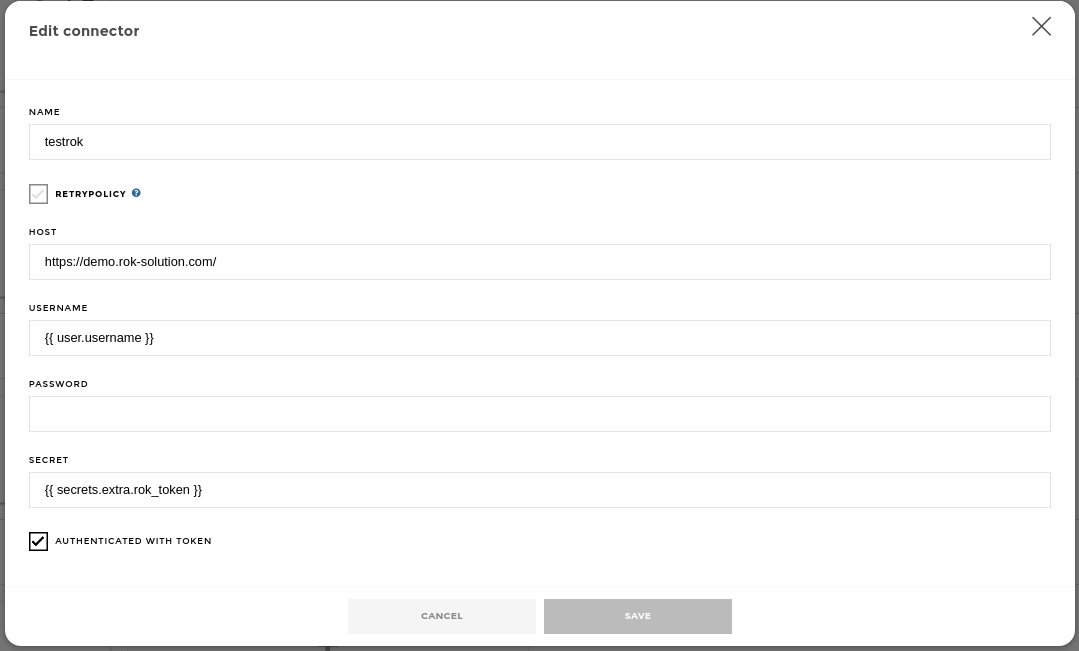
Create ROK Connector with Token
Create the associated Data Source:
You can now create your Data Source as described above.
⚠️ In this mode, you have to tick the “Live Data” box.
Rok Data Source Live Data