How to setup and create a Google Sheets Connector
Overview
The Google Sheets connector relies on the OAuth protocol. Oauth is an industry-standard protocol for authorization. It allows a client to easily authenticate and authorize access to resources. You may not be familiar with the term, but you actually run through the OAuth protocol when you login to some of your apps and authorize access to your data via this kind of 2-steps popup:
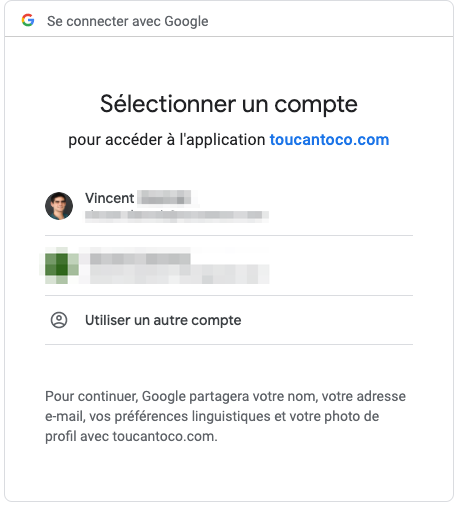
OAuth popup login example
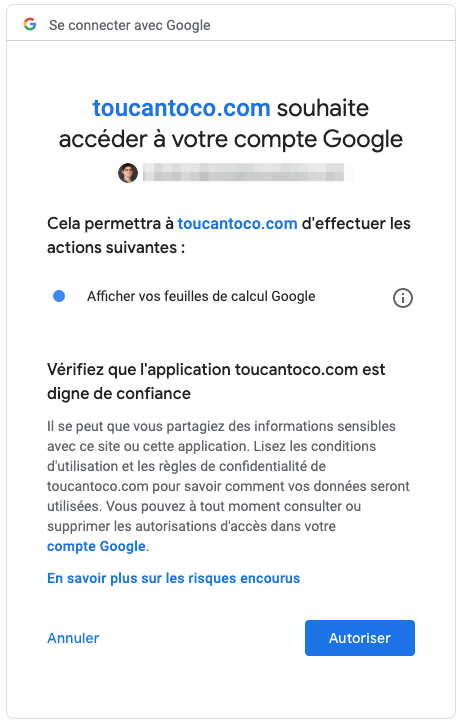
OAuth popup auhtorization example
In Toucan Toco, as an administrator you can easily setup OAuth credentials for your platform. Once setup, any App Builder on your platform will be able to create a connection to Google Sheets in just a couple of clicks!
In this tutorial we will provide a step-by-step guide to help administrators get the required Google OAuth credentials and use them in Toucan Toco. Then we will show you how easy it is for an App Builder to create a Google Sheets connection in a Toucan Application application.
For Admins: How to get Google Oauth credentials
You will first need to go in the Google console. From there, you will need to go through the following steps:
1. Select or create a project in the Google console
If you don’t have a Google project yet, or if you need to create a new project dedicated to your Toucan usage, you will need to create such a project and fill the required information.
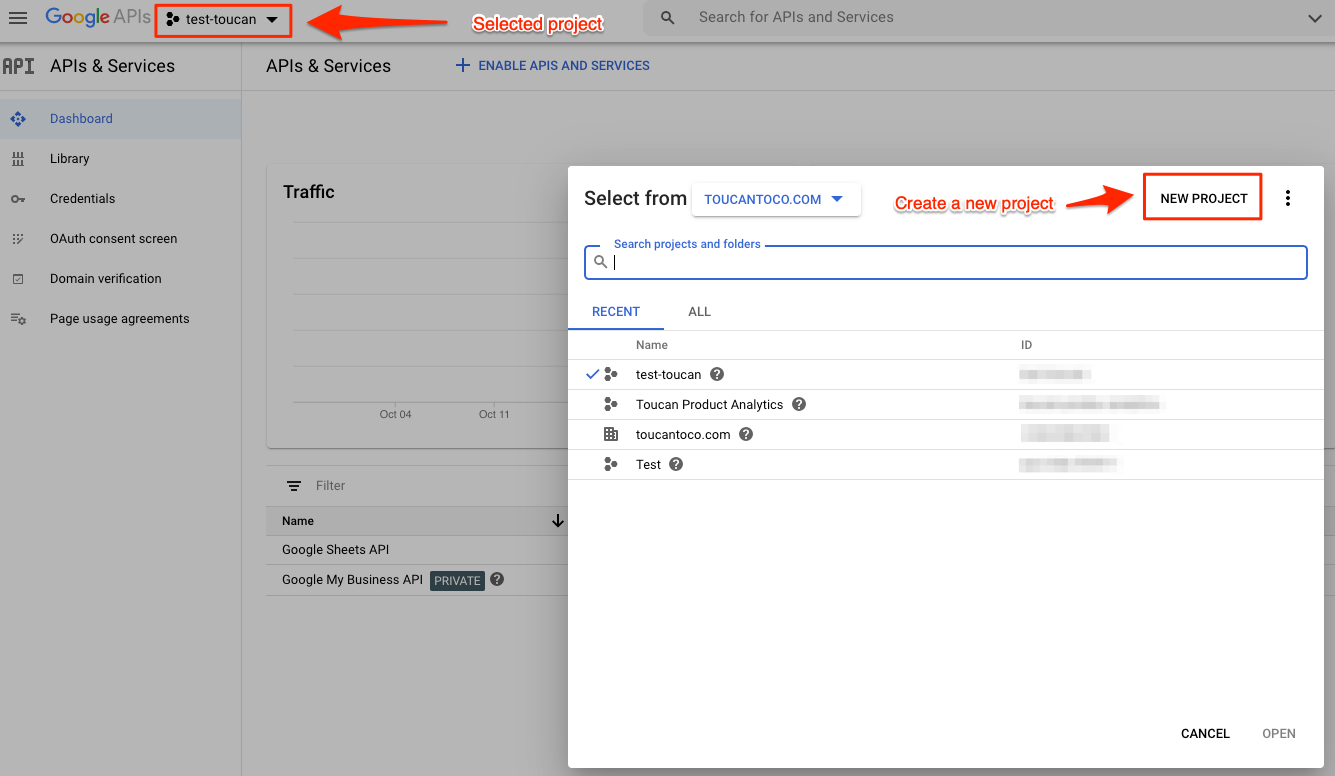
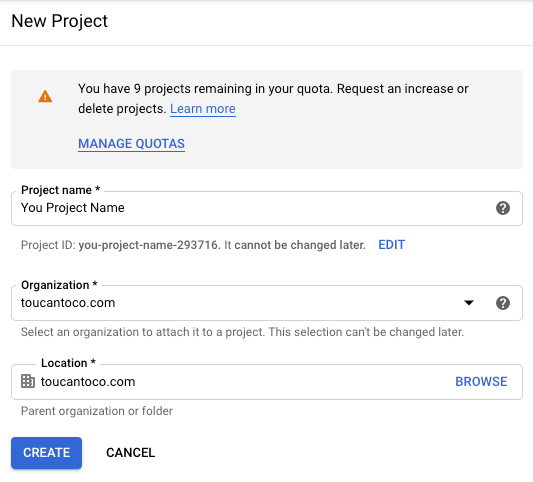
Once you are in your target project, you need to enable the required API.
2. Enable the Google Sheets API in your project
Note that if the Google Sheets API is already enabled in your project, it will appear in your dashboard:
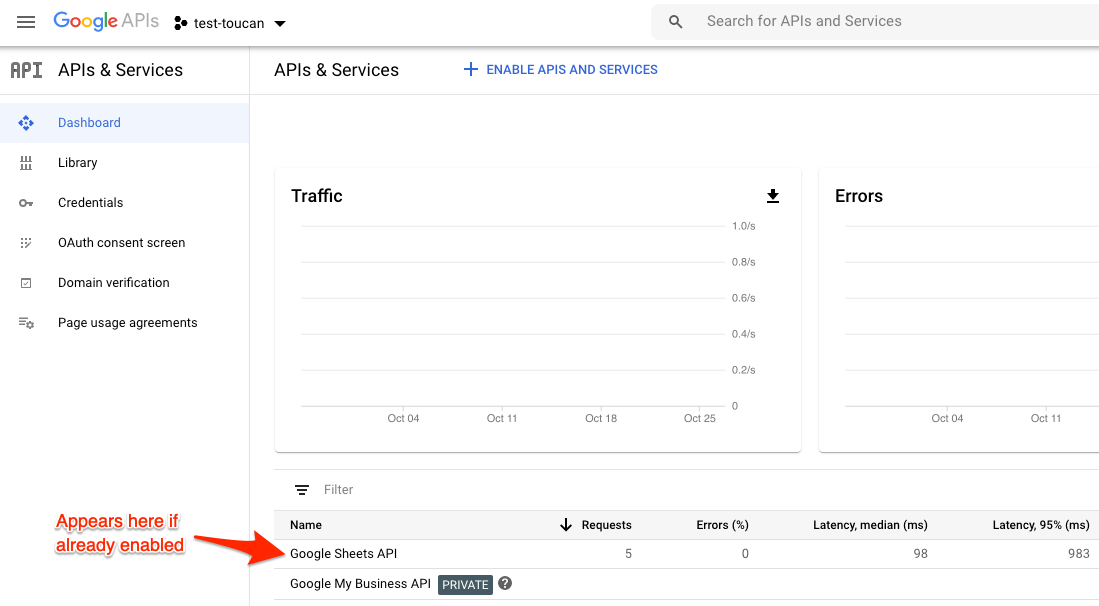
Google console Google Sheets API enabled
In such a case you can skip this section and follow the remaining steps.
If you have not enabled the Google Sheets API in your project yet, you must do so as shown in the following screenshots.
First click on the button “Enable APIs and services”:
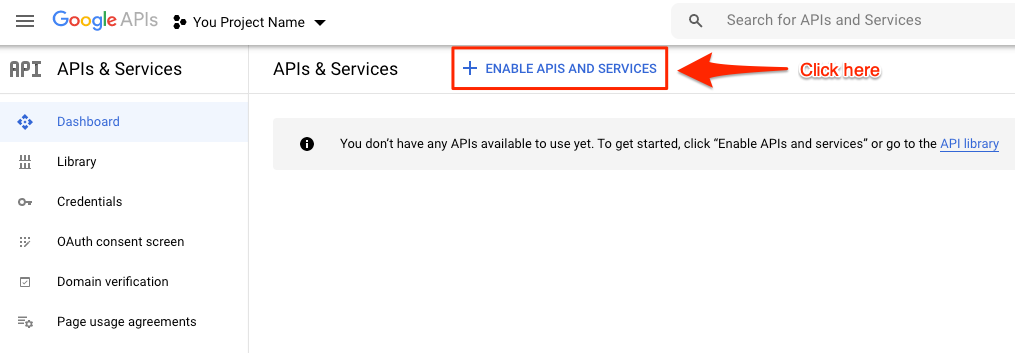
Google console enable API
Then search for the Google Sheets API and select it:

Google console search Google Sheets API
And click on the button “Enable”:
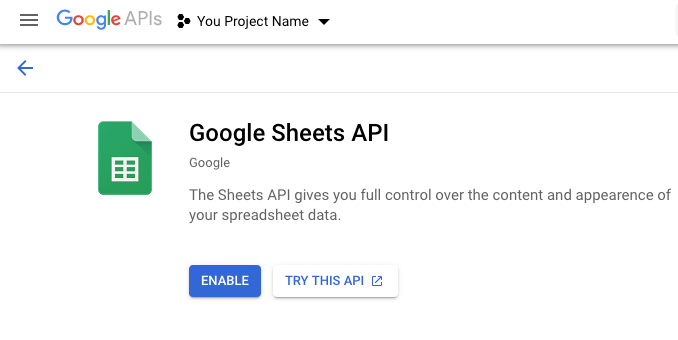
Google console enable Google Sheets API
3. Configure OAuth consent screen
For the OAuth workflow to work, you need to specify basic information that will have an impact on the display of the consent screen that pops up to the user who will login and authorize access.
So if you have not configured a OAuth consent screen yet, let’s see how to do so. From your dashboard, you can click on “OAuth consent screen” in the left menu:
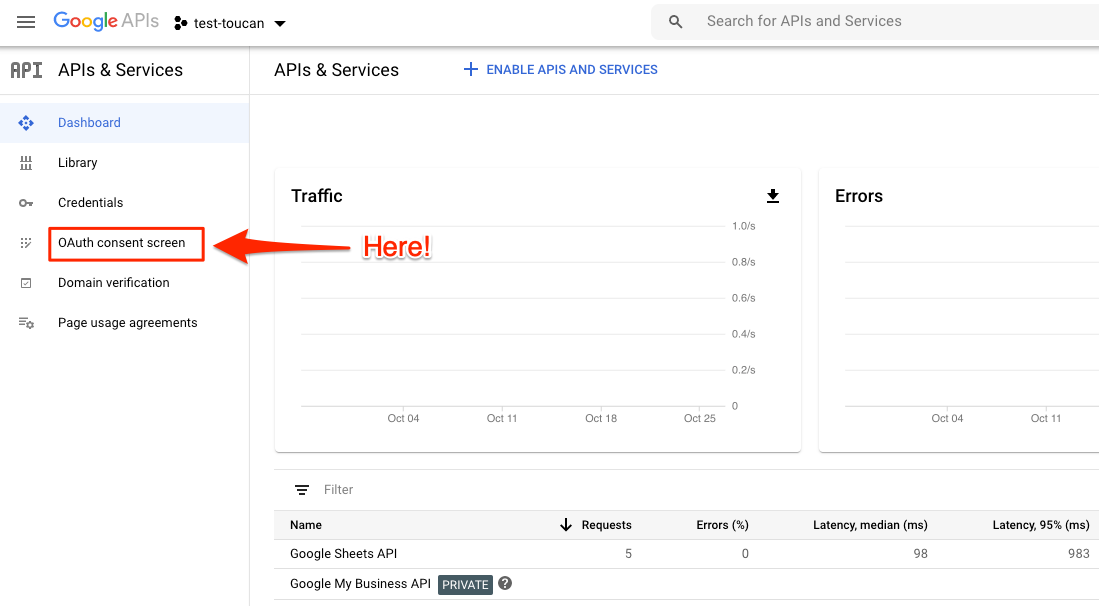
Google console OAuth consent screen button
On the next screen, just click on the create button (you can still configure the user type in the following step):
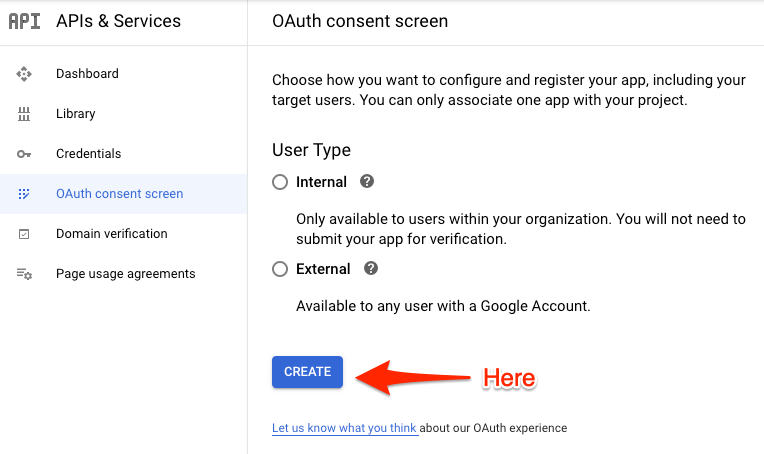
Google create OAuth consent screen
From there you can fill in the form. Actually, we will focus here on the basic required fields to have an application up and running:
- Specify whether your app will be public or accessible to your organization only
- Specify your application name
- Specify the scopes to authorize.
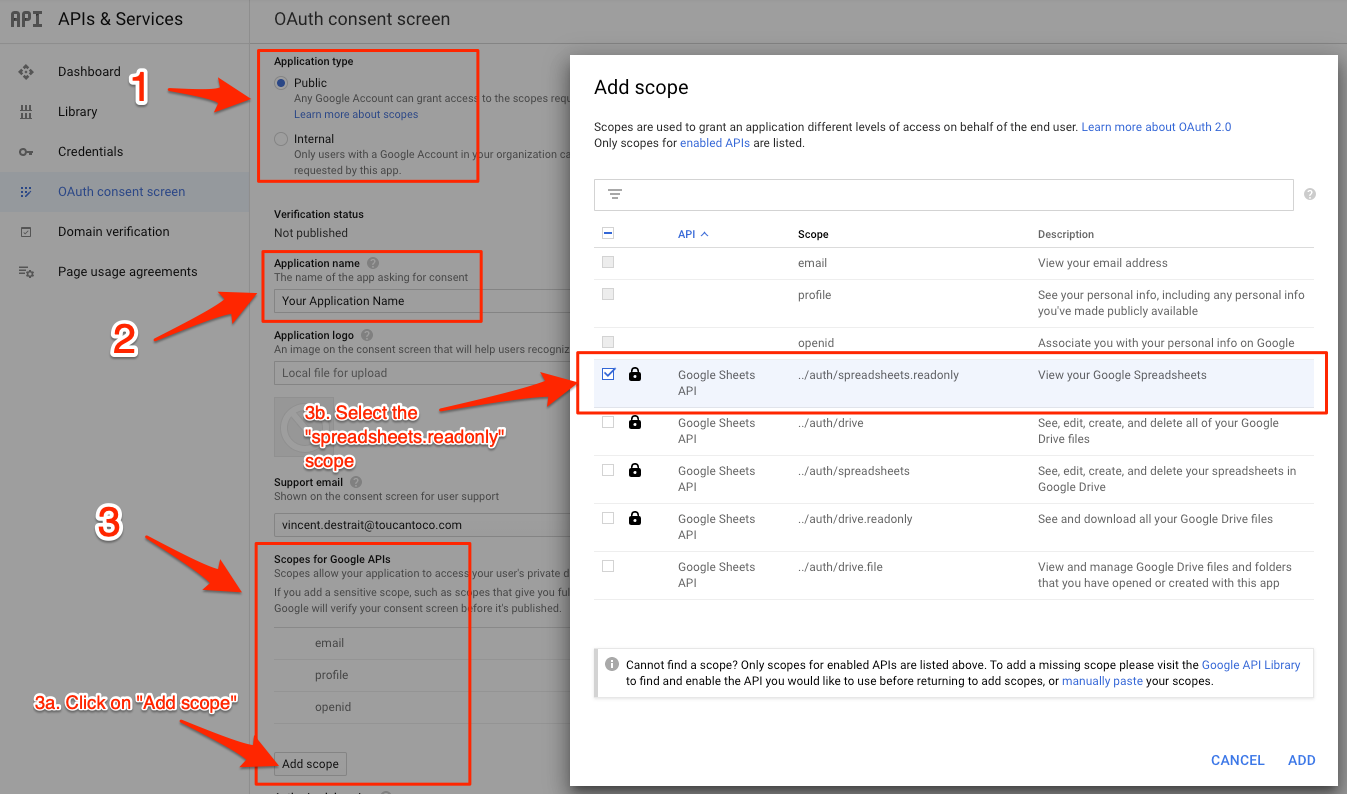
Google OAuth consent screen configuration
Now you can save to validate your const screen configuration.
Note that Google will inform you that you should have your application verified by Google. Actually your app will work fine, but users who will login may come across this kind of screen:
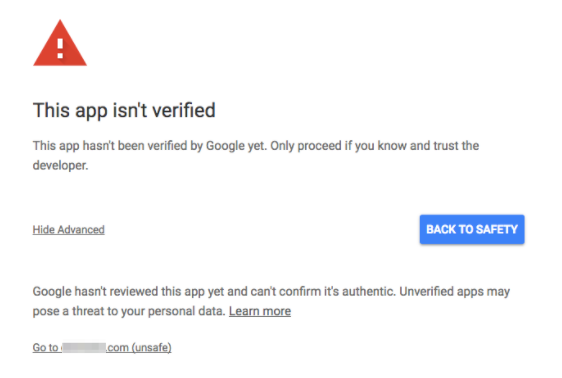
Google site not verified
In such a case your users will still be able to authorize access, but maybe you will want to take the time to have your app reviewed by Google to guarantee a flawless experience. You will need to fill in a few information and the review process is quite fast. It’s up to you!
Now that you have your consent screen set up, you can finally add OAuth credentials for your app!
4. Create OAuth credentials for your app
Go back to your dashboard, and this time go in the “Credentials” section in the left menu. From there, you can click on “Create credentials”, and select “Oauth client ID”
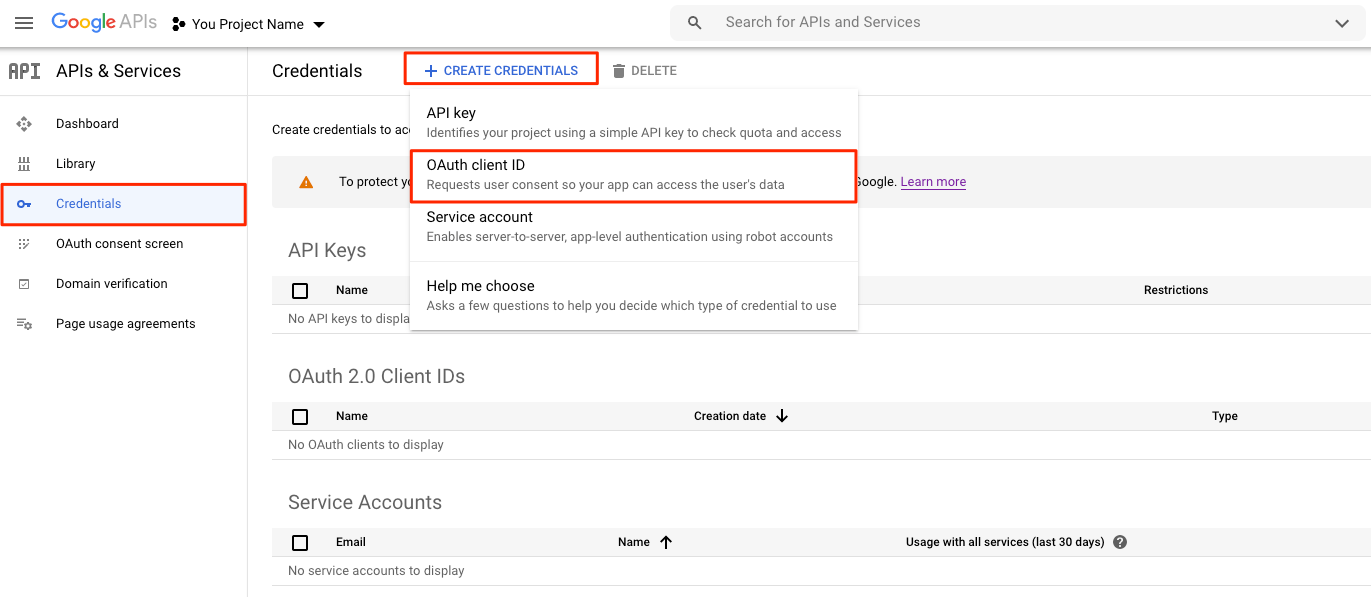
Google create OAuth credentials
You will need to fill some basic informations:
- The application type: specify “Web Application”
- Your application name
- Authorized redirect URIs (to render the login and authorization popup
properly): this URI depends on your Toucan Toco platform and is of
the type
https://api-<your_instance_name>.toucantoco.com/oauth/redirect?type=GoogleSheets2. Your instance name can be easily found in the URL that you use to connect to your platform. But to make your job a bit easier we provide you the right URI to copy-paste: it will be displayed in your connector creadentials configuration interface (see the section just below)
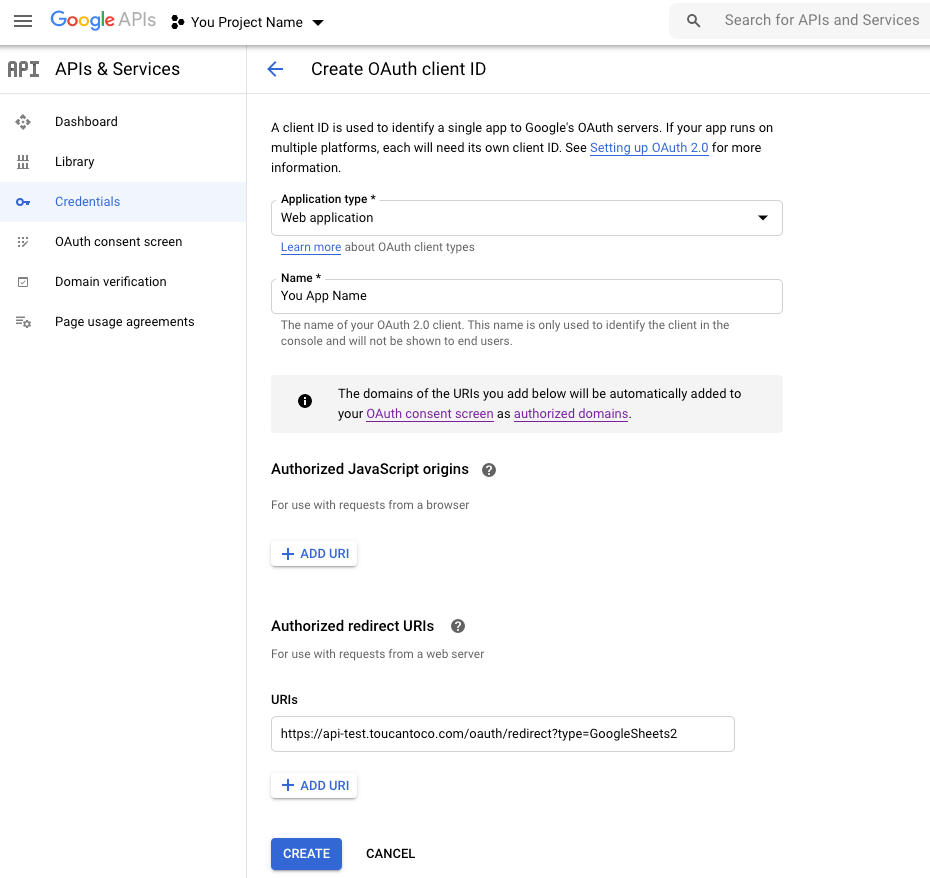
Google OAuth credentials configuration
You are all set! You can save the form and you will now be able to get the OAuth credentials (client ID and client secret) that will be required in the Toucan Toco configuration.
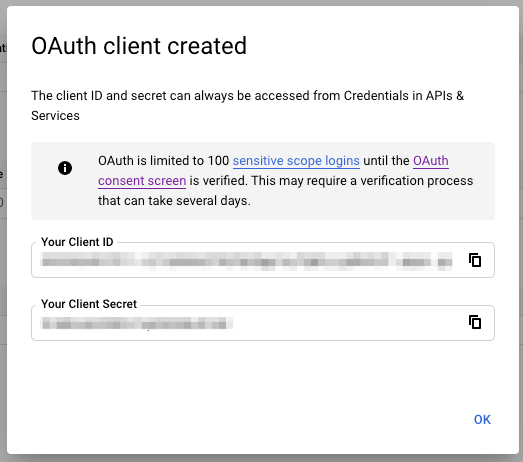
Google OAuth credentials created
For Admins: How to add Google Sheets credentials on the platform
AS an admin, you can easily add Google Sheets credentials that will be available for all the apps of your platform.
From the apps store, click on the “””Admin area” button, and then click on the “Connectors” button:

Connectors button
You will land on a interface listing connectors for which you can add credentials. When no credentials have been filled for a given connector, the status will appear as “Not configured”, in red. To set new OAuth redentials for Google Sheets, click on the configure button:

Connectors platform inteface
Now you can enter the client ID and client secret that you got by following the steps of the previous section (note that we show you in the popup the exact URL to copy-paste in the “Authorized URI” field of the Google confifuration):
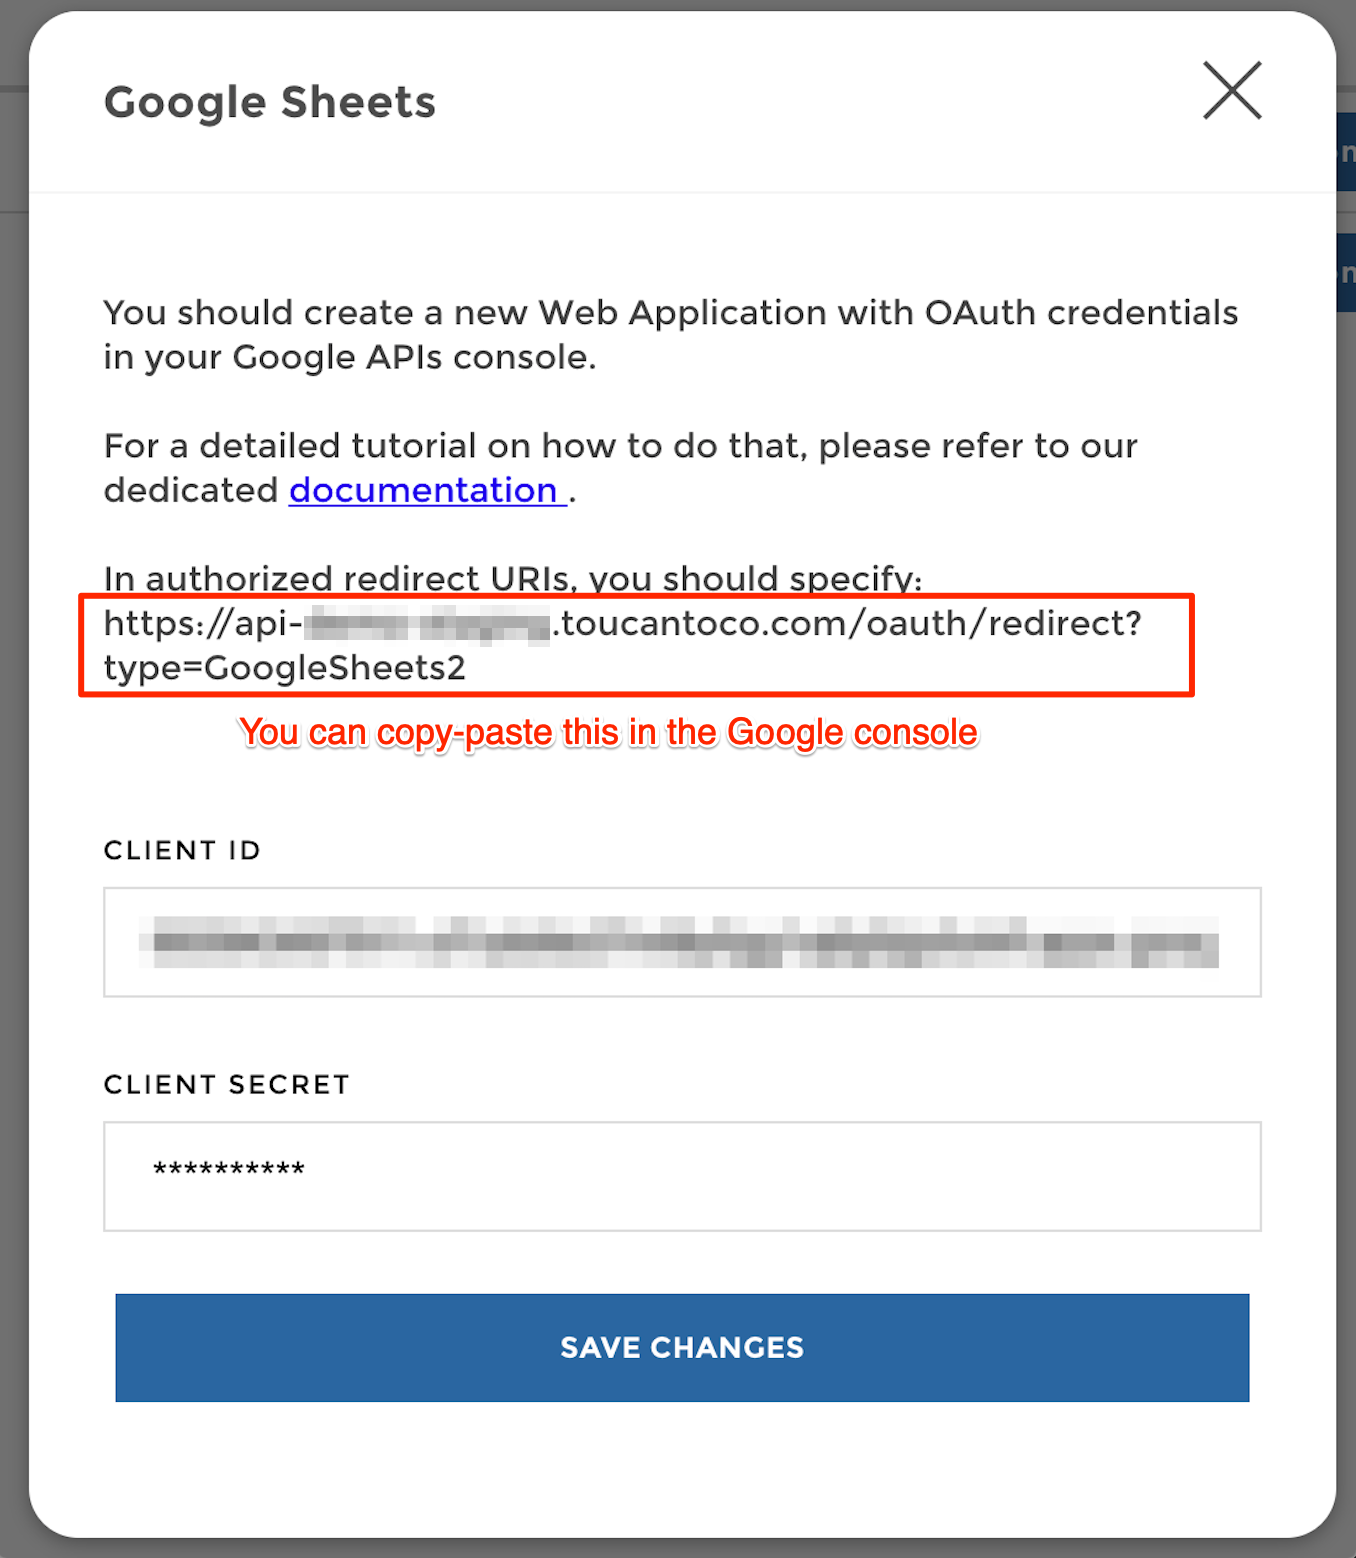
Add Google Sheets credentials
You’re all set!! Now your users who have access to the apps studio can create Google Sheets connections in just a few clicks. Let’s see how easy it is in the next section.
For App Builders: How to create a Google Sheets connection in an application
Now from an application, if can easily create a Google Sheets connector:
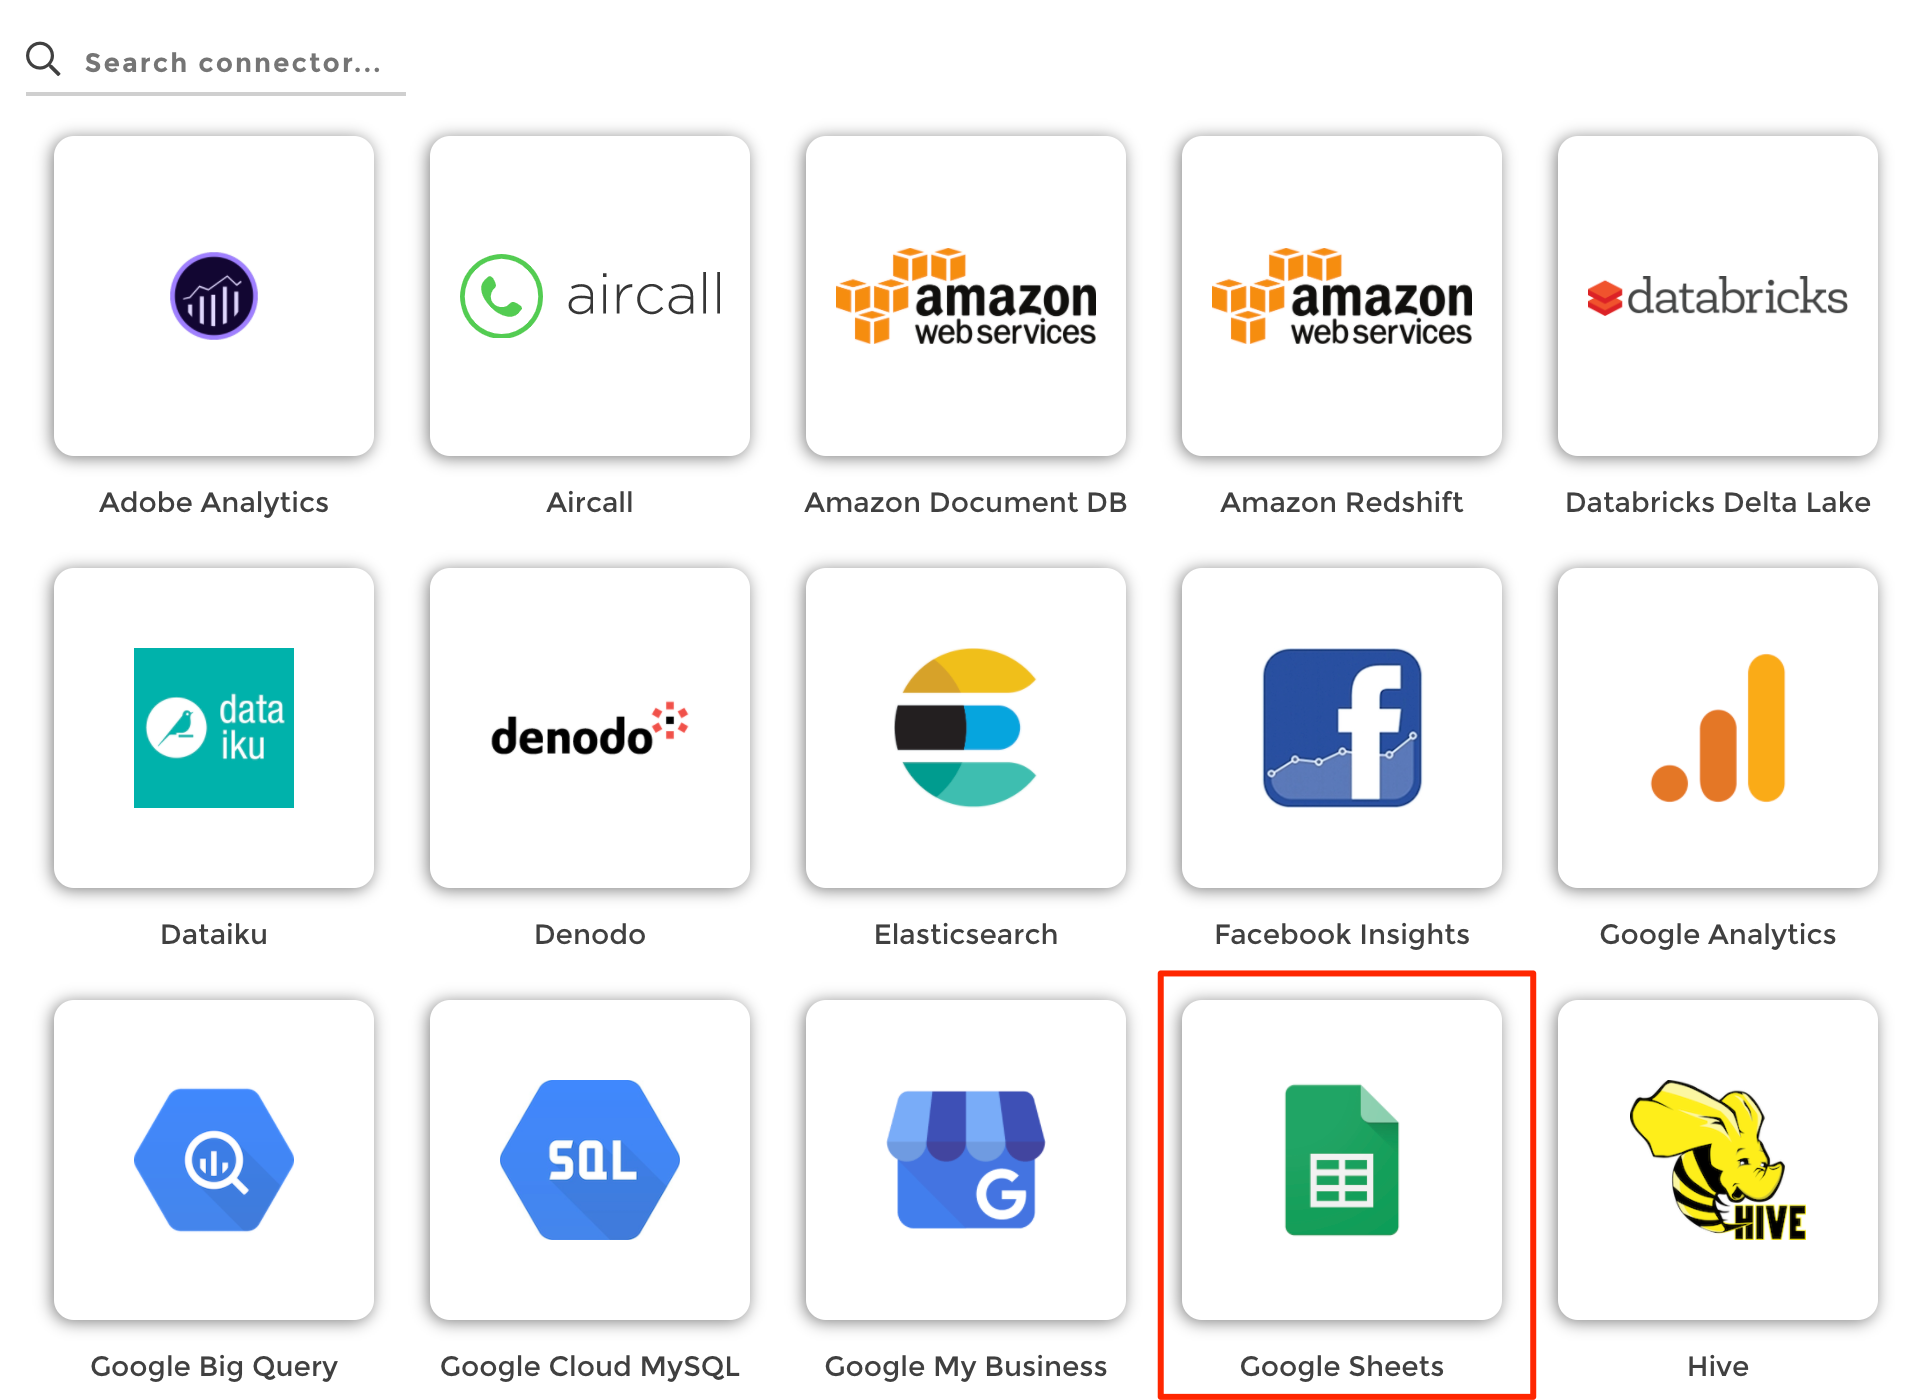
Create Google Sheets connector
You will walk through the 2-steps popup as shown at the very top of this tutorial page, where you need to first login and then authorize access to your Google Sheets.
From there you can give a name to your connector:
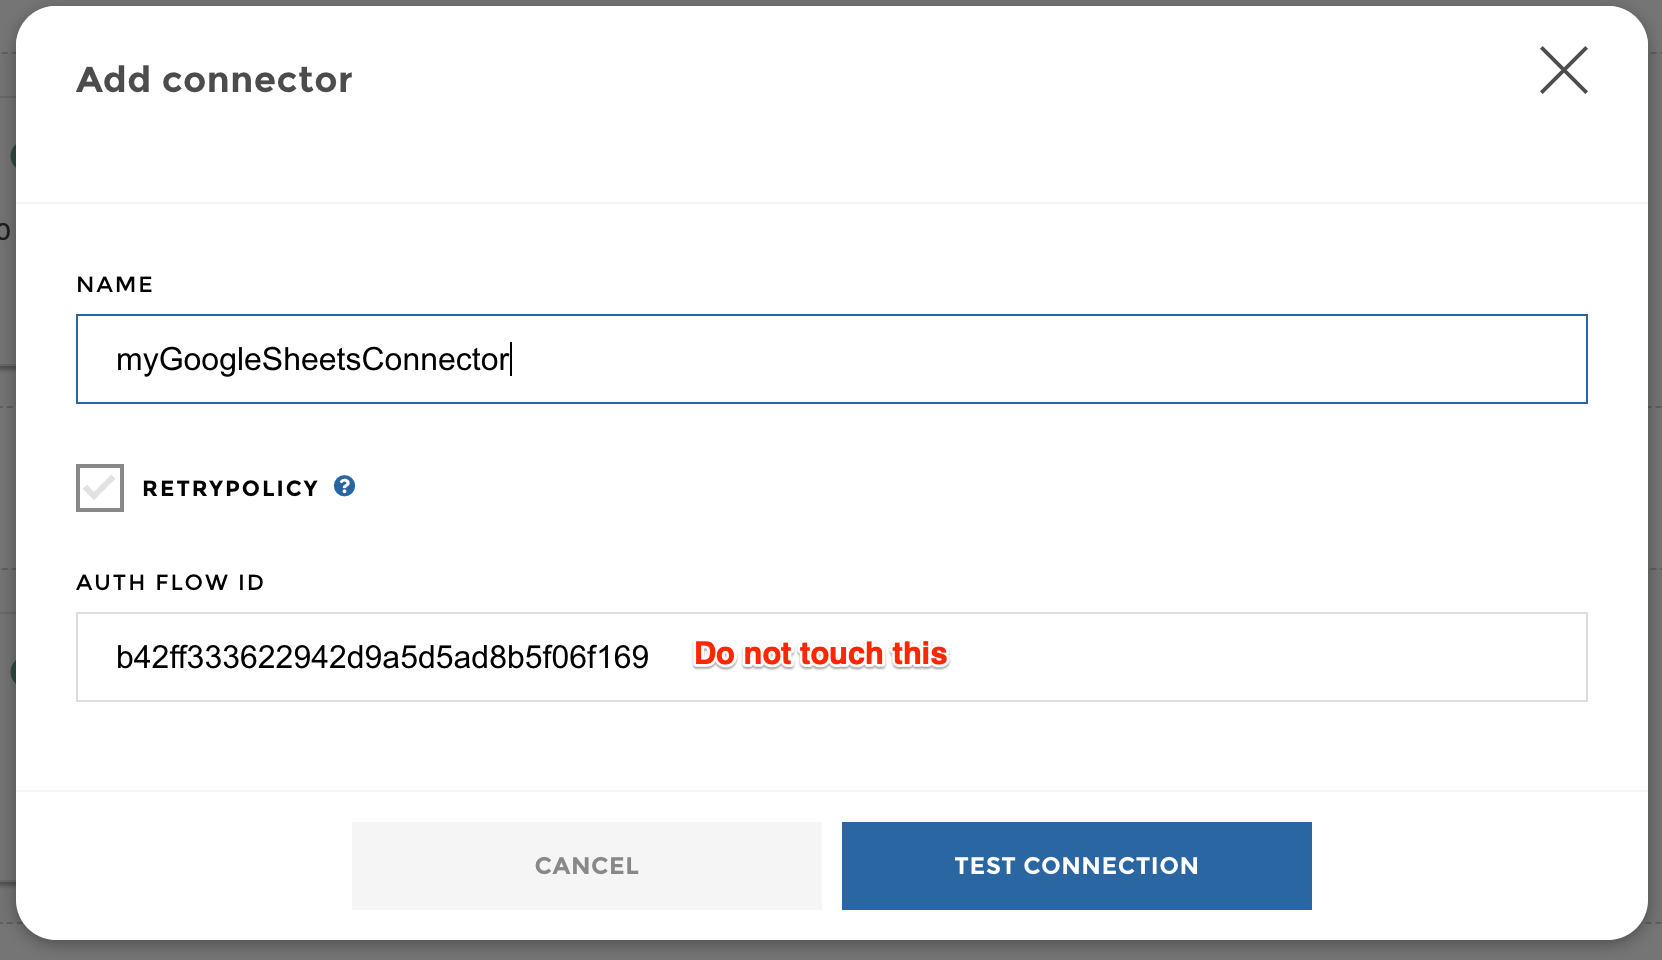
Google Sheets connector configuration
Once you have checked that your connection works (click on “Test connection”), then you can save your connector. It will appear in your connectors list. To add a new dataset extracted from a Google Sheet, click on “Add a query”:
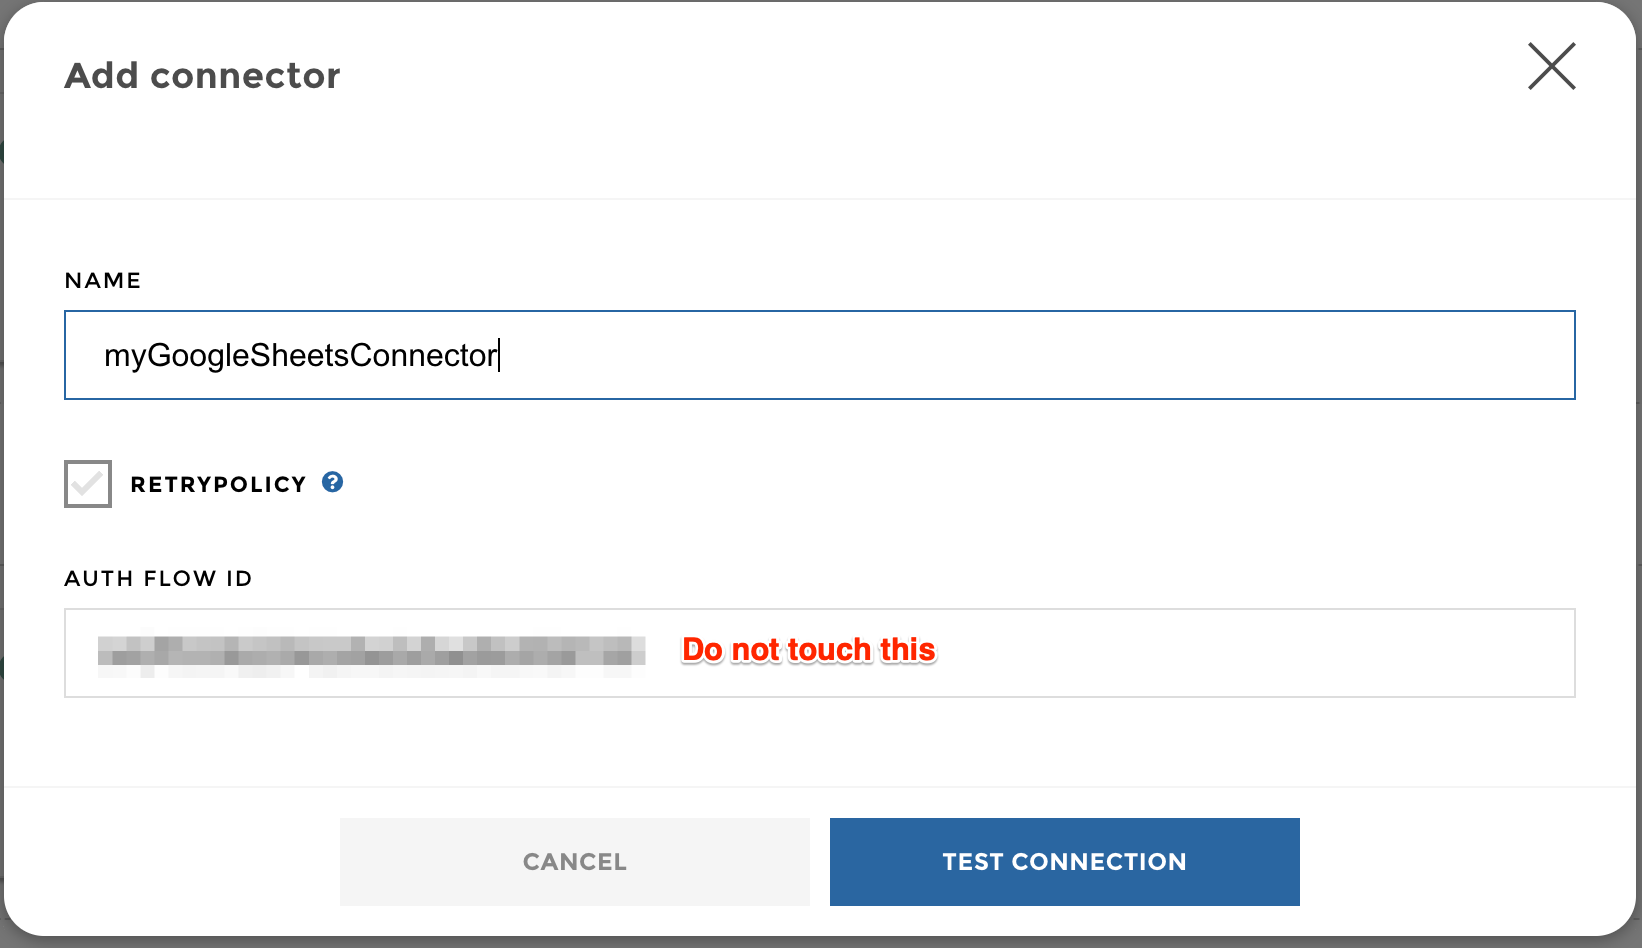
Google Sheets connector added
You’re almost there… You just need to give a name to your dataset and to enter the ID of the Google spreadsheet that you want to retrieve (this ID can be easily found in the URL of your Google Spreadsheet):
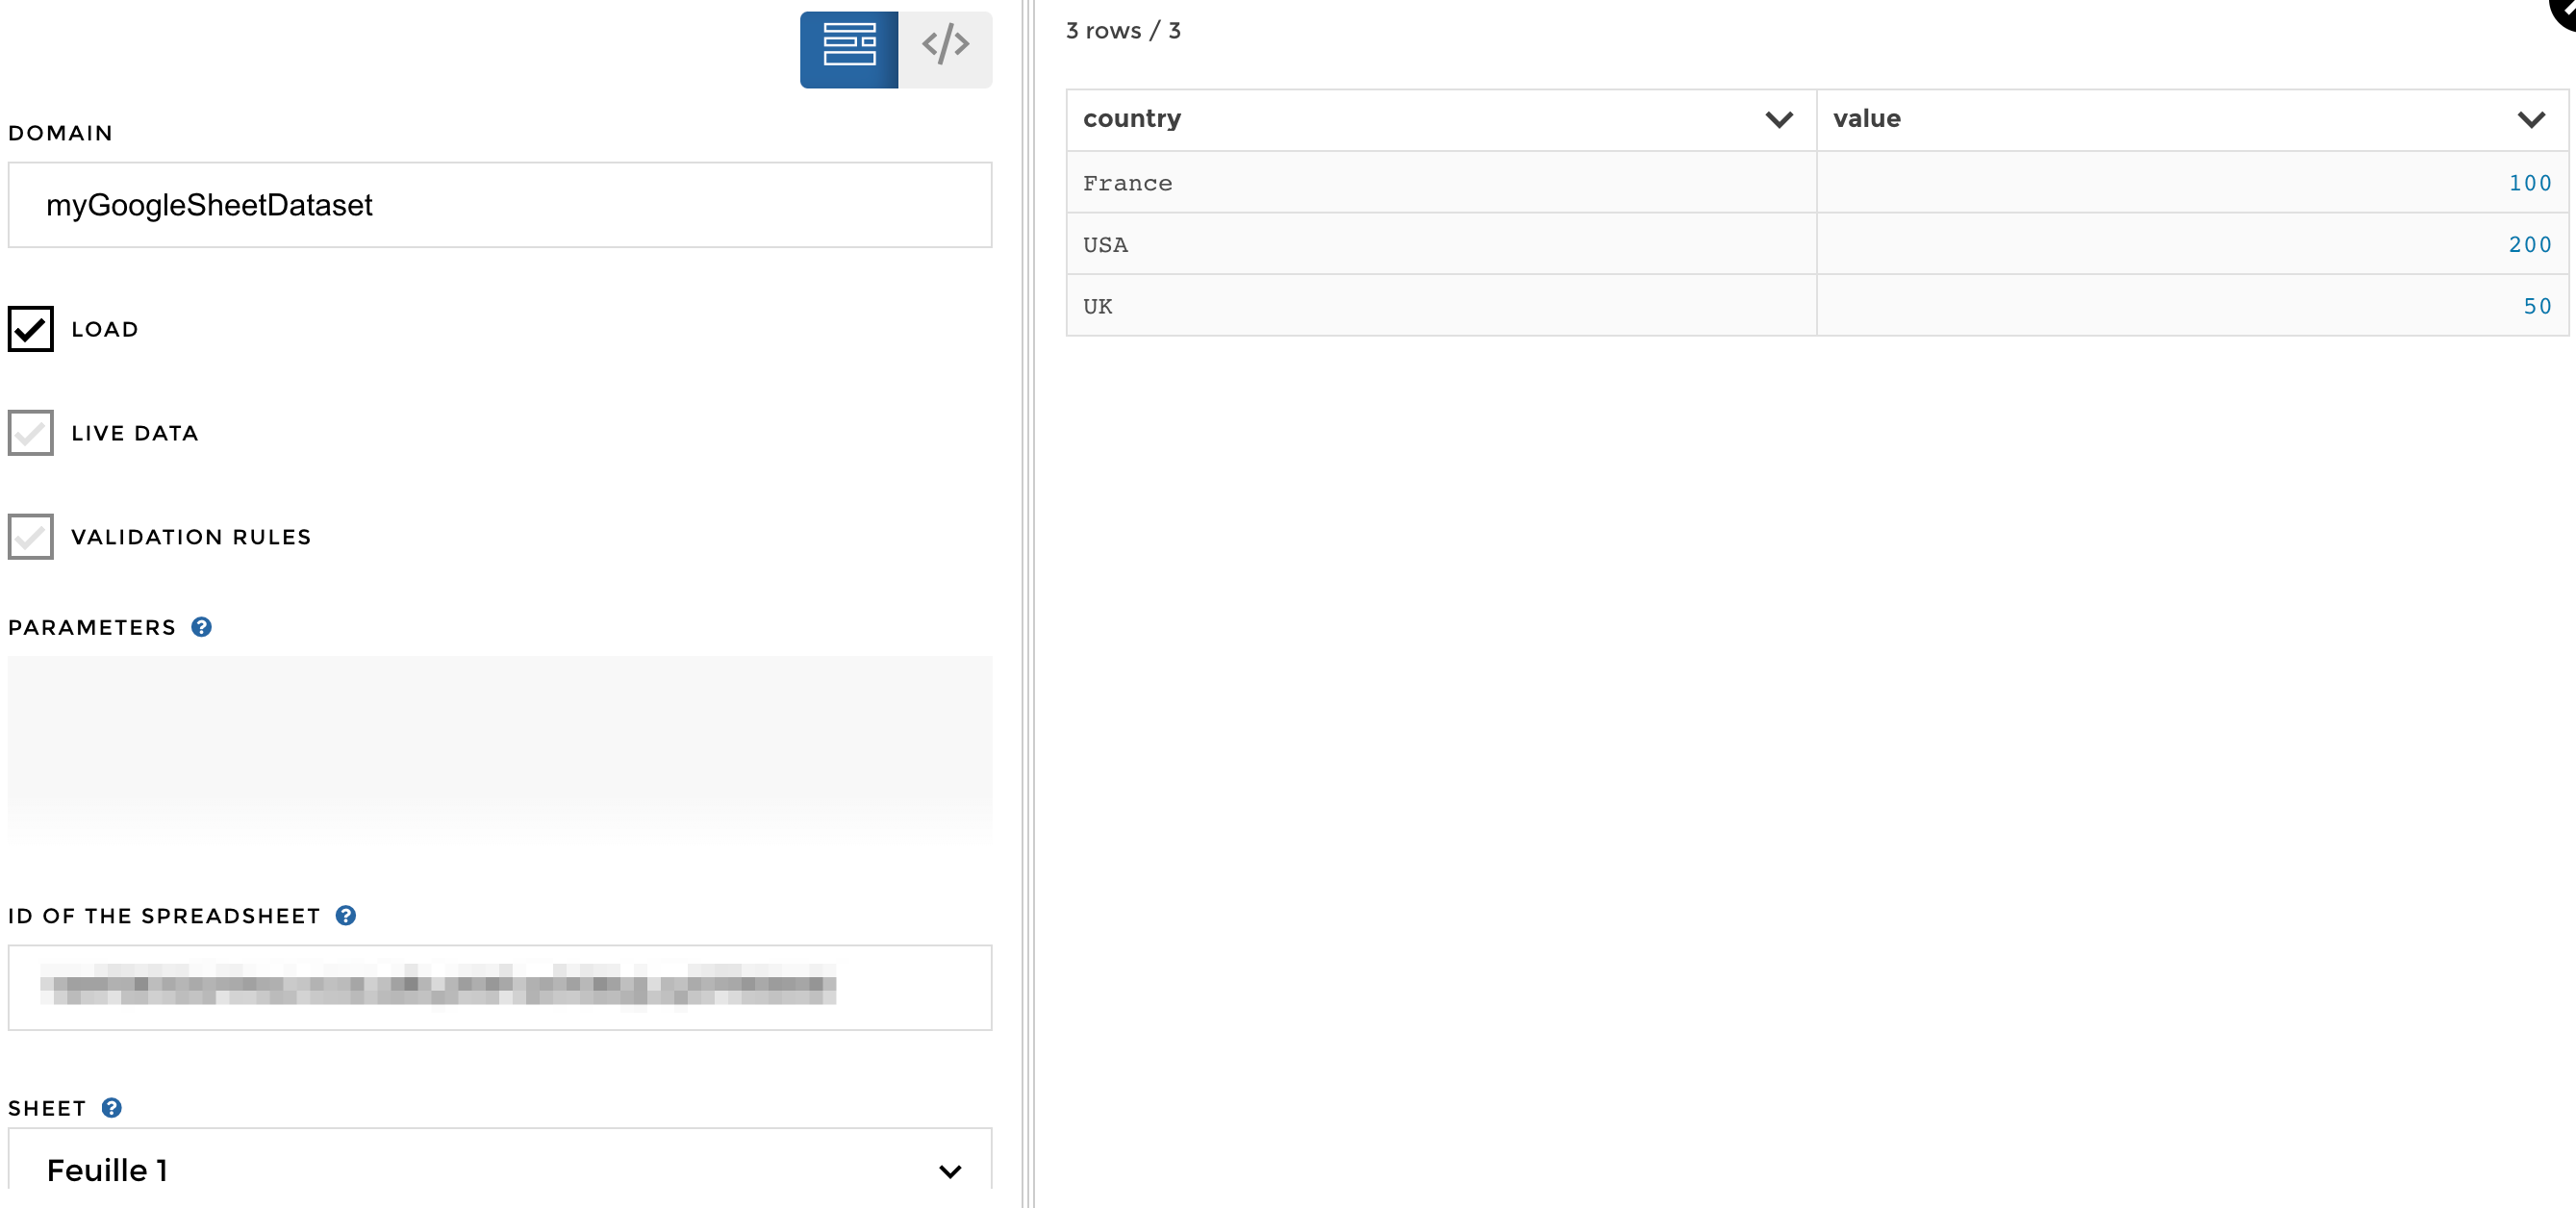
Google Sheet datasource configuration
That’s it! now if you save, your new dataset will be available in your application! Easy peasy right?
Have fun with your Google Sheets data!!