How to setup a Snowflake connector
Overview
The Snowflake connector allows you to connect your Snowflake cloud database to Toucan.
In this guide you’ll learn how to connect Toucan Toco to your Snowflake data.
Note
If you’re looking for more advanced guides on how to configure rights and access in Snowflake for Toucan, you can check our other docs:
Configuring the Snowflake connector in Toucan
In this part we assume you already have:
- a user (and its password), we’ll use
TOUCAN_USER - that user has a role configured, we’ll use
TOUCAN_ROLE - that role can access the database you need, we’ll call it
TOUCAN_TEST - that role can use a warehouse, we’ll call it
TOUCAN_WH
Go to this detailed guide on how to setup Snowflake if you’re missing something.
Note
As a security best practice, we recommend you create a specific user and role to connect to Toucan, check out our guide on granting access if you need to do this.
Choice of type of Snowflake connector
Important
In Toucan you have the choice of 2 connectors “Snowflake” and “SnowflakeOauth2”.
The “Snowflake” connector is usually simpler to configure: you just need a Snowflake user with a login and password. -> Use this connector if you want to quickly try out our connection or for small personal apps.
The “SnowflakeOauth2” connector implements the OAuth2 protocol, which is a standard and secure way to authorize connection between Toucan and Snowflake. -> We recommend you use this for production apps. The detailed documentation is here
Configuring the Snowflake with login/password connector
- Click “Add connector” in the Toucan connector interface.
- Fill the form with the following info:
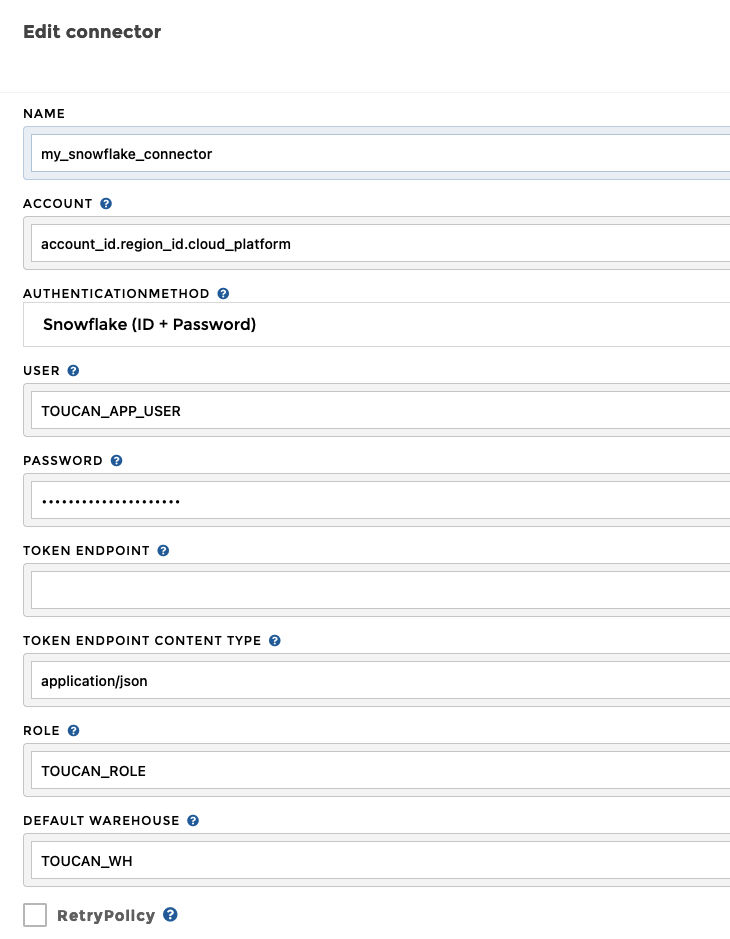
- name: give a name, for example “my_snowflake_connector”
- account: usually of the form
account_id.region_id.cloud_platform. When you connect to your snowflake UI, it is the first part of the url<account_identifier>.snowflakecomputing.com. You can read more about it here authentication method: leave it as “Snowflake (ID+Password)”- User:
TOUCAN_USER - Password: The password for
TOUCAN_USER - Token endpoint: leave empty
- Token endpoint content type: leave unchanged (‘application/json’)
- Role:
TOUCAN_ROLE - Default Warehouse:
TOUCAN_WH - Retry policy: leave unchecked
- Click save, you should see the following check succeeding:

- Once the check has succeeded you can close the popup window and save the form.
That’s it! You’ve successfully configured your connector!
Selecting data from Snowflake
📝 In this documentation, you’ll learn how to select data from Snowflake. We assume you already have a working Snowflake connection configured. If that’s not the case, go back to our other tutorials.
The workflow is similar when adding a tile from the homepage and creating a new story in the app.
- Once you’ve added a new tile or story, you’ll be asked to pick some data:
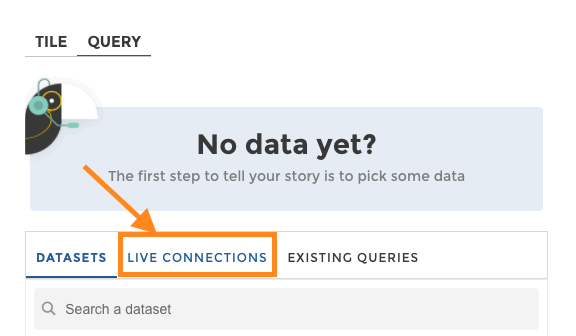
- Click on “Live Connection”:
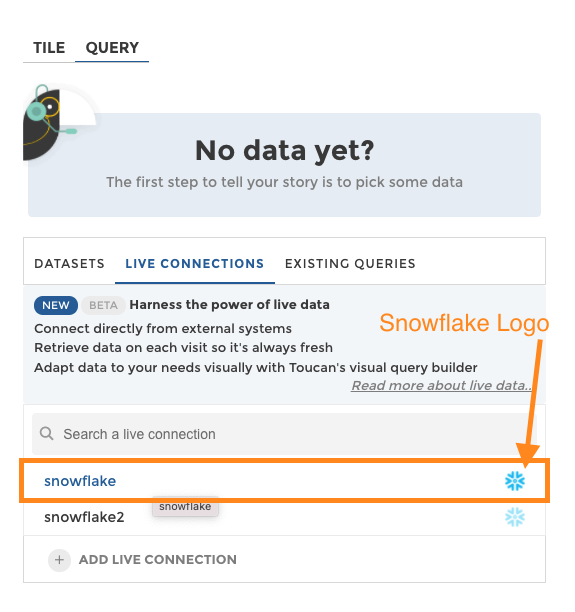
- Pick a configured Snowflake connector. They have a Snowflake logo next to their name. In the example above, I have 2 Snowflake connectors configured. I’ll pick the the first one.
- You’ll arrive on the following interface:
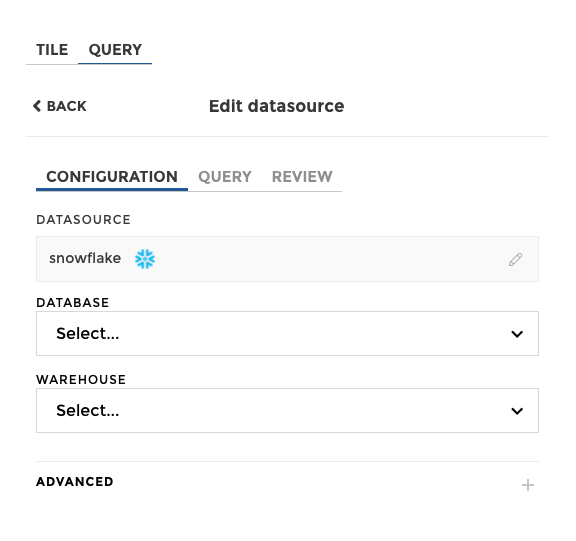
- From the database dropdown, select the database you want to pick data from.
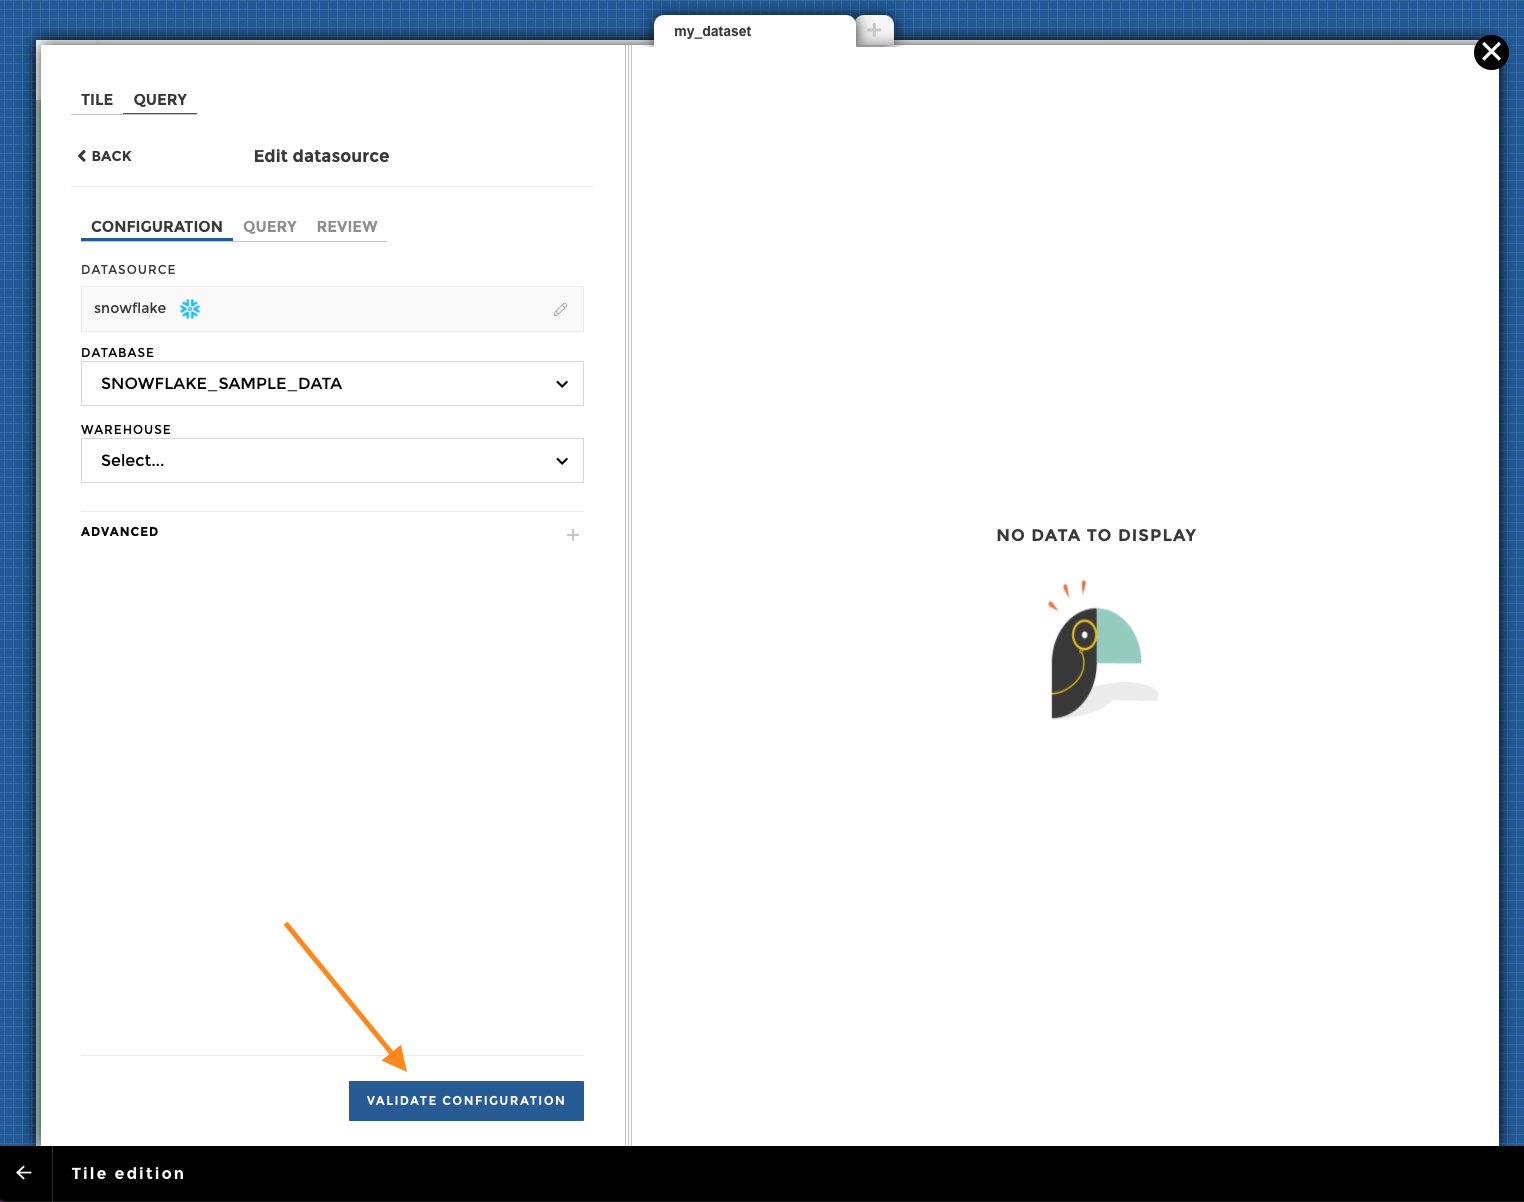
I’ve selected the SNOWFLAKE_SAMPLE_DATA database.
- (Optional) If you do not have a default warehouse configured, or you want to use a different warehouse for this request, you can pick a warehouse using the warehouse dropdown.
- Then click “Validate Configuration”. You’ll arrive on this next interface:
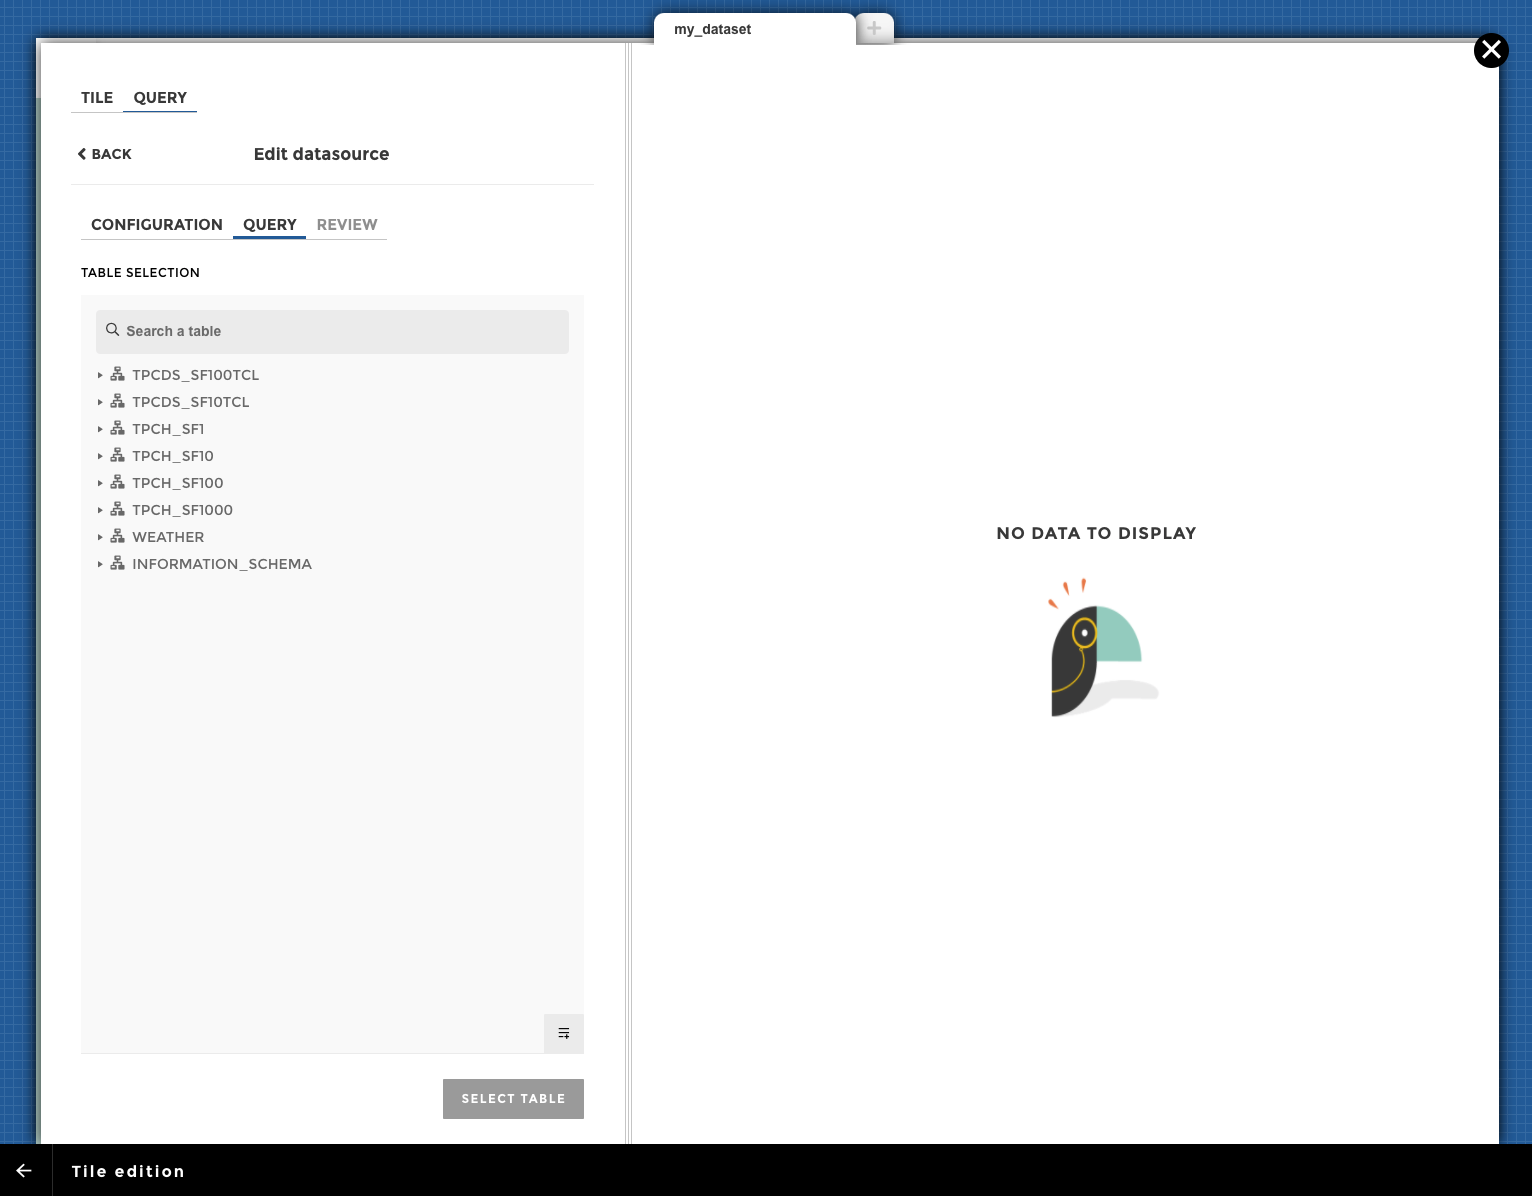
You can see there a list of schema in the selected database.
- Click on a schema to see the tables or views that are inside.
- Once you’ve found the table (or view) you want, select it by clicking on it.
- Then validate your choice by click the “select table” button:
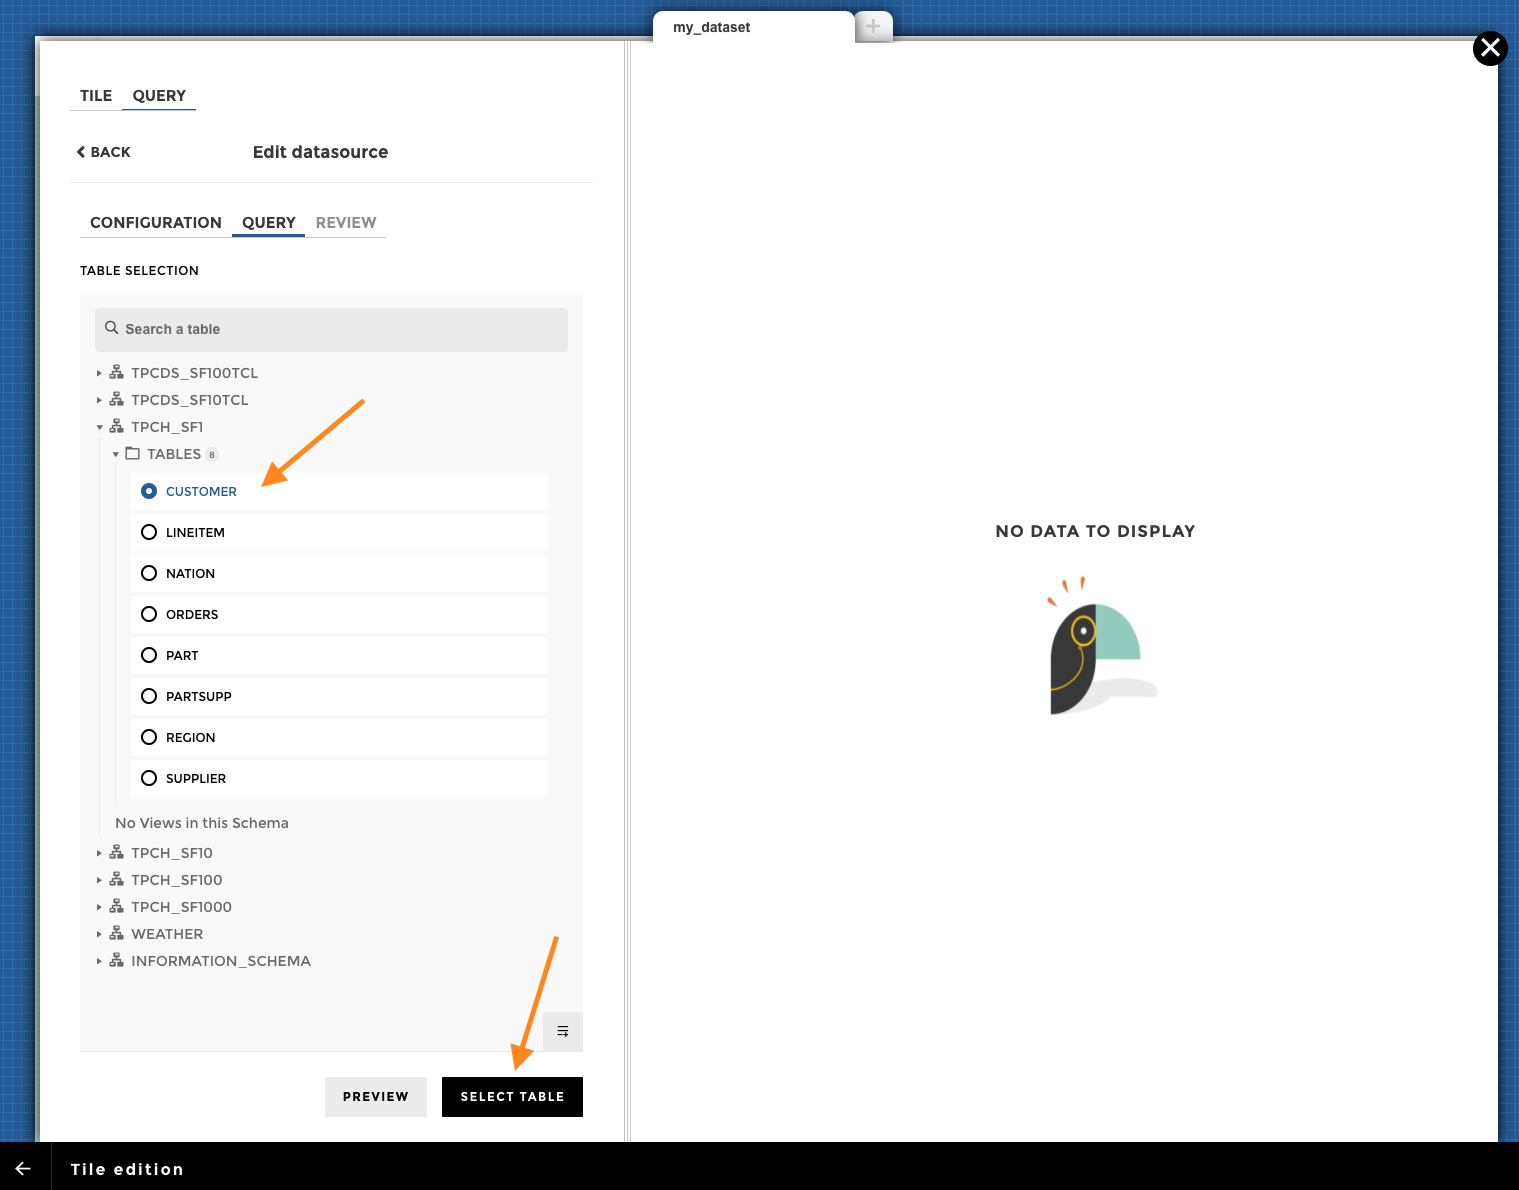
In this example, I’m choosing the “CUSTOMER” table inside the “TPCH_SF1” schema.
- In the next step, choose the columns you want to use by cheching the name in the list, then click “Apply data selection” to validate:
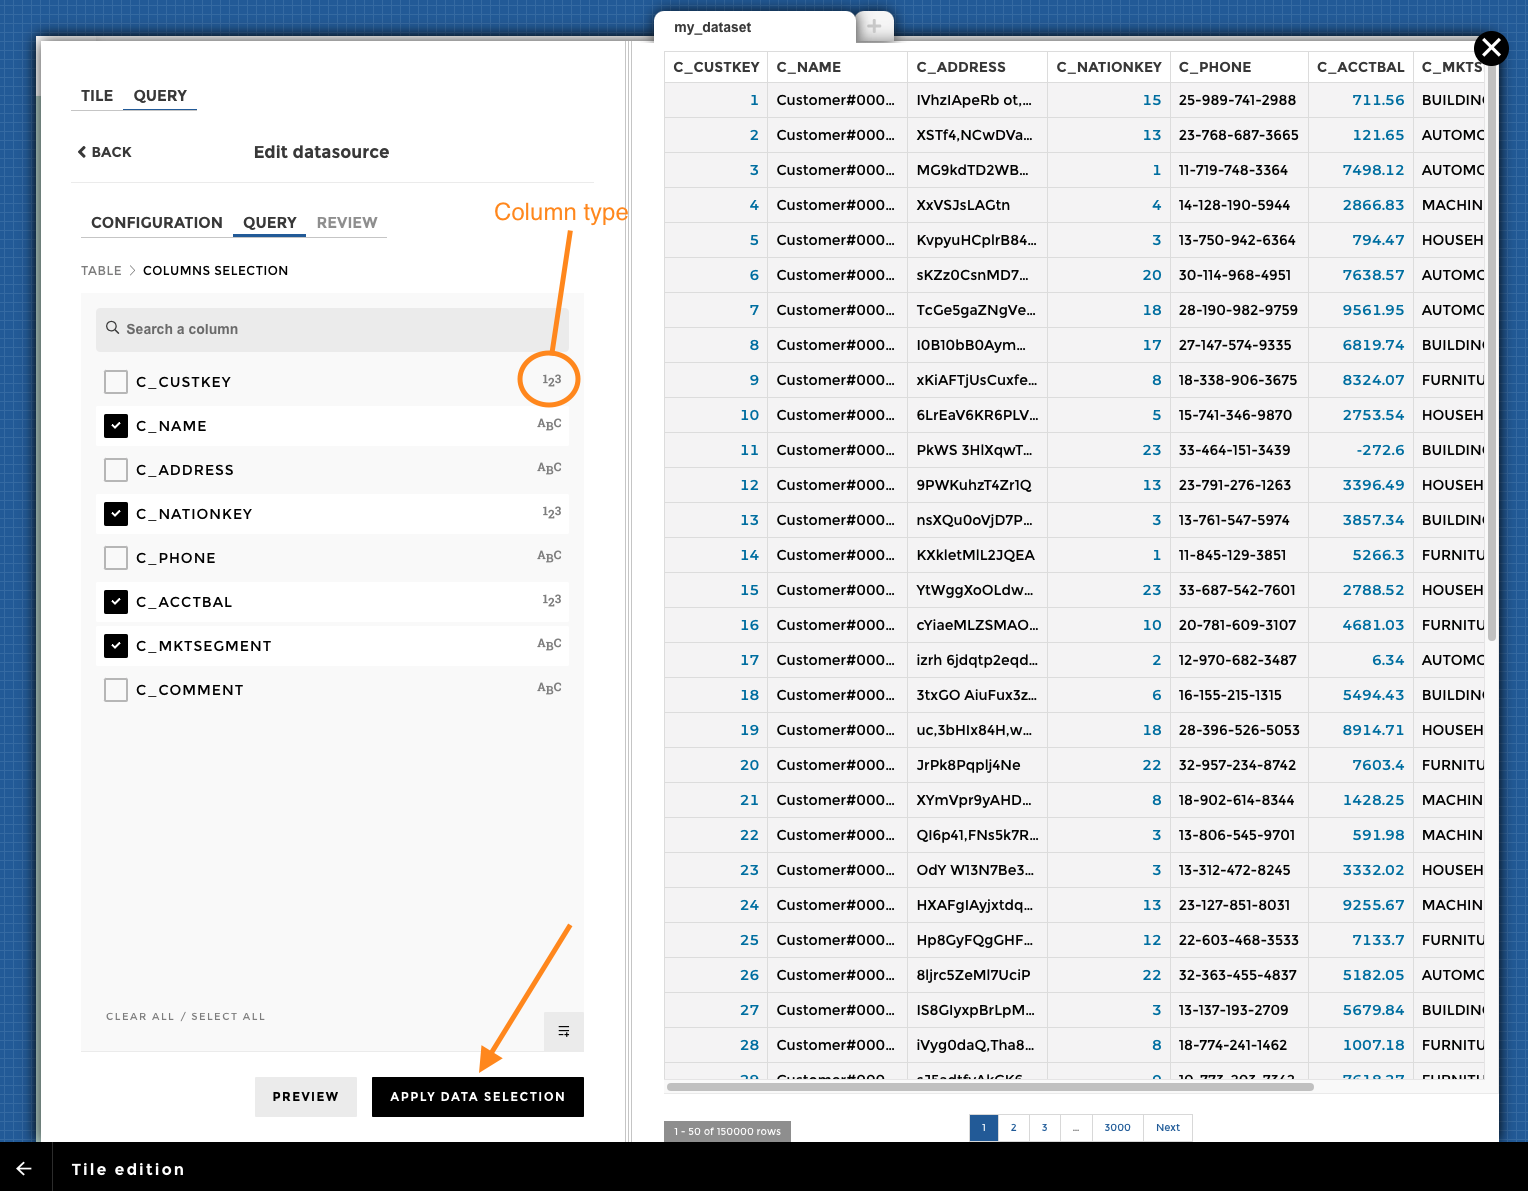
💡 Tip: You can get a quick idea of the column type next to the column name.
- Once you have applied the selection, you’ll get a chance to review your choices before saving your query:
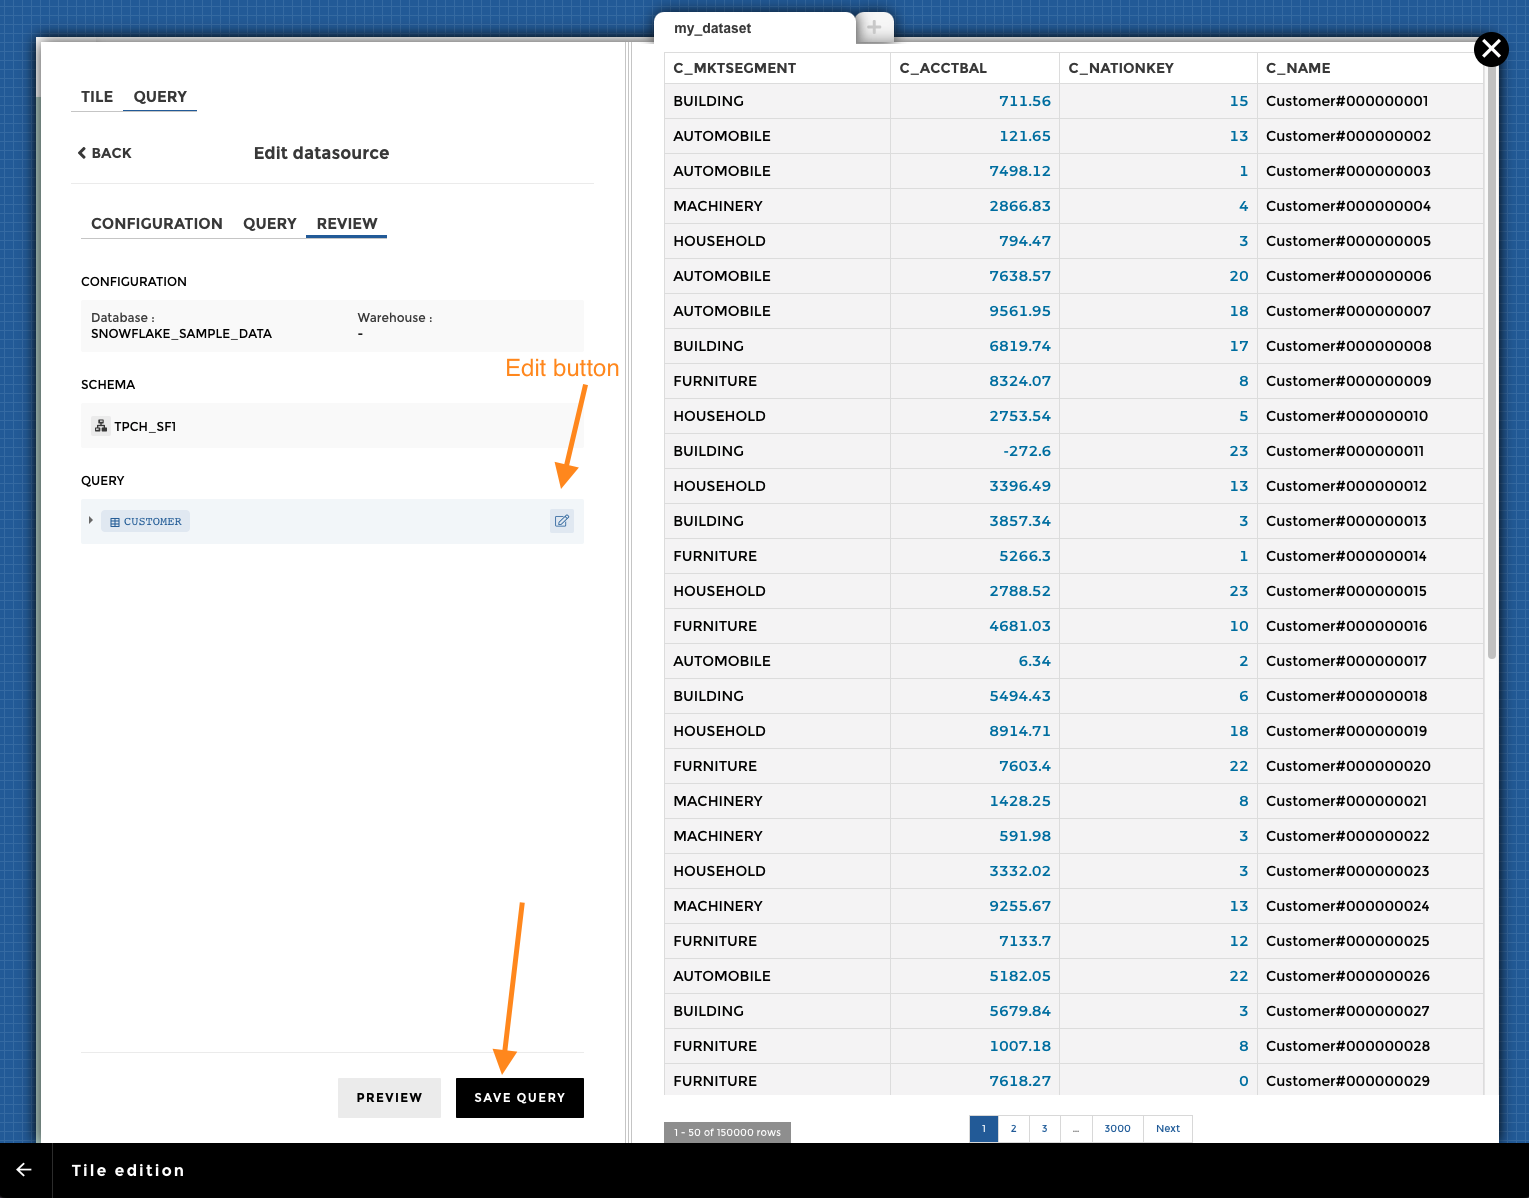
💡 Tip: Once you over one of your choice, you’ll see a pencil icon that you can click as a shortcut to change the value
- Tadaa! You have now selected data from Snowflake:
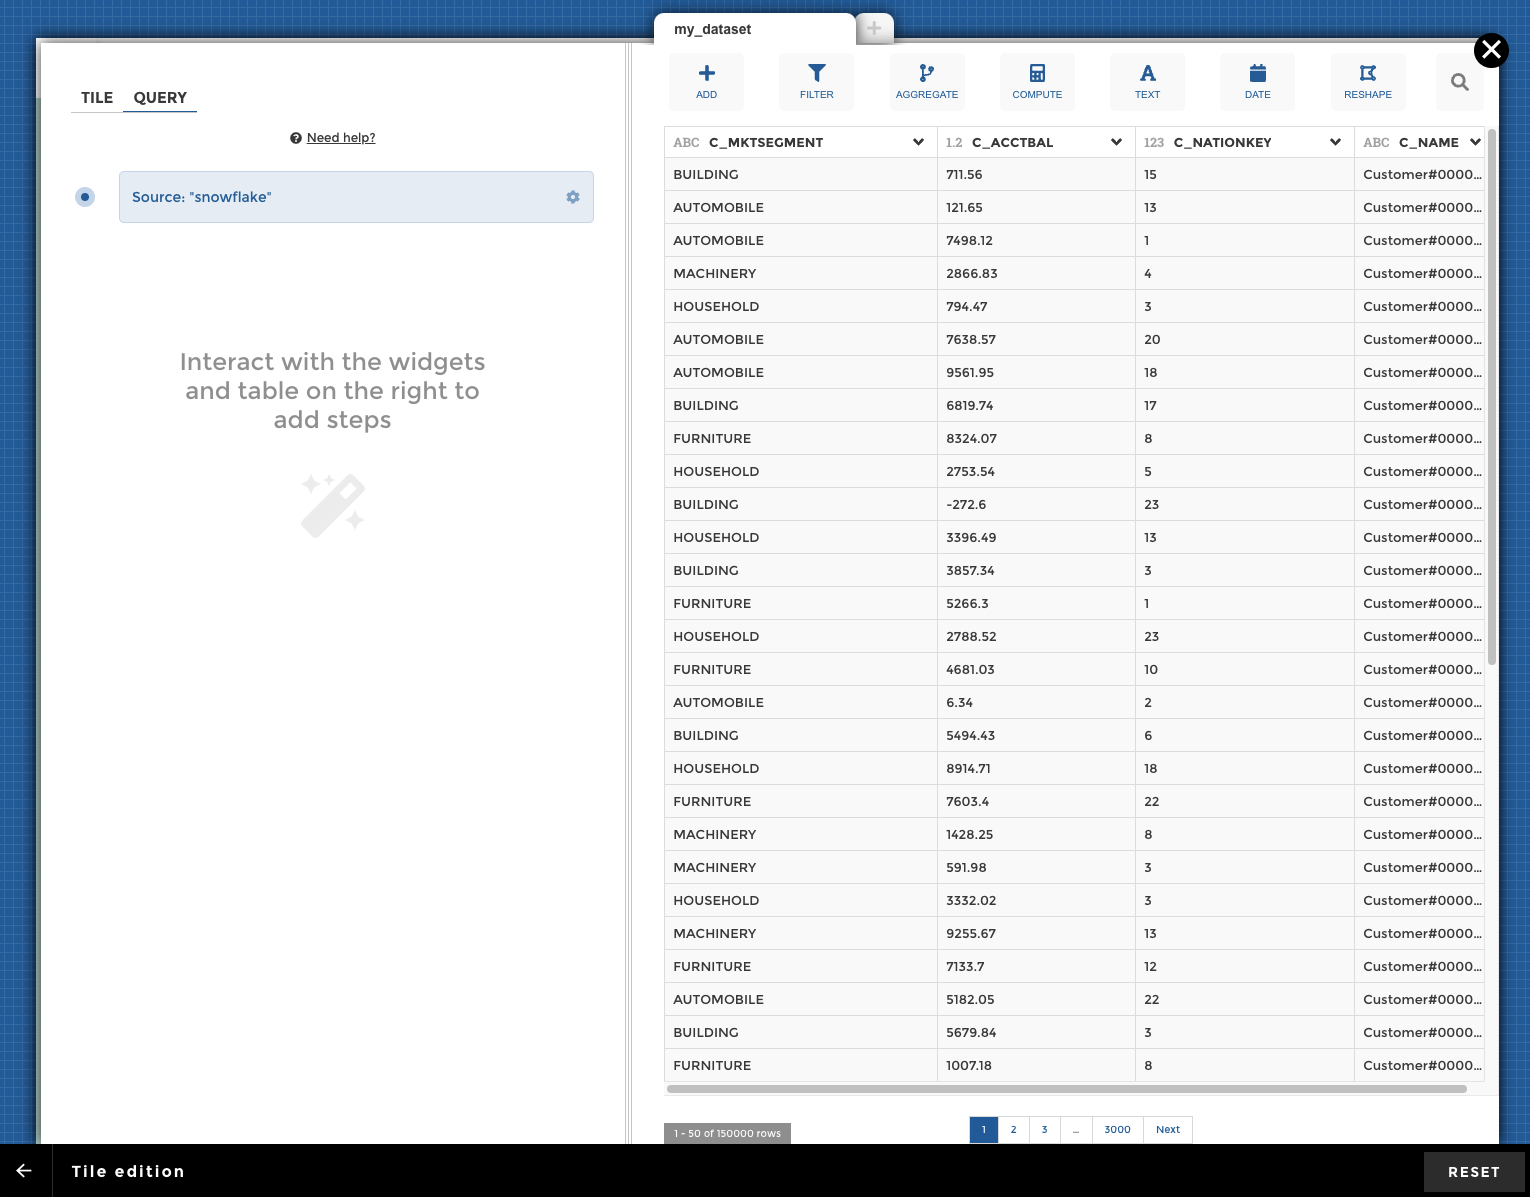
What’s really cool is that you can now use YouPrep™ to transform your data like you’re used to… but all computations will be done directly in Snowflake!
Important
Please note that in order to transform your data (coming from Snowflake) with YouPrep™, your column names must be in uppercase!
Have fun with your Snowflake data!!