How to :: Use templating variables in your application
What is templating?
As a data story teller, you’re probably familiar with these questions:
- Can I customize my narrative based on what report/view I’m choosing?
- Can the chart display different metrics/values based on the user choice?
- How can I use the view I created and only show a slice of the data?
- Can the value shown be different based on what the user selects?
- Can I use the result of a query in my narrative?
The answer to all of these questions is : TEMPLATING.
There are 2 different templating syntaxes, that are used for different purposes:
- Display data from a dataset anywhere in your story
- Display data from a requester’s selection
Display data from a requester’s selection in YouPrep™
Overview
If you want to apply some condition on your dataset depending on your date requester, view requester or a story requester ==> You’re in the right place ✌
Important
When using all your YouPrep™ step, you will find the button {} on
the right of your tab to call some variable on your story By clicking on
{}, you will find all the variables you can call on your story (yeah
that’s it 🧙) !!!
But could you please tell me more about the variable I could find here ?
✔ You will find some variable from your view requester. If you select the “make all columns available” option on your view requester, then you will be able to call all the columns from your view requester! (ex Date / Quarter / Year)
✔ You will find the variable of your view requester. If you select the “make all columns available” option on your view requester, then you will be able to call all the columns from your view requester! (ex Label/Parent/Countries/region)
✔ Finally you will find the variable of the requesters on your story
Sounds good but How can I use it ?
Using the variables into your data preparation is unlimited ! Thanks to this easy way to use the result of other selection in your date requester/ report requester / requester. Building a story has never been so fast
Note
- Your variable is keeping the format of the value contained in the requester (that’s why you will not find any result if you’re trying to compare a string with a number 😉 ).
- You could use the variable on the name of your column directly (to filter a column). Nonetheless, that mean you need to have a column name matching the value of your requester. For example you’re selecting report.level containing regions or countries as value. Then if you’re using it to filter your column region or your column countries into your dataset with another value, you can use it on the left as well.
variable left bis
Beginner:
📝 I’m going to apply a filtering operation depending on my appRequesters
First of all, you need to understand how your appRequesters has been set up. Here, my report allow me to switch with different countries.
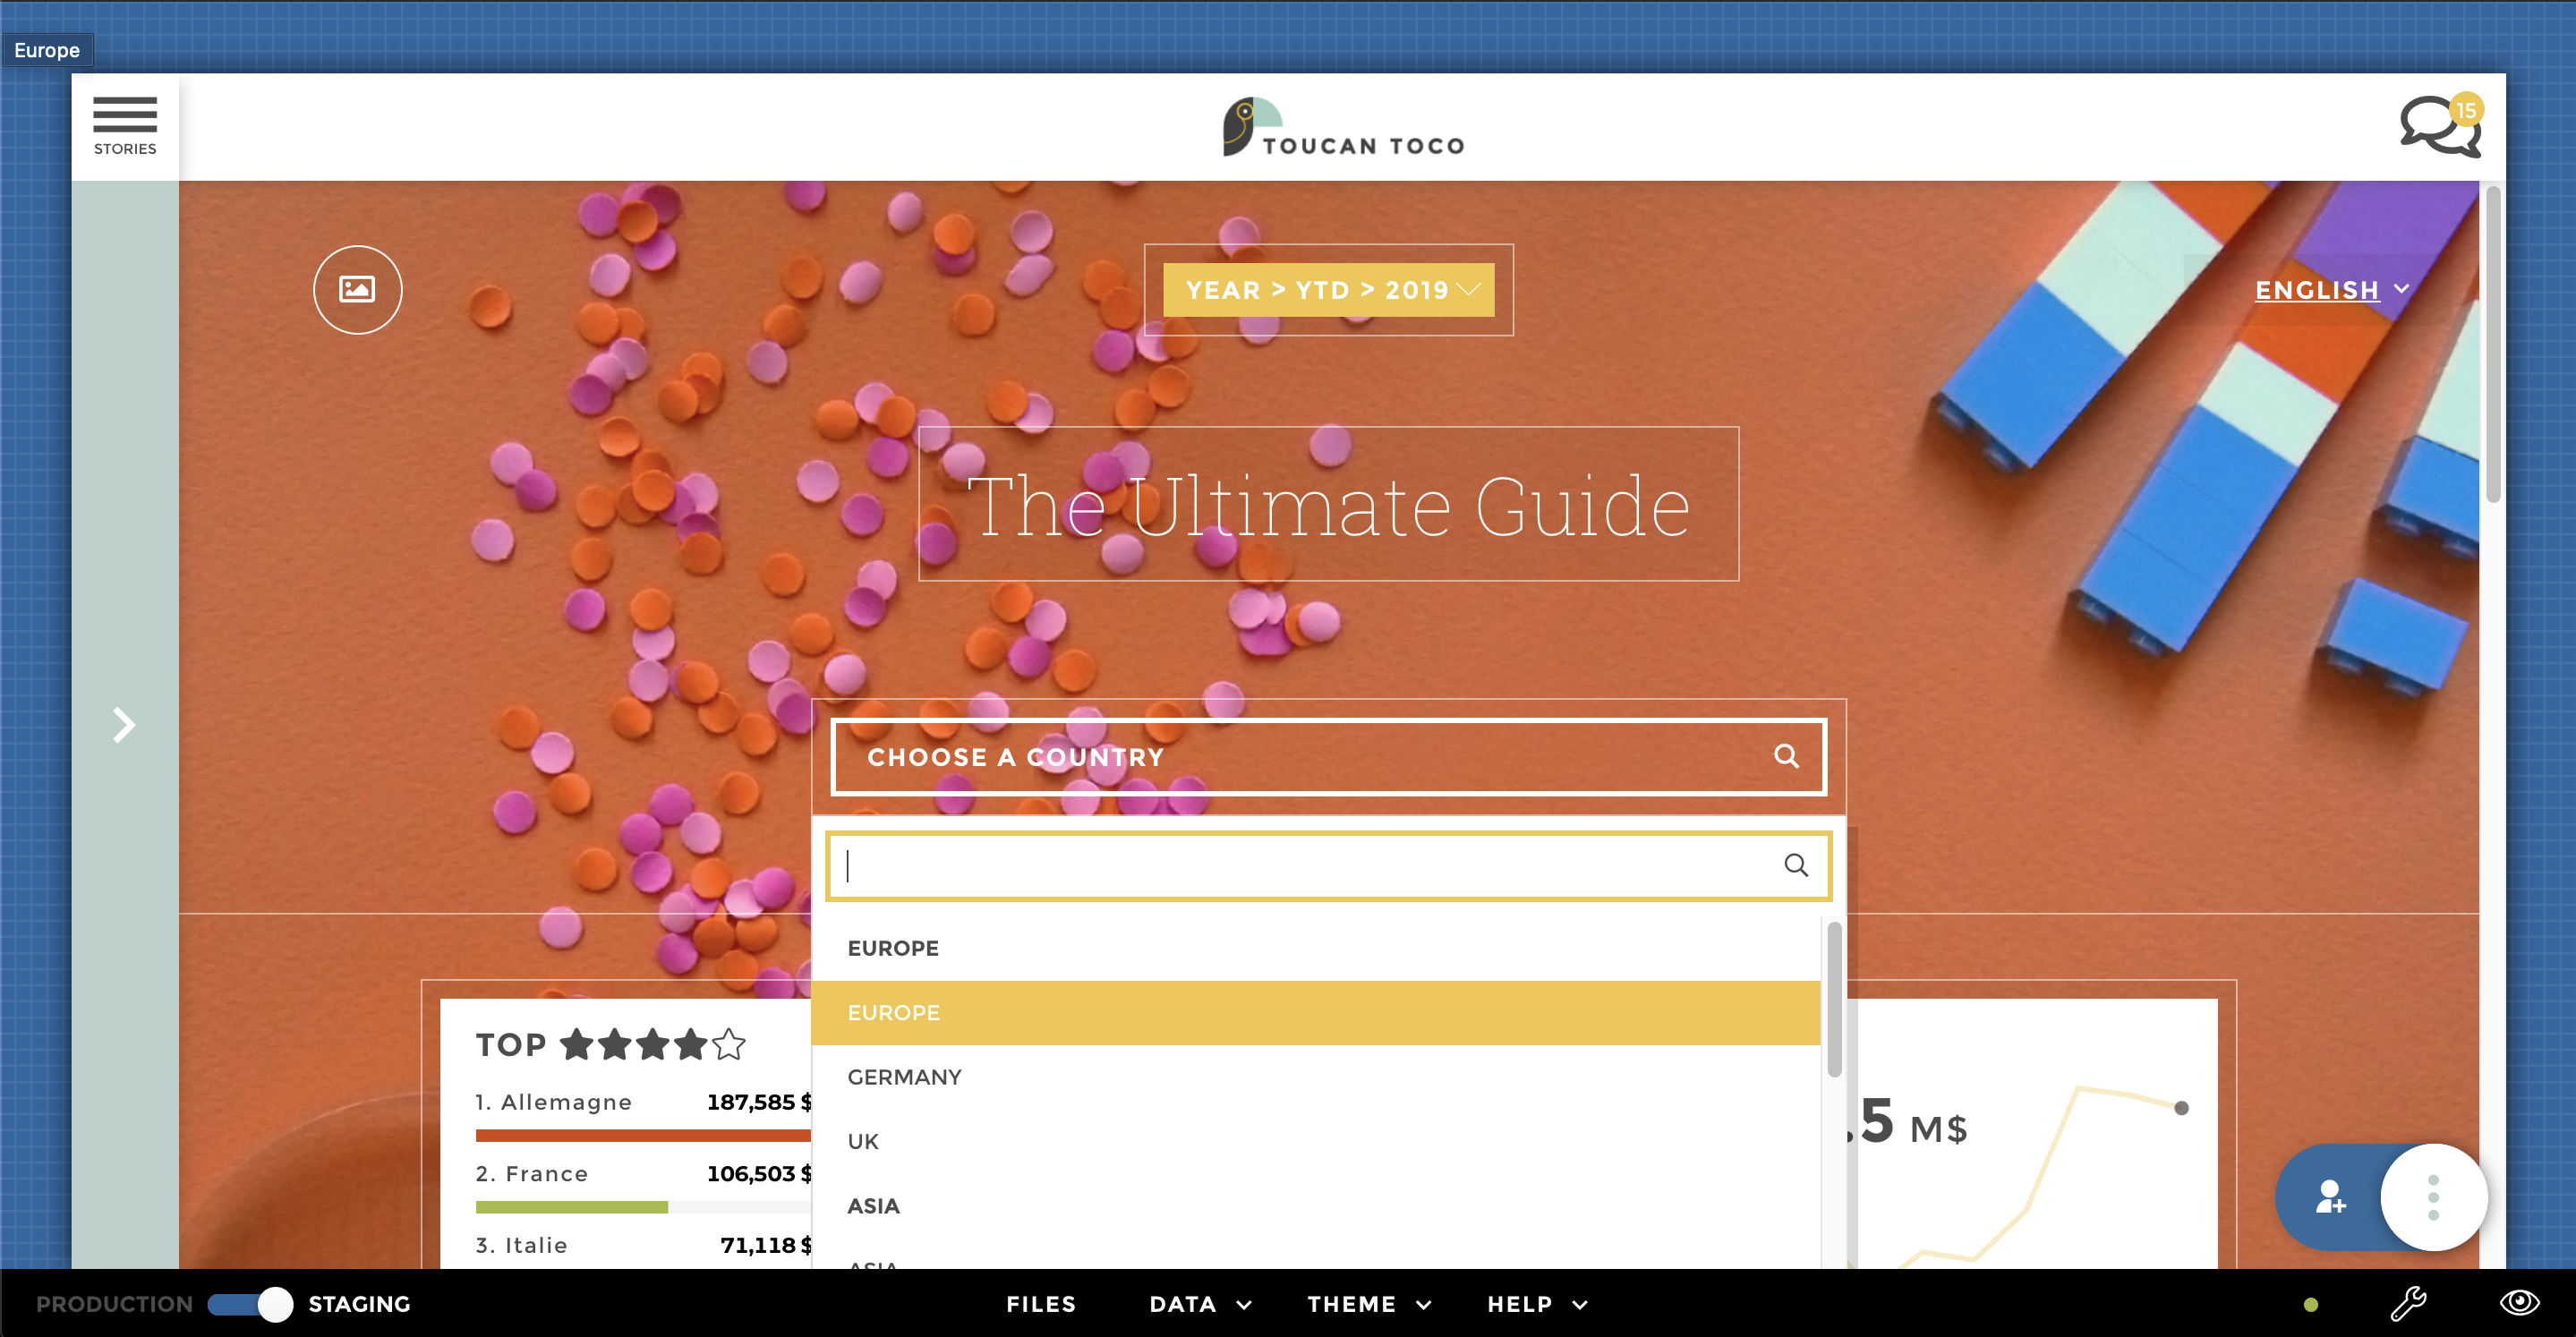
start report
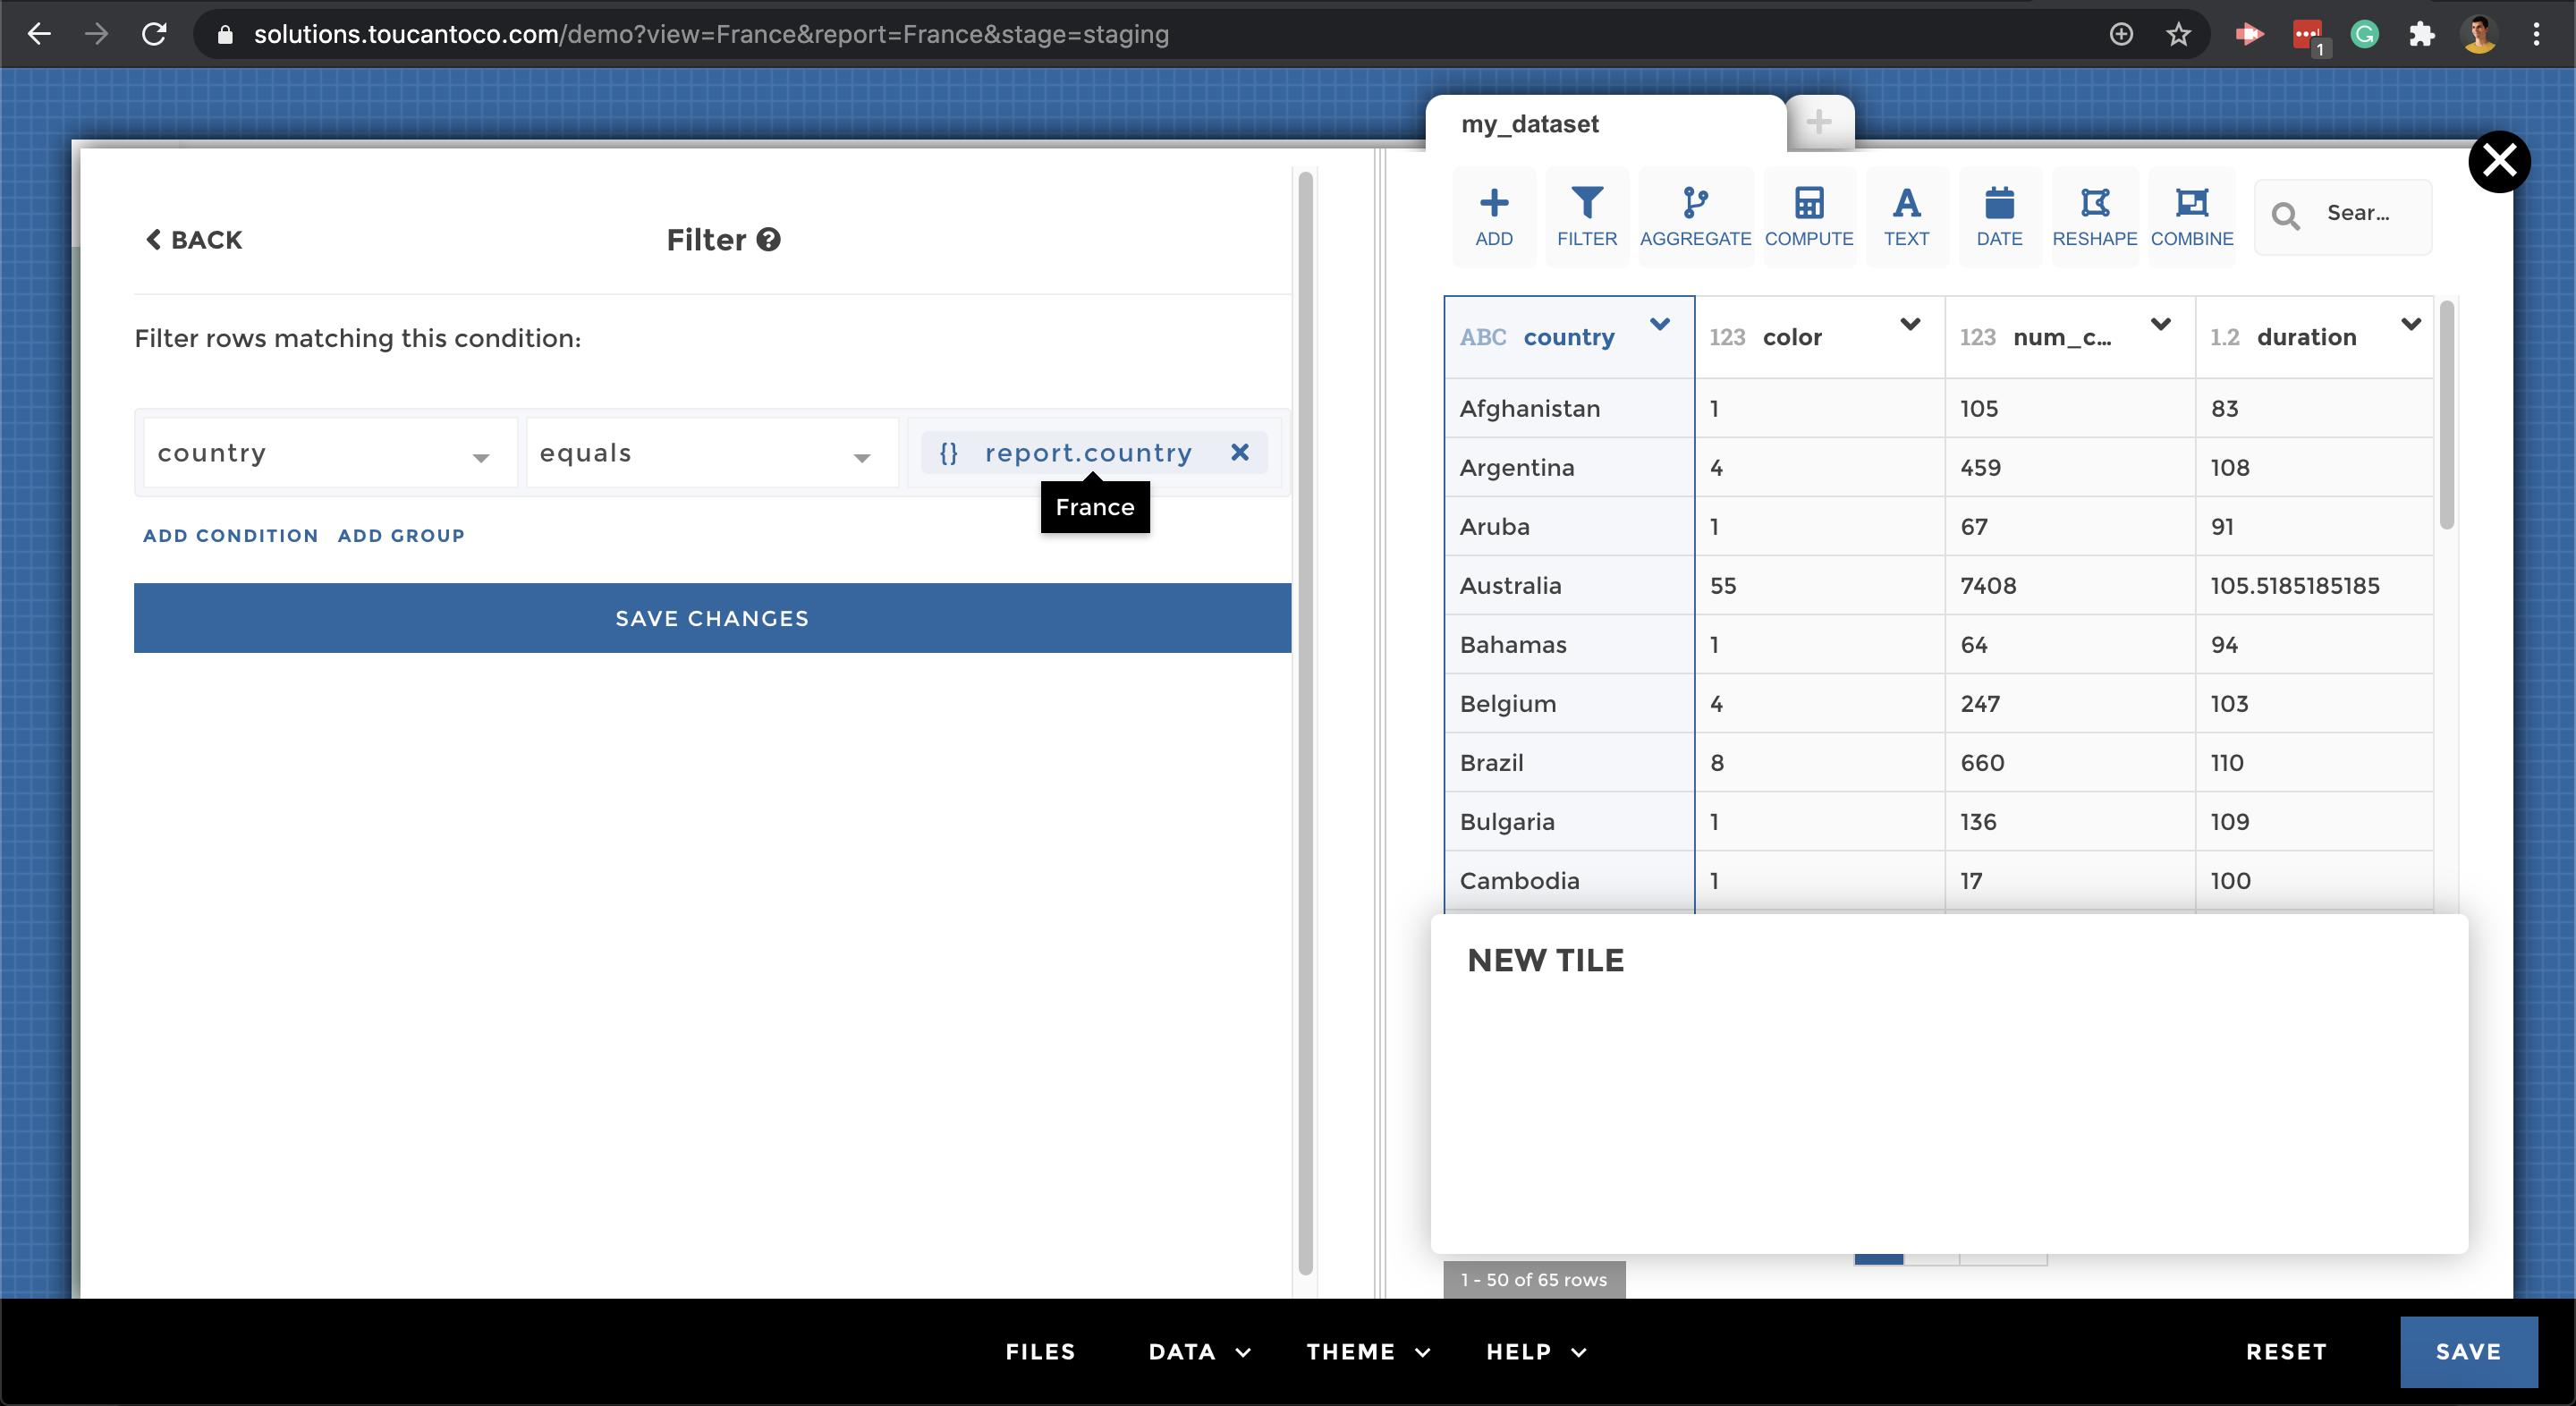
Now is the time to build your first tile/story using the templating in
the query. 1/ Select your dataset 2/ Use YouPrep filtering operation 3/
Select the column on which you want to apply the dependence on your
appRequesters 4/ You’re almost there ! You just need to click on {}
and take the country column of your report
beginner étape 2
And here you go 👍
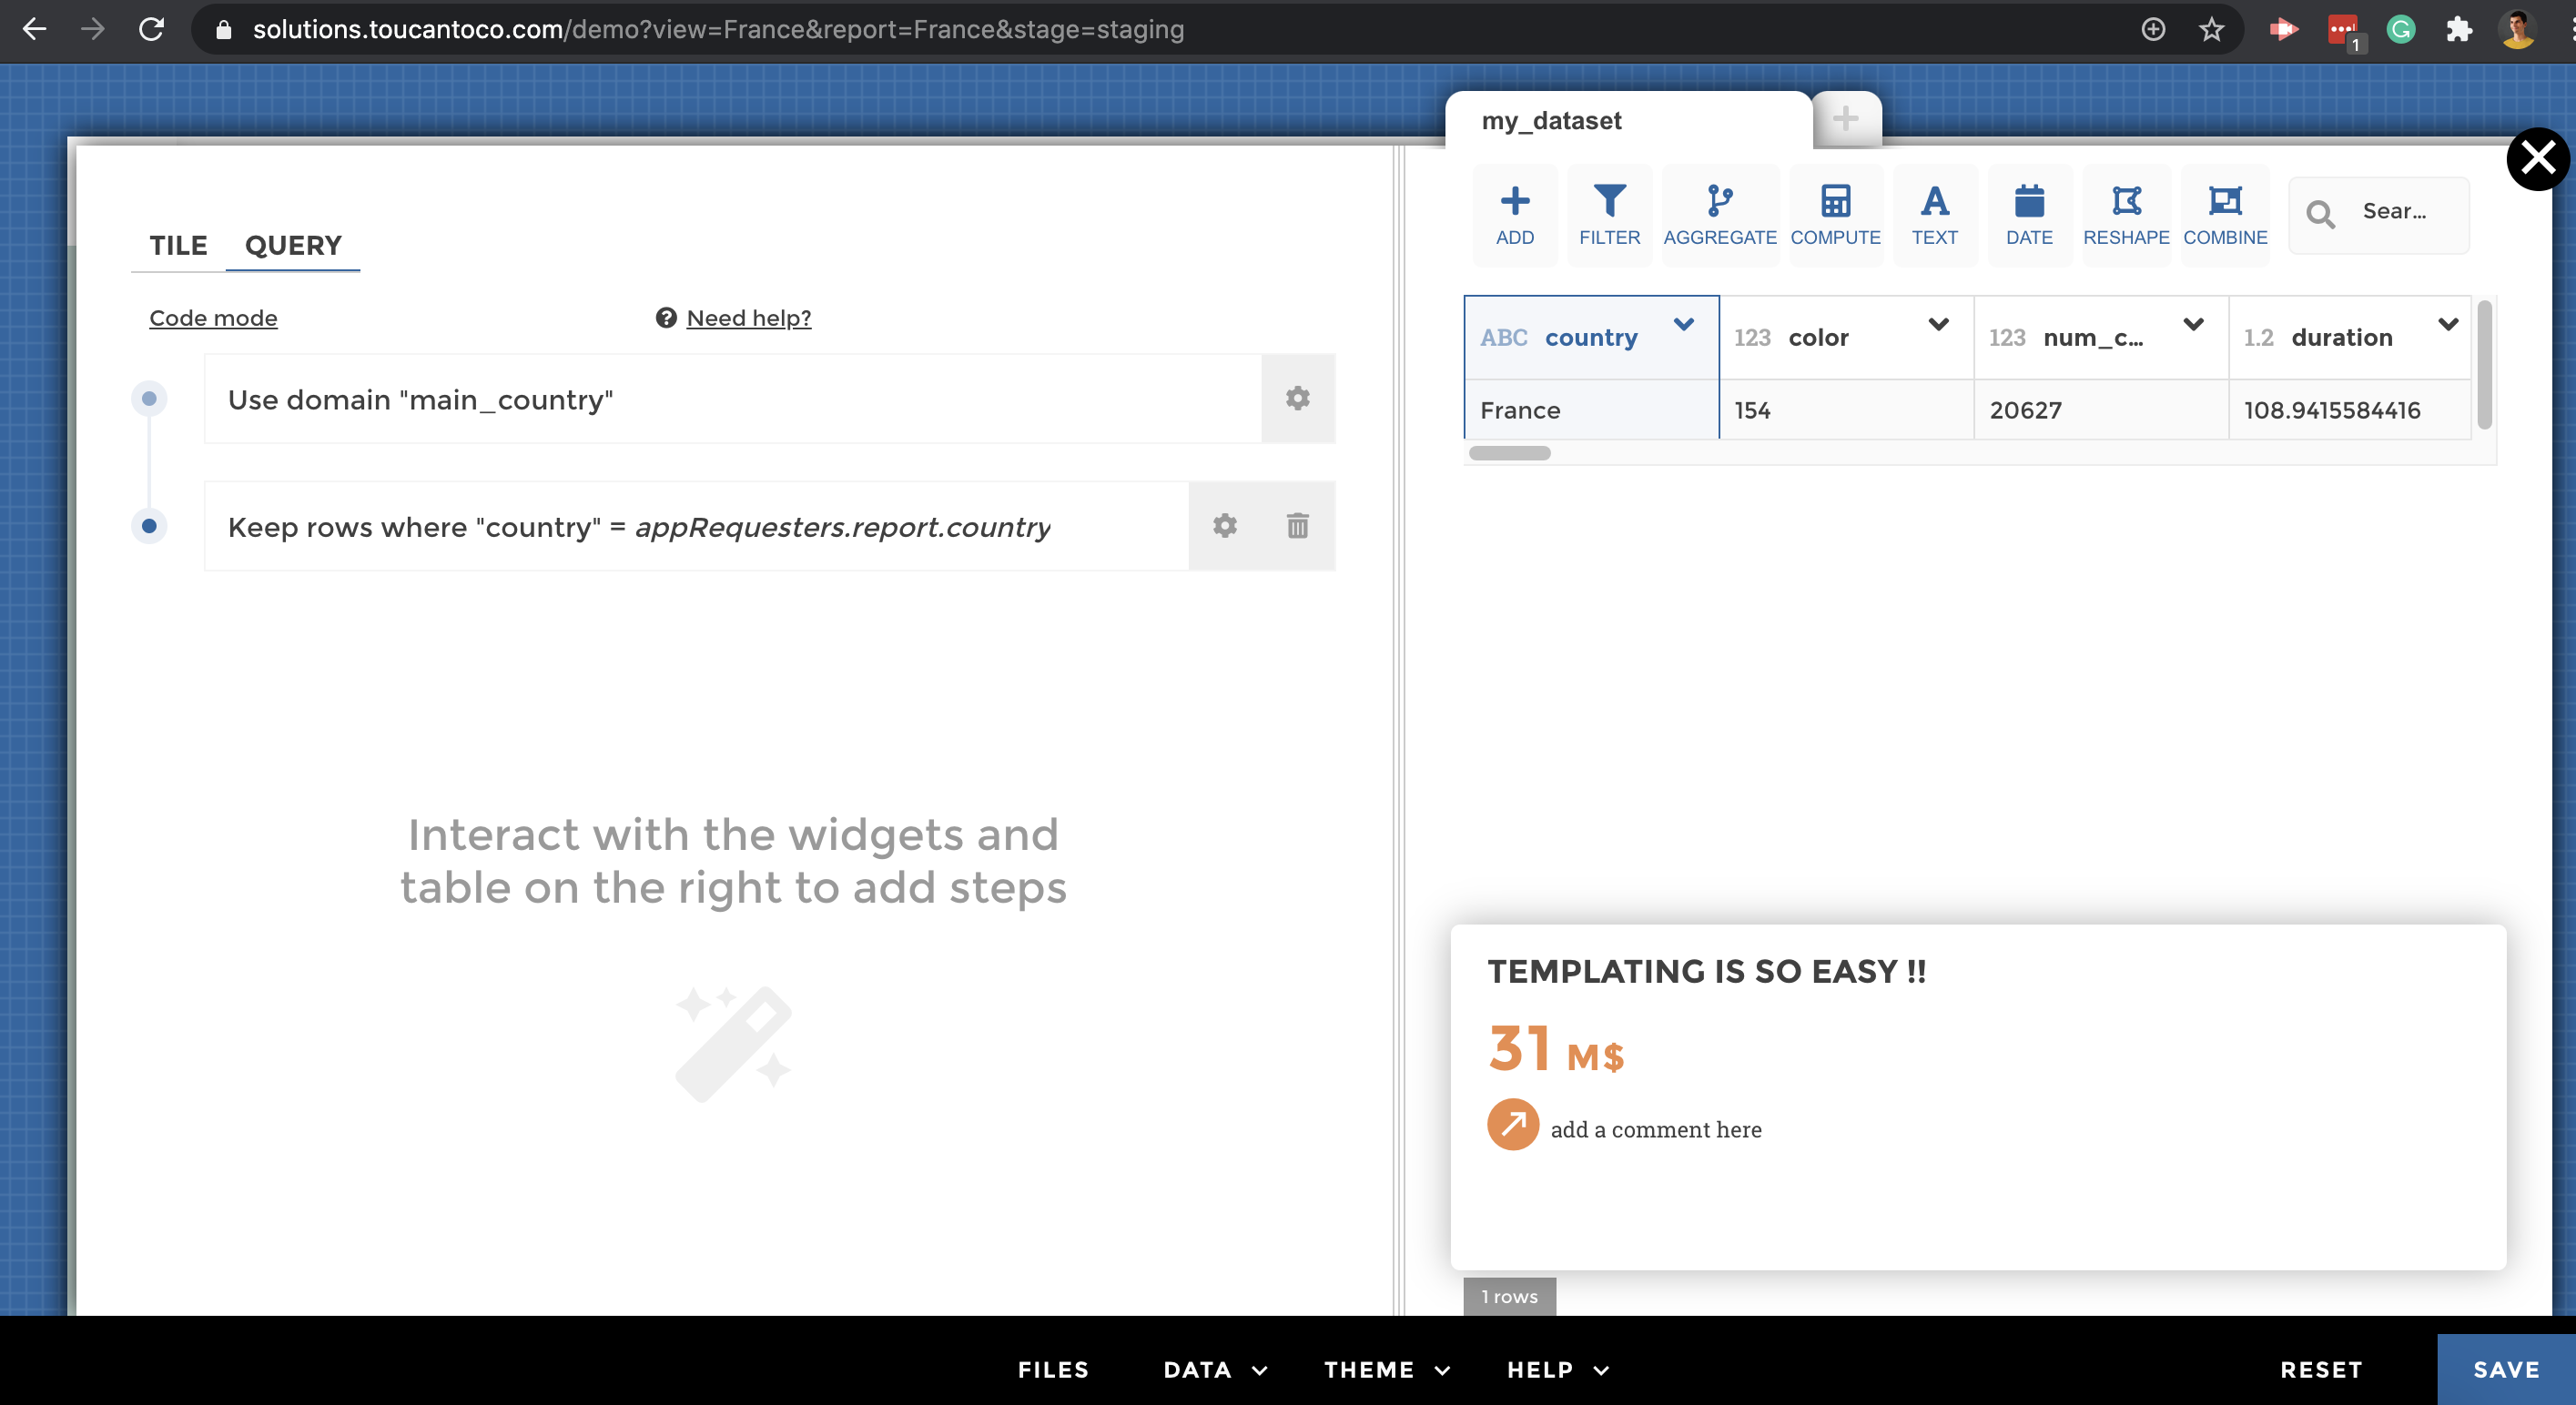
beginner final
Advanced:
📝 I would like to be able to switch between a Region and a country vision on my appRequesters
Let’s start by downloading the following file data_countries.csv and set the appRequesters on your app to display the countries and regions in your view selector.
step 1
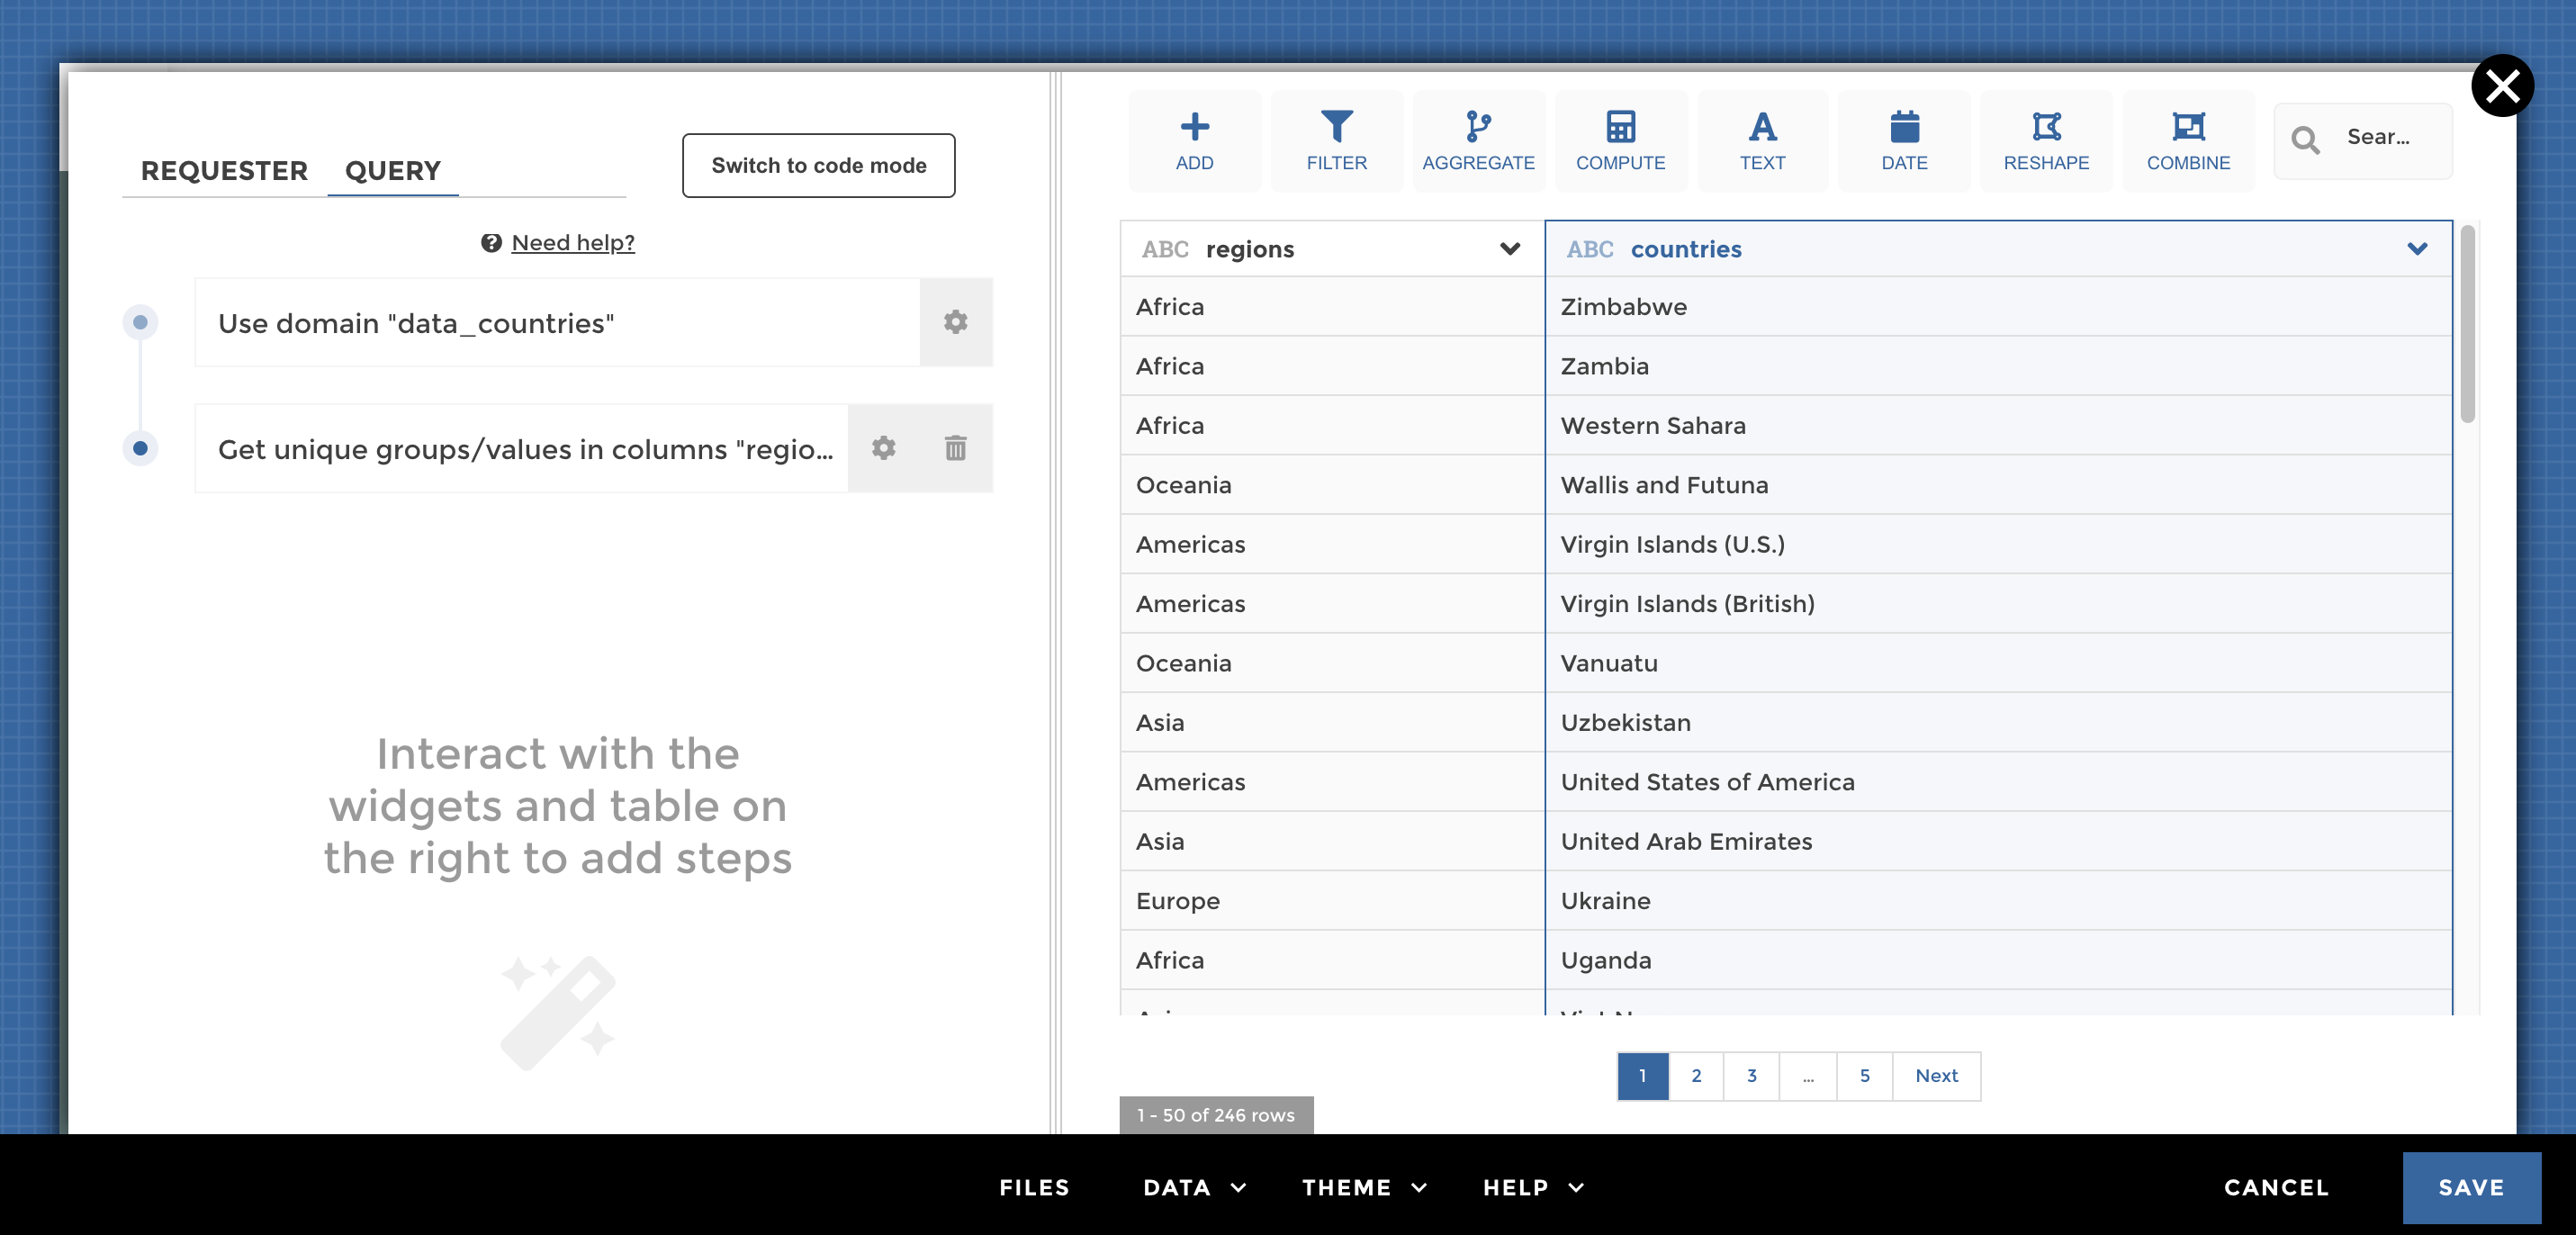
First of all, you need to create a hierarchical step to generate your
parent level on your report requester (your dataset is only containing
your children levels). This step will allow you to generate your parent
label (that is to say your regions label 😎) 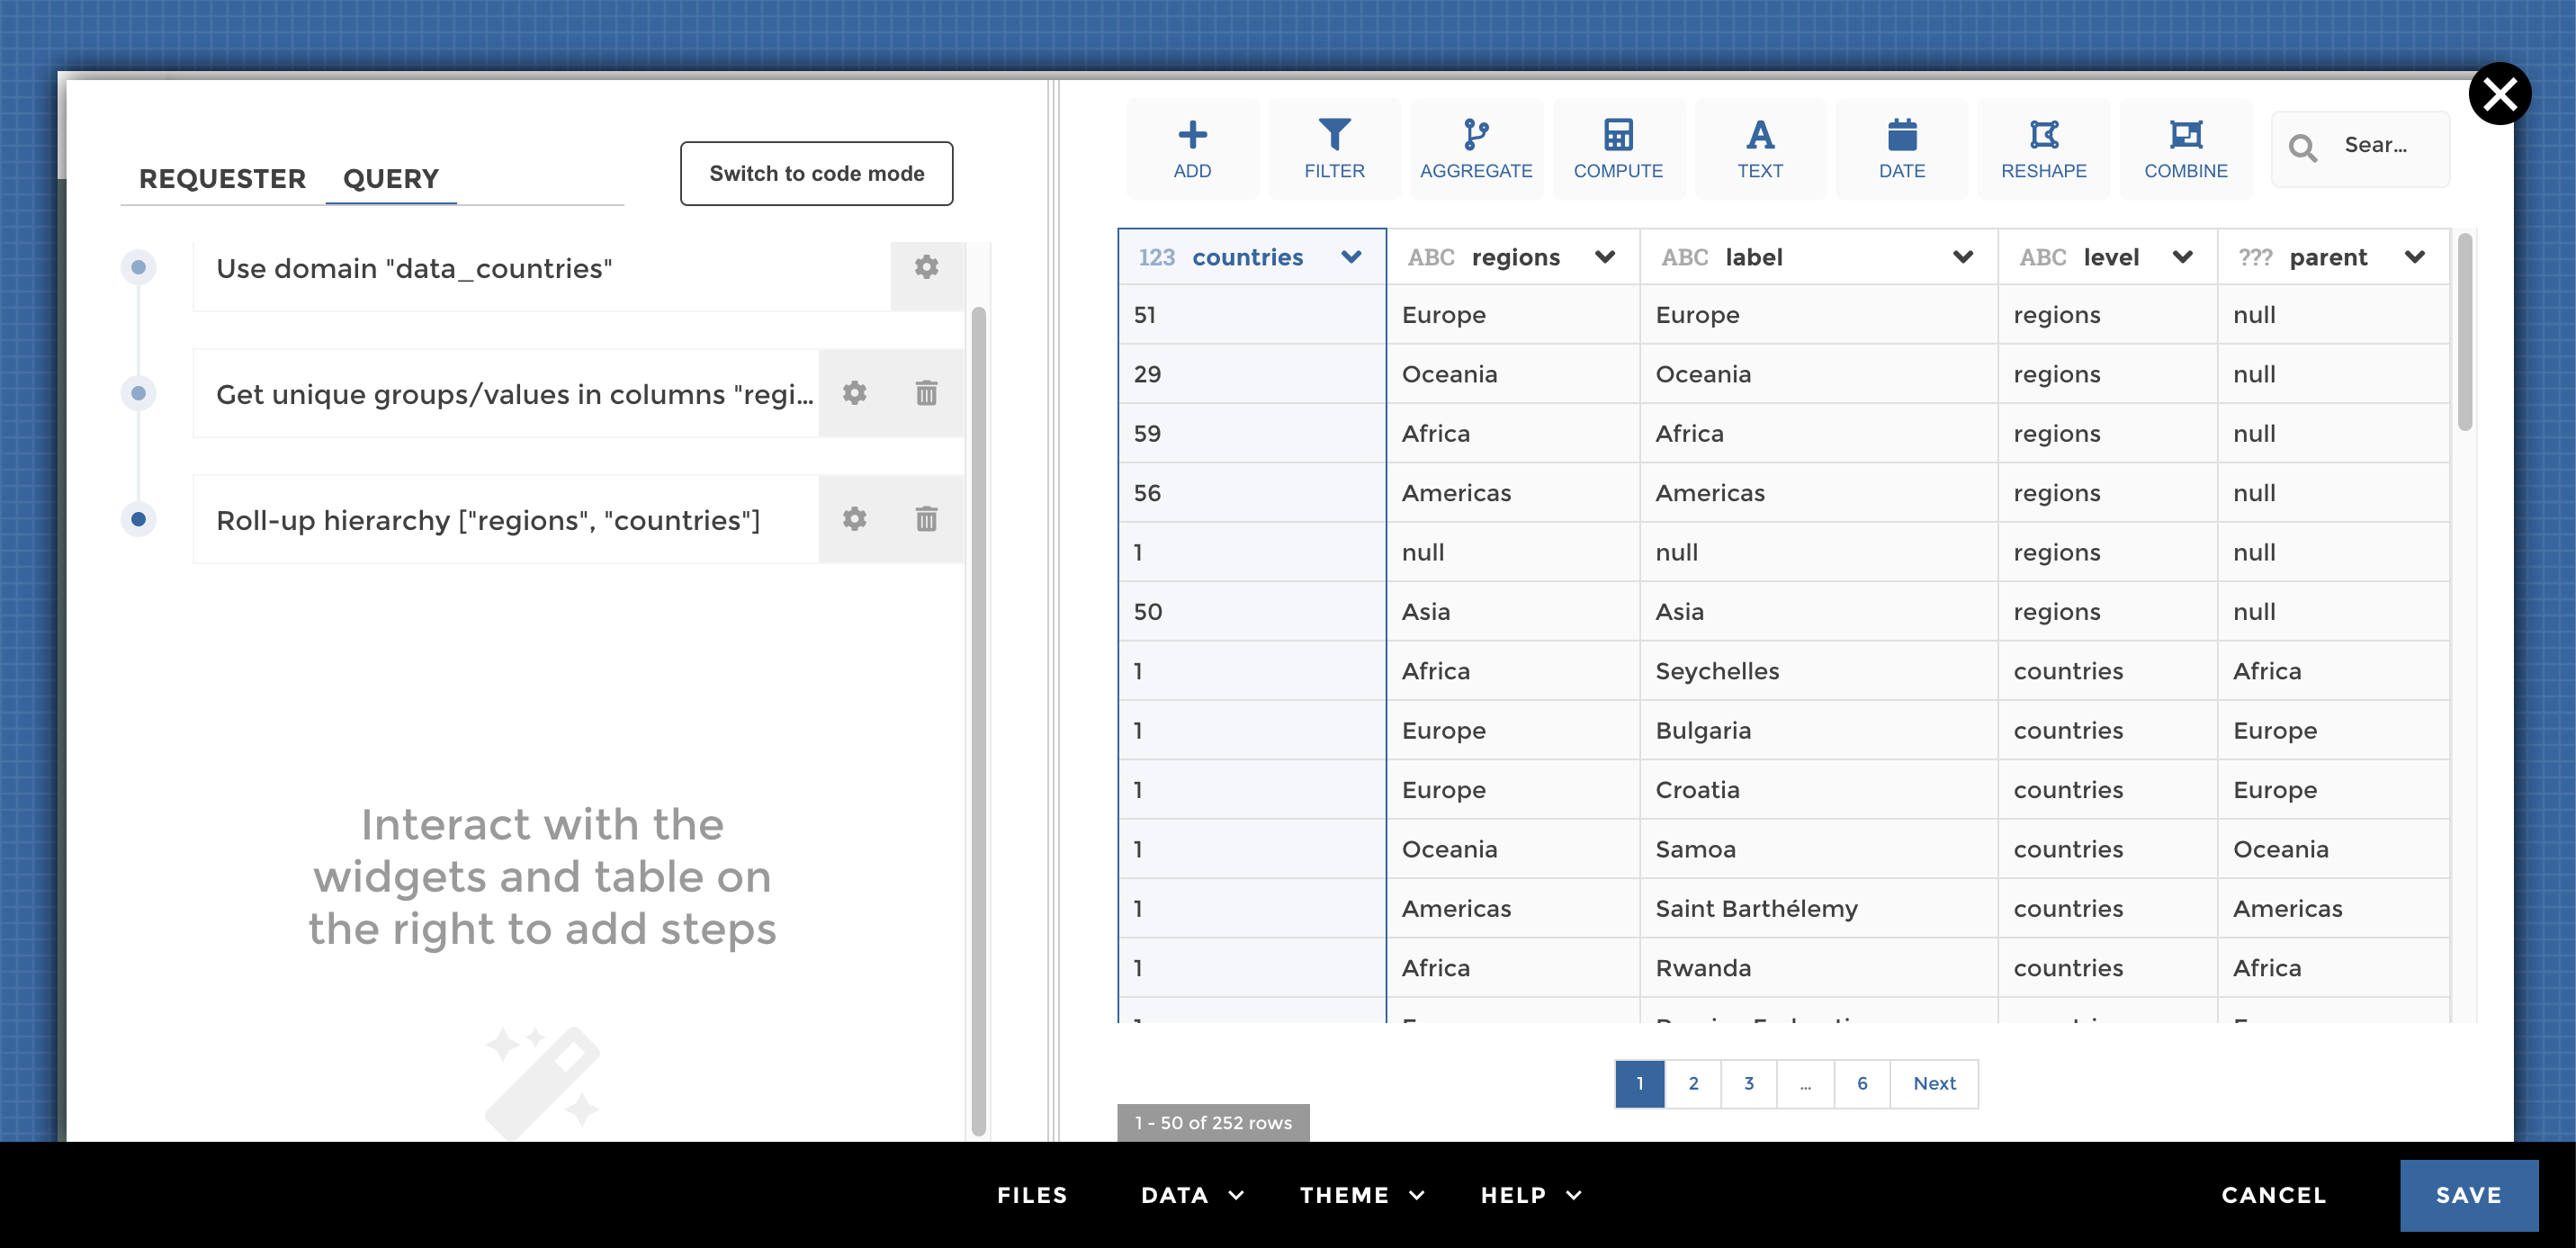
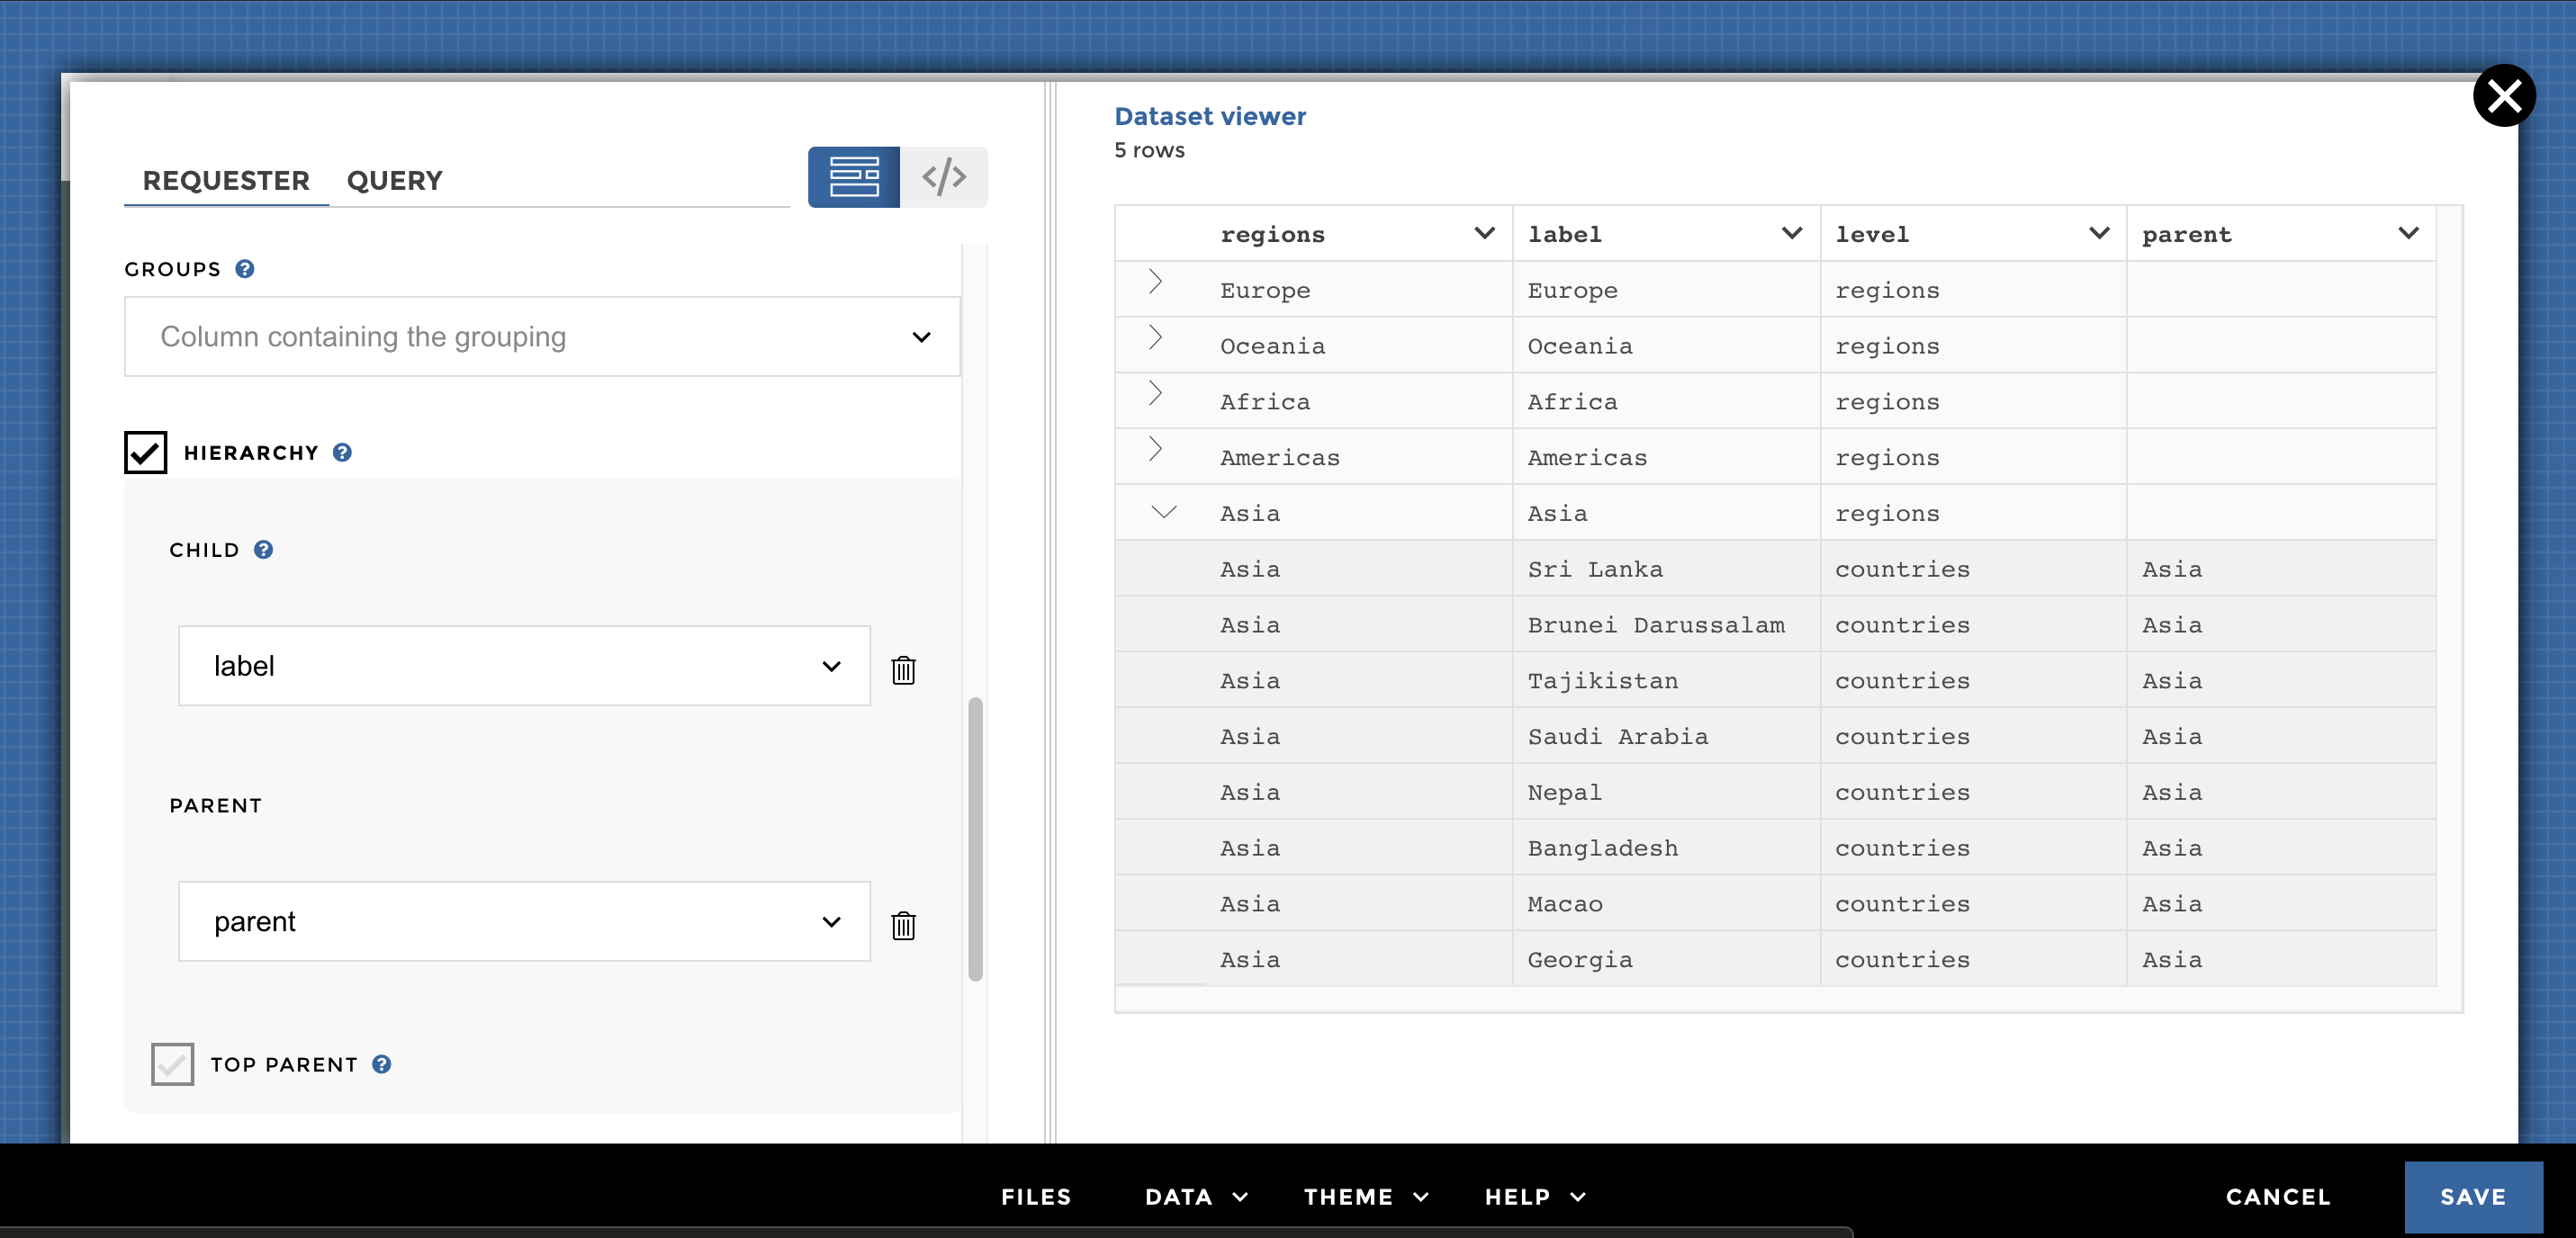
Then you can set your appRequesters with a hierarchy => That means the label we are choosing could be a region or a country. It’s important to take it in consideration when you will use the templating to filter your dataset in your story.
step 2 bis
Create a story using the same dataset as your appRequesters (data_countries). You are using the same dataset, but if you want to match to the selected value of your appRequesters, you need to adapt it. Let’s start by using the hierarchical roll-up YouPrep™ step. This step will give you your parent level and will aggregate your children values to generate your parent values!
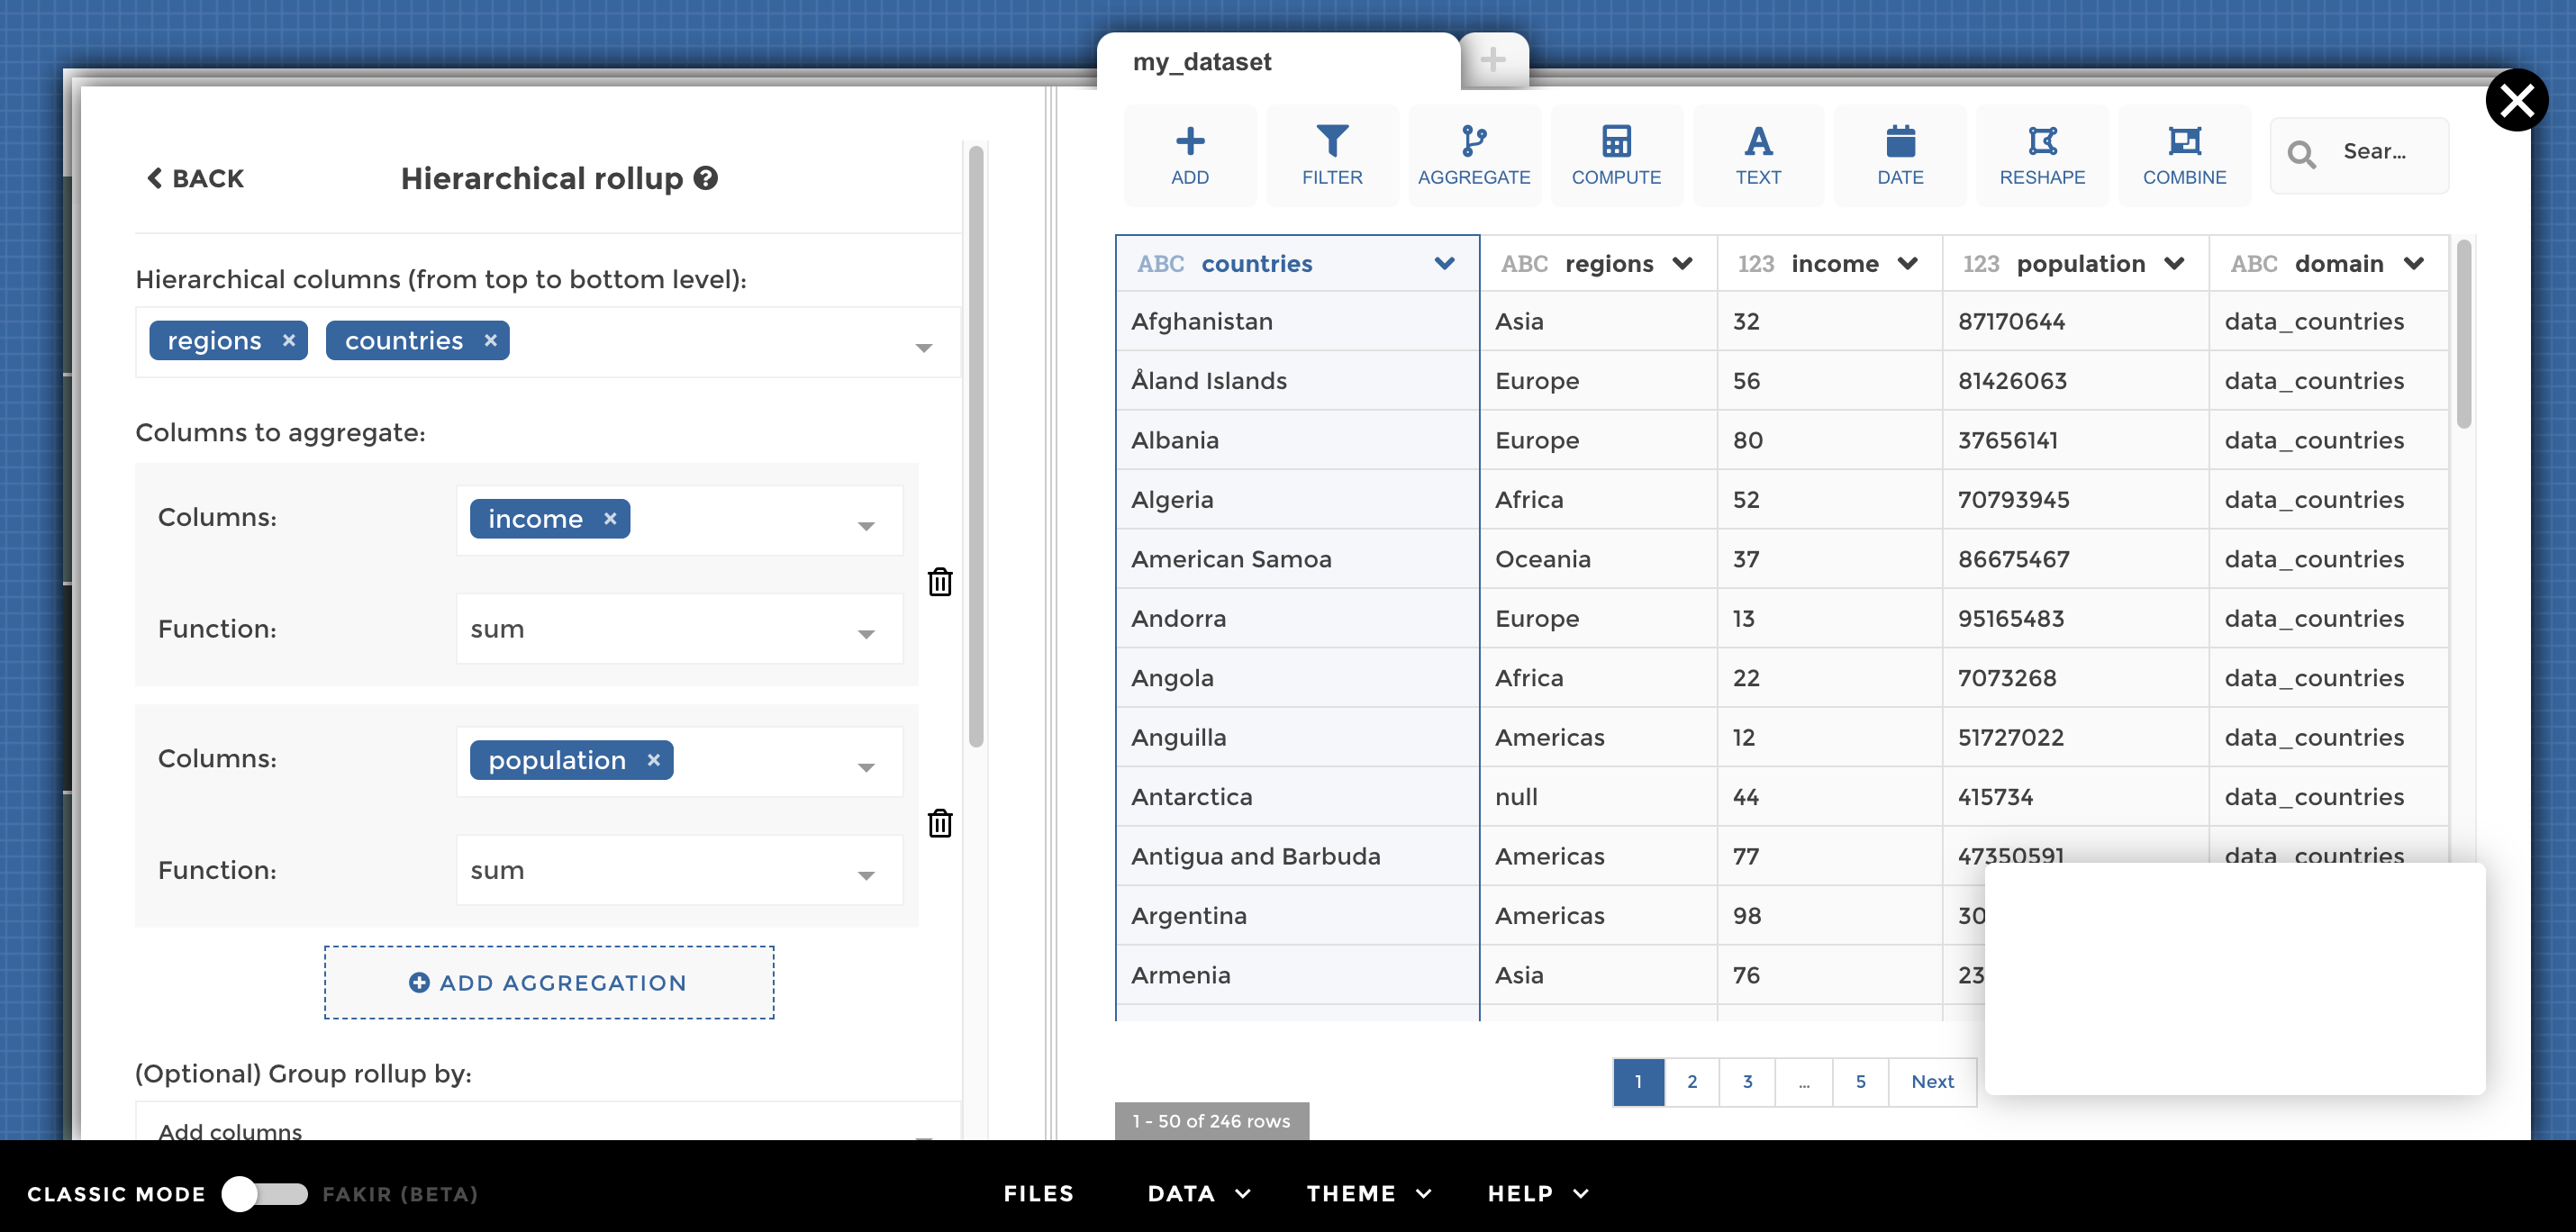
step 4
Then you could start to play with the variable selection 🙌
📝Keep in mind that you want your label to match exactly the value of your report.
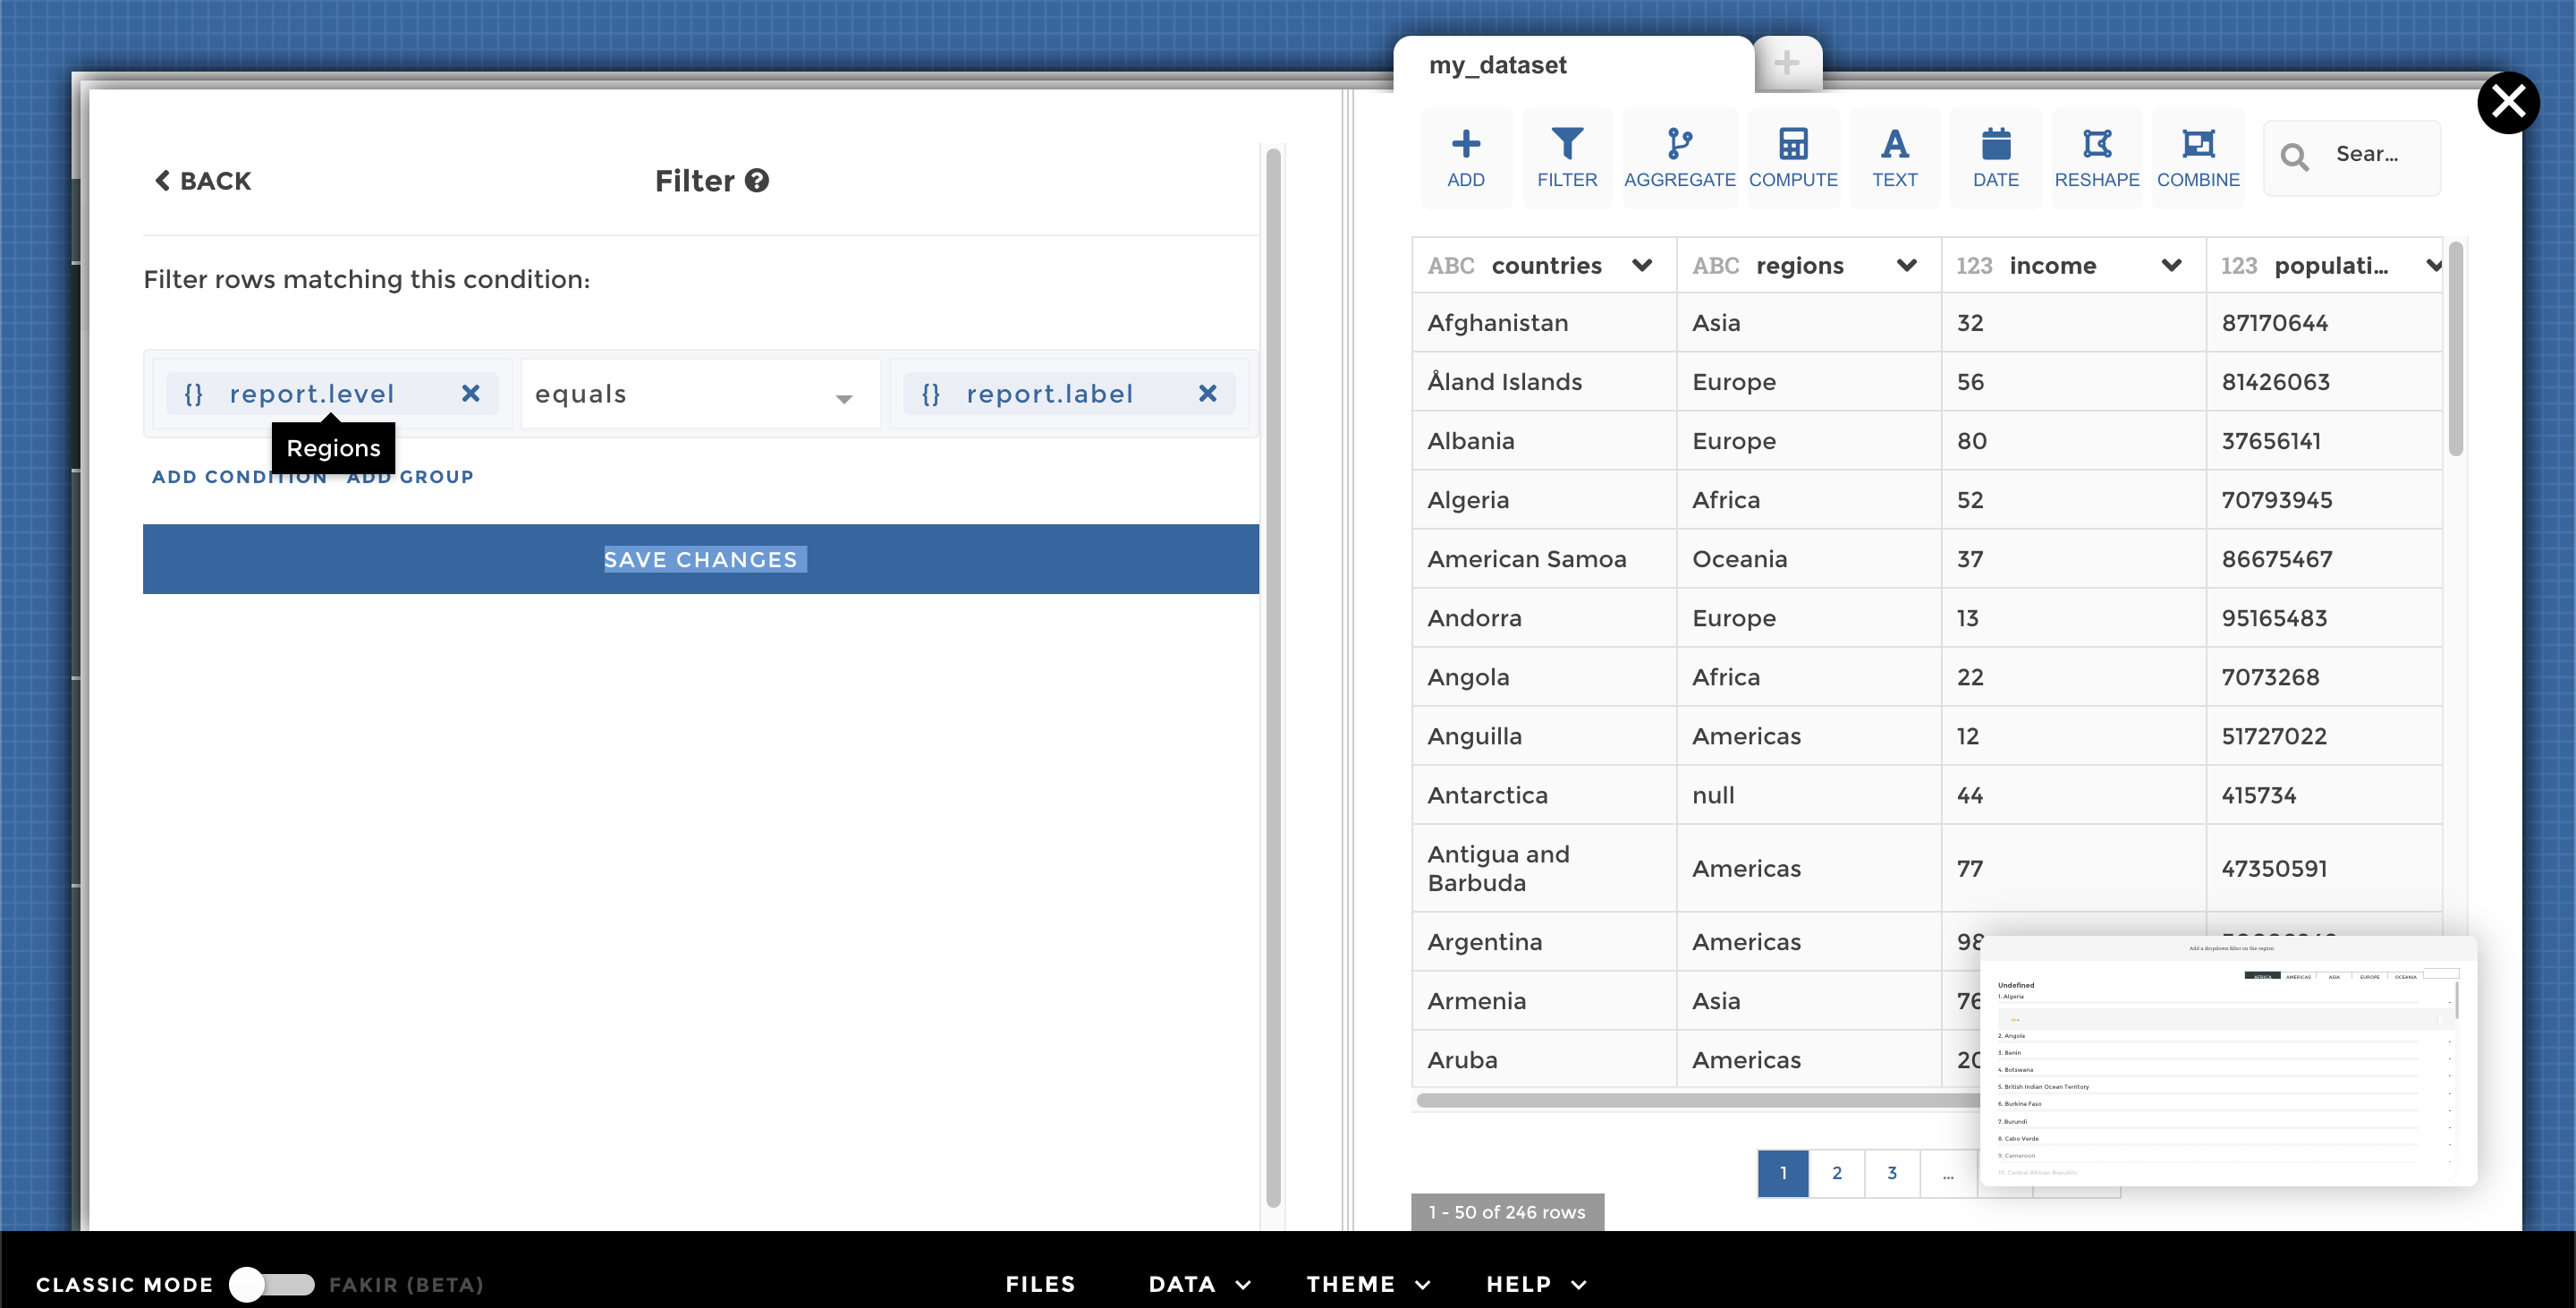
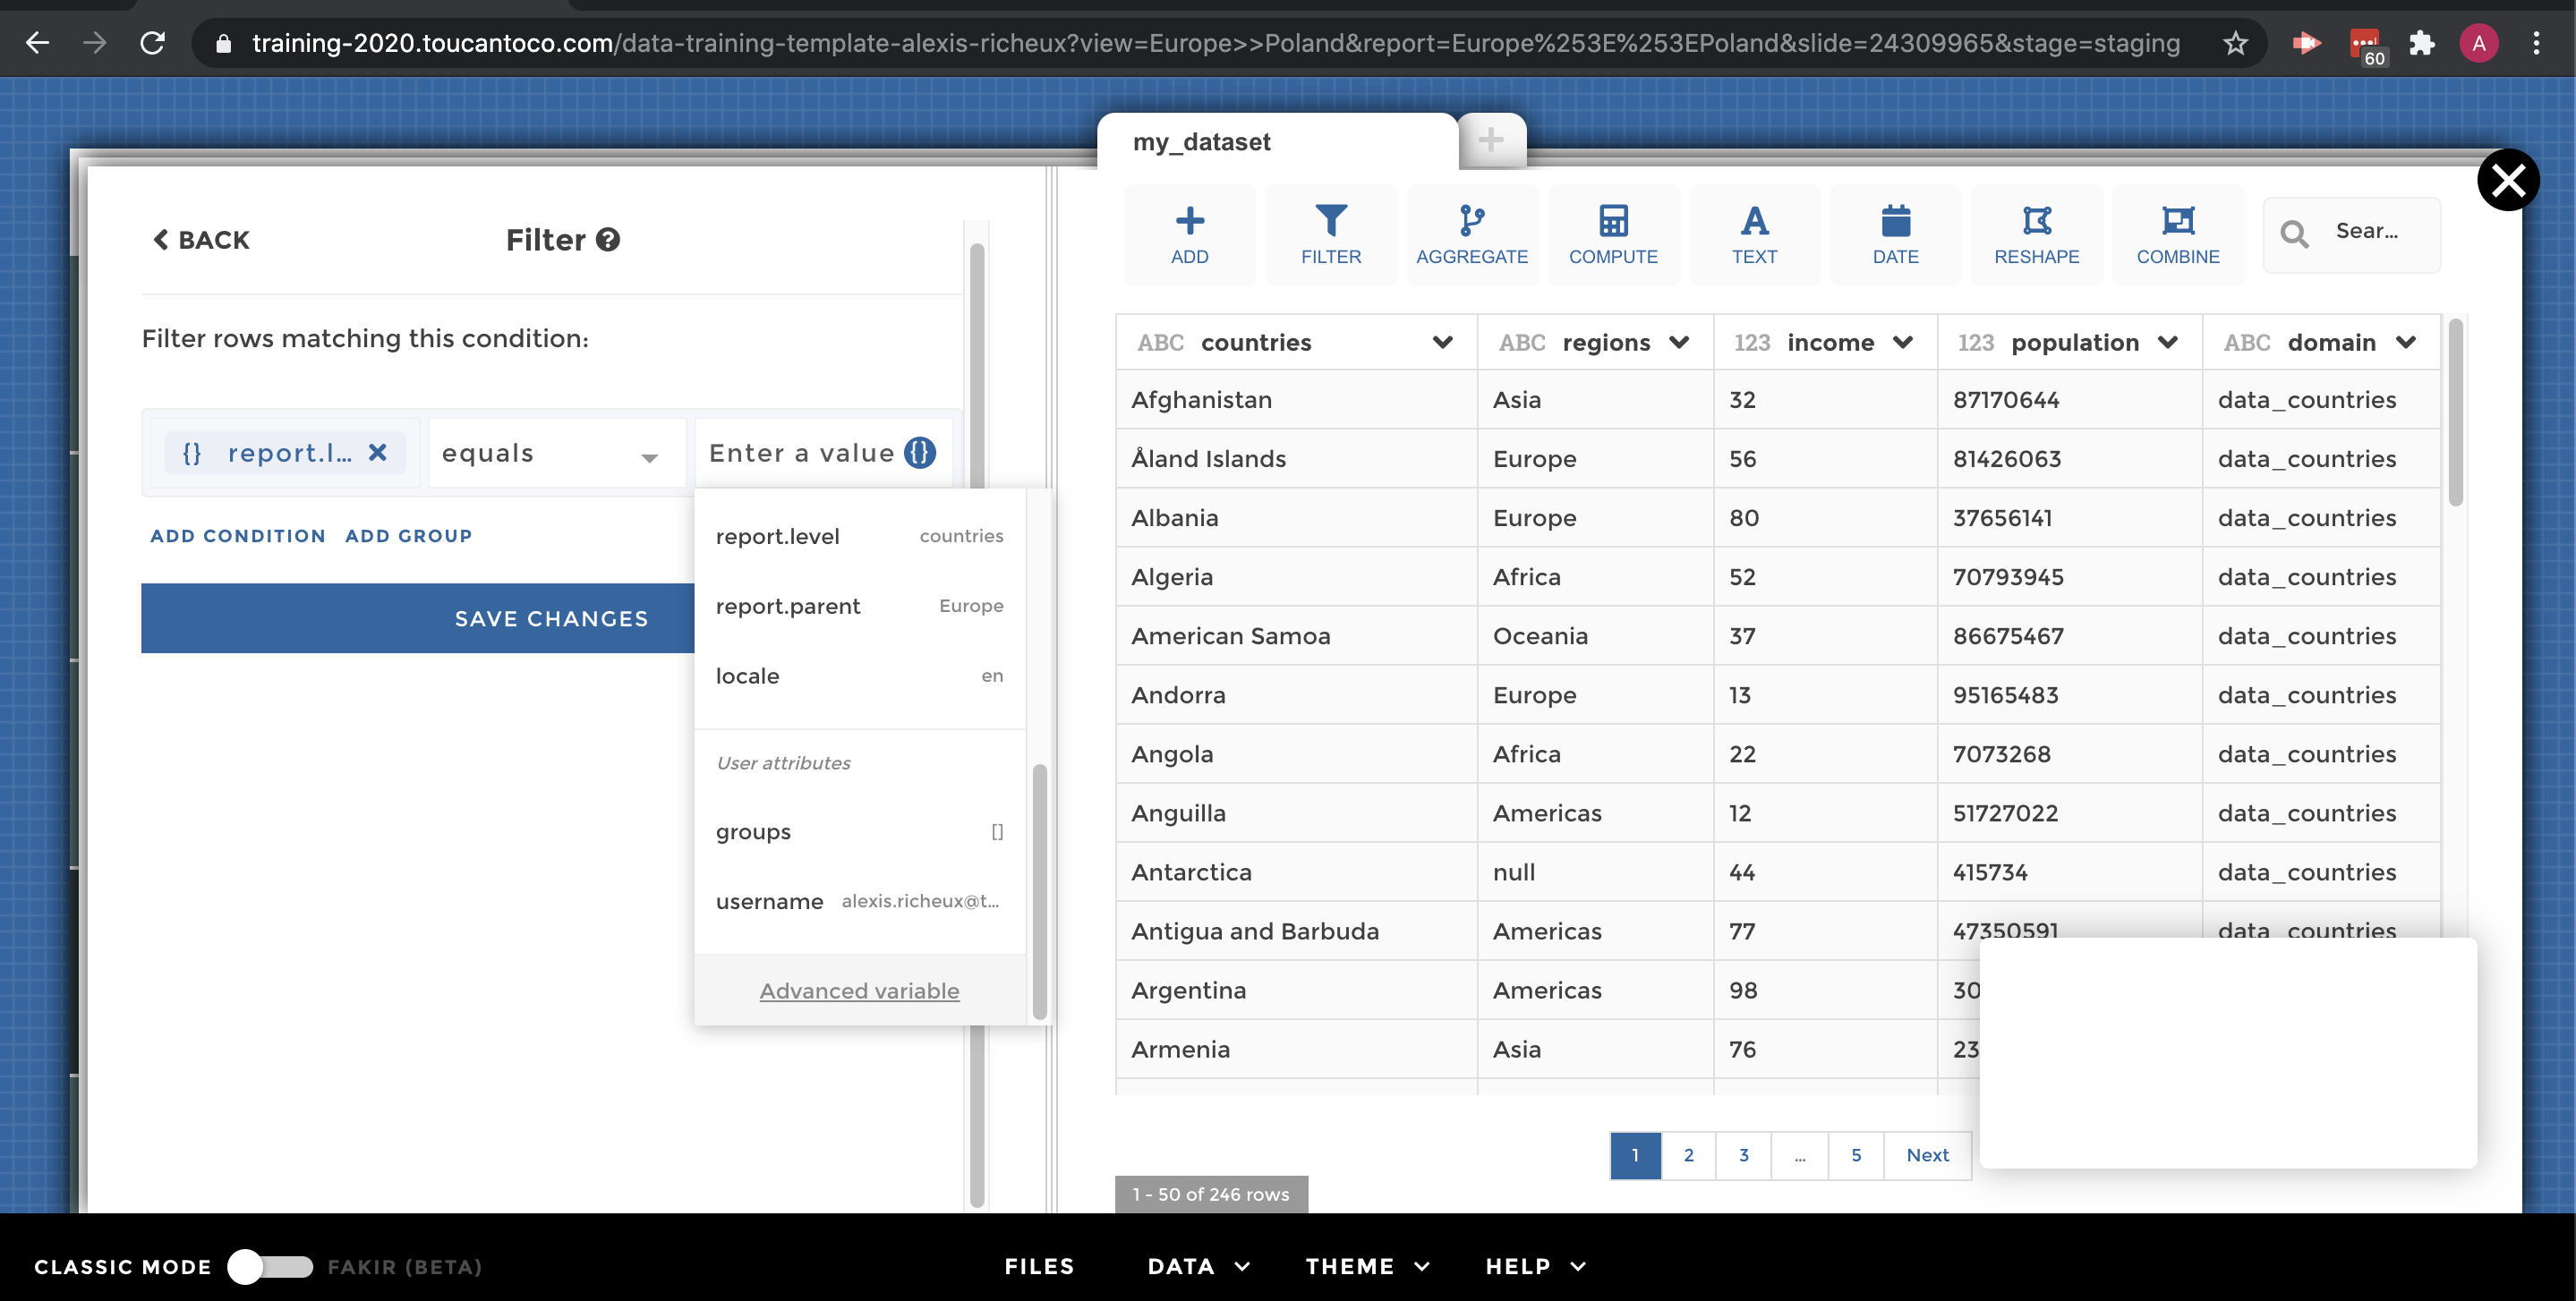
Start by adding a filter rows step in which you’re going to specify
“label” equals to ? Then follow the next image and call your variable
thanks to {} on the right of the box. By taking your “report.label”
you will match the appRequesters value.

step 5
Expert
📝 If you’re still struggling with your dataset and you need to play more with the variable no worries we have the solution
Just check the Advance variable option 👍
advanced_variable.png
It can sometimes be a little tricky but it is very helpful for specific cases. To show all the possibilities of the advances variables. Let’s check out an example an example ( using the variable on the left part of YouPrep™ step and adding an Advanced variable on the right)
Warning
Before you start! This example is just randomly chosen ==> You can in fact do it in a much easier way ⚡
Check the Dataset + variable picture 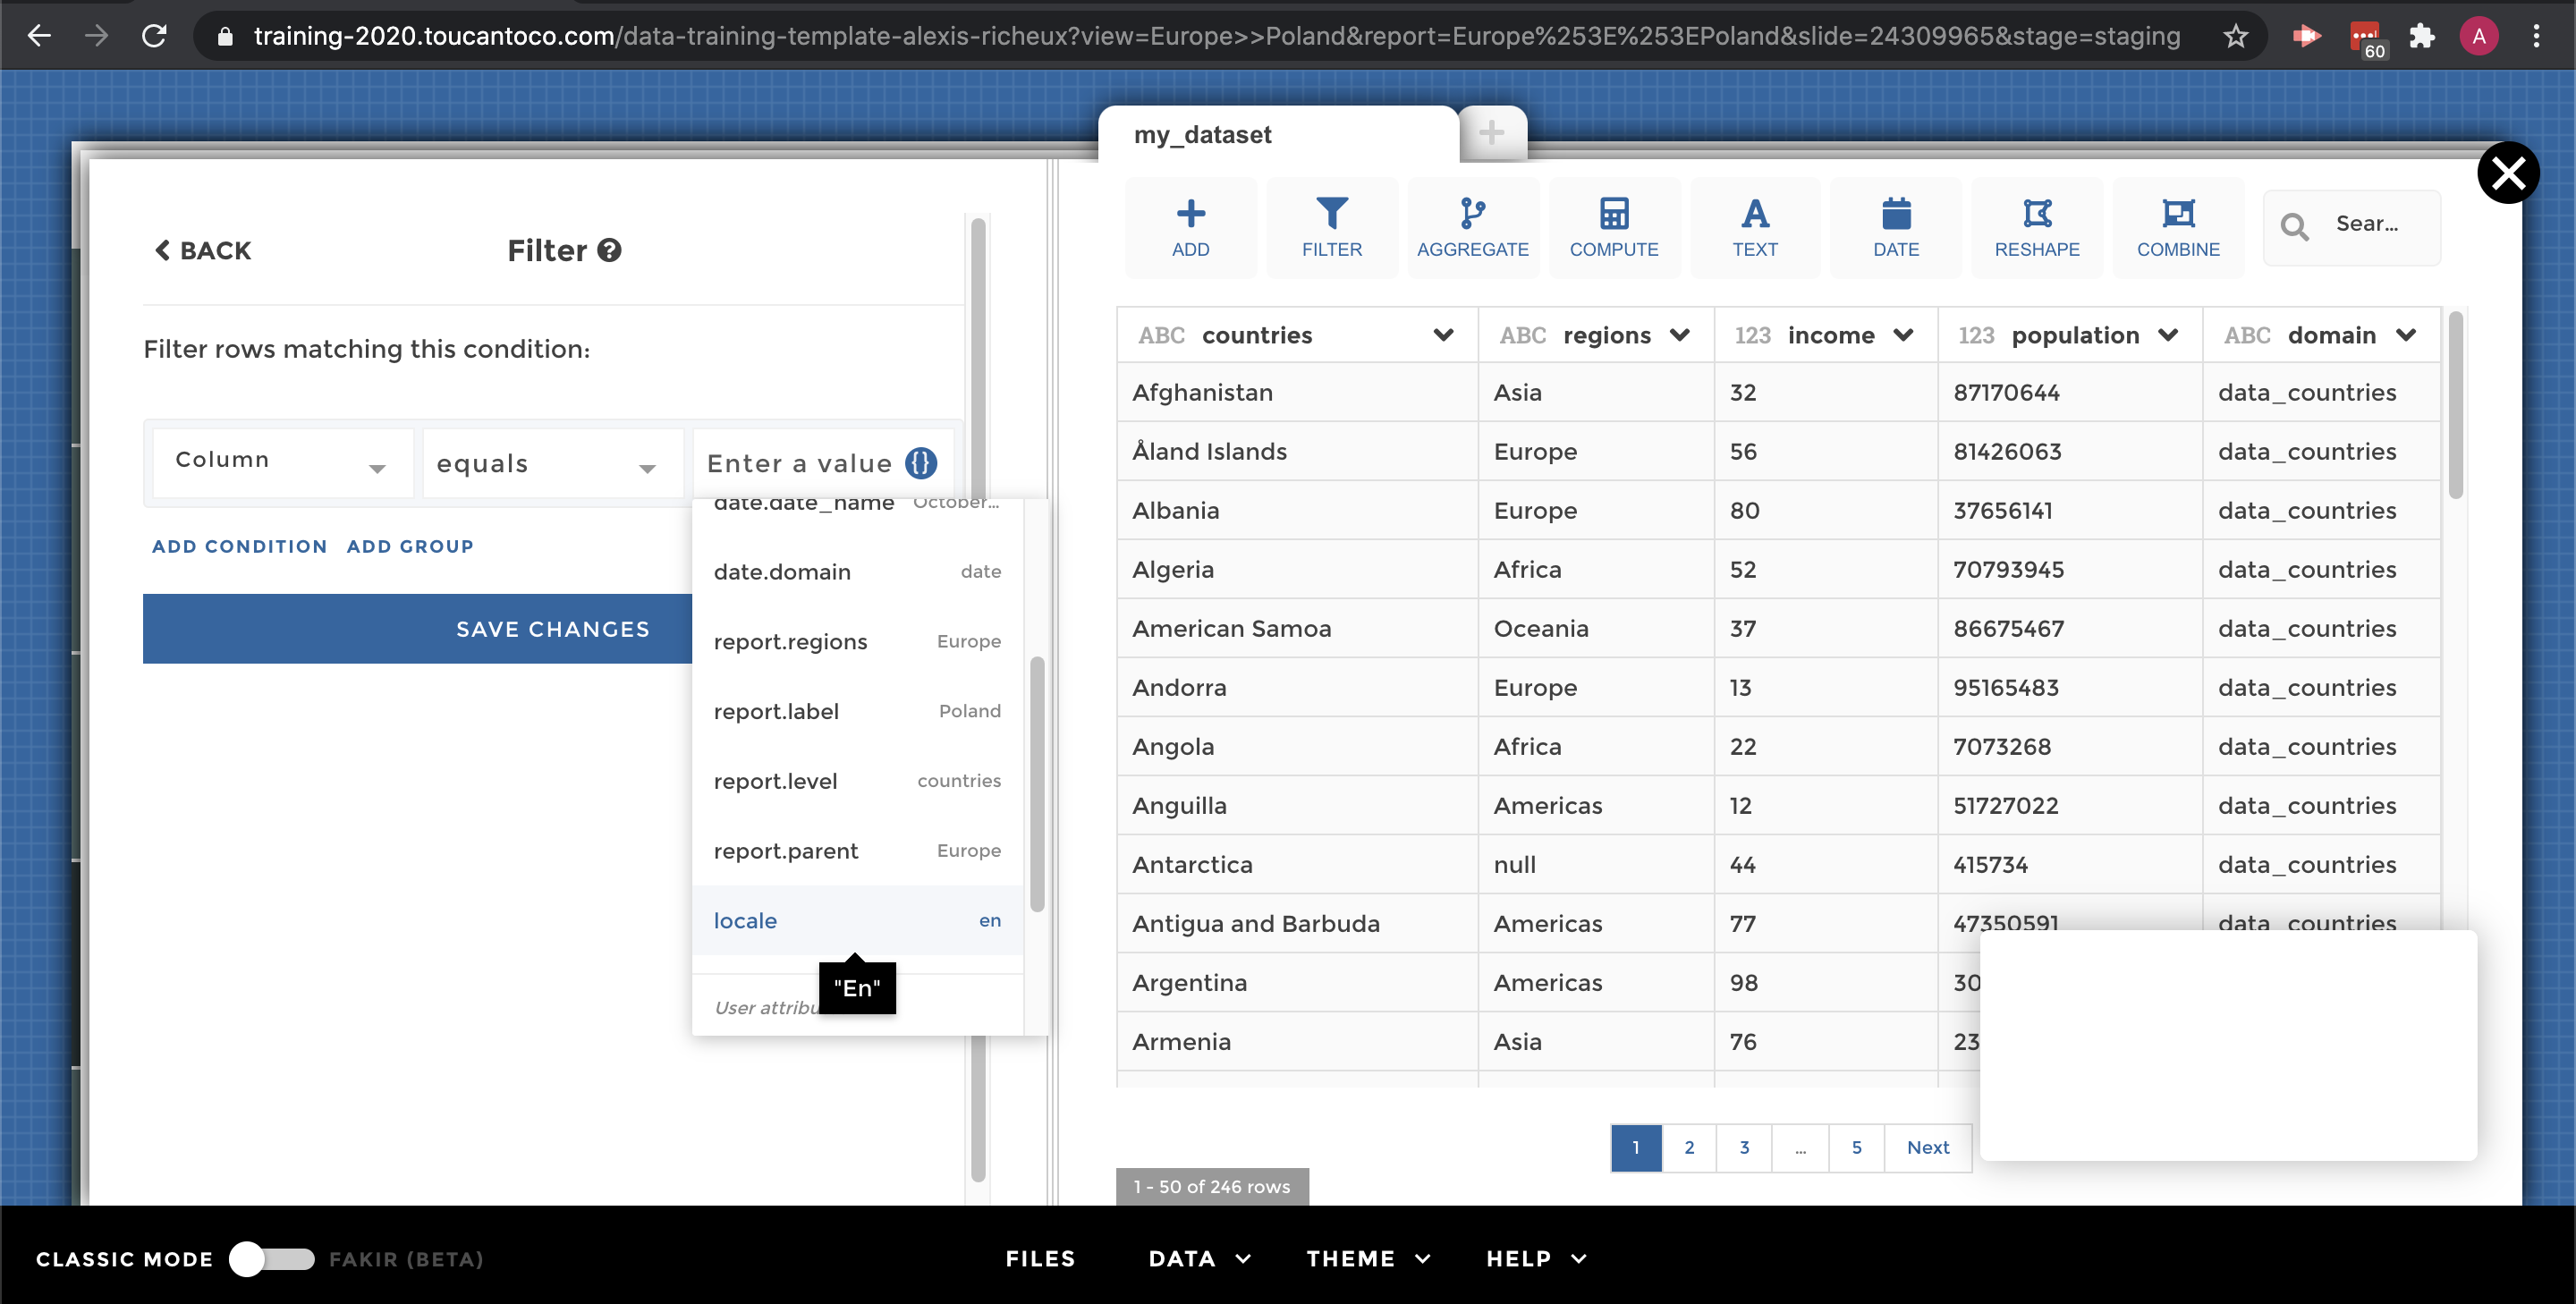
Depending on my report level, I would like to filter my dataset with the
label of my requester ==> check the “Variable on left” picture.
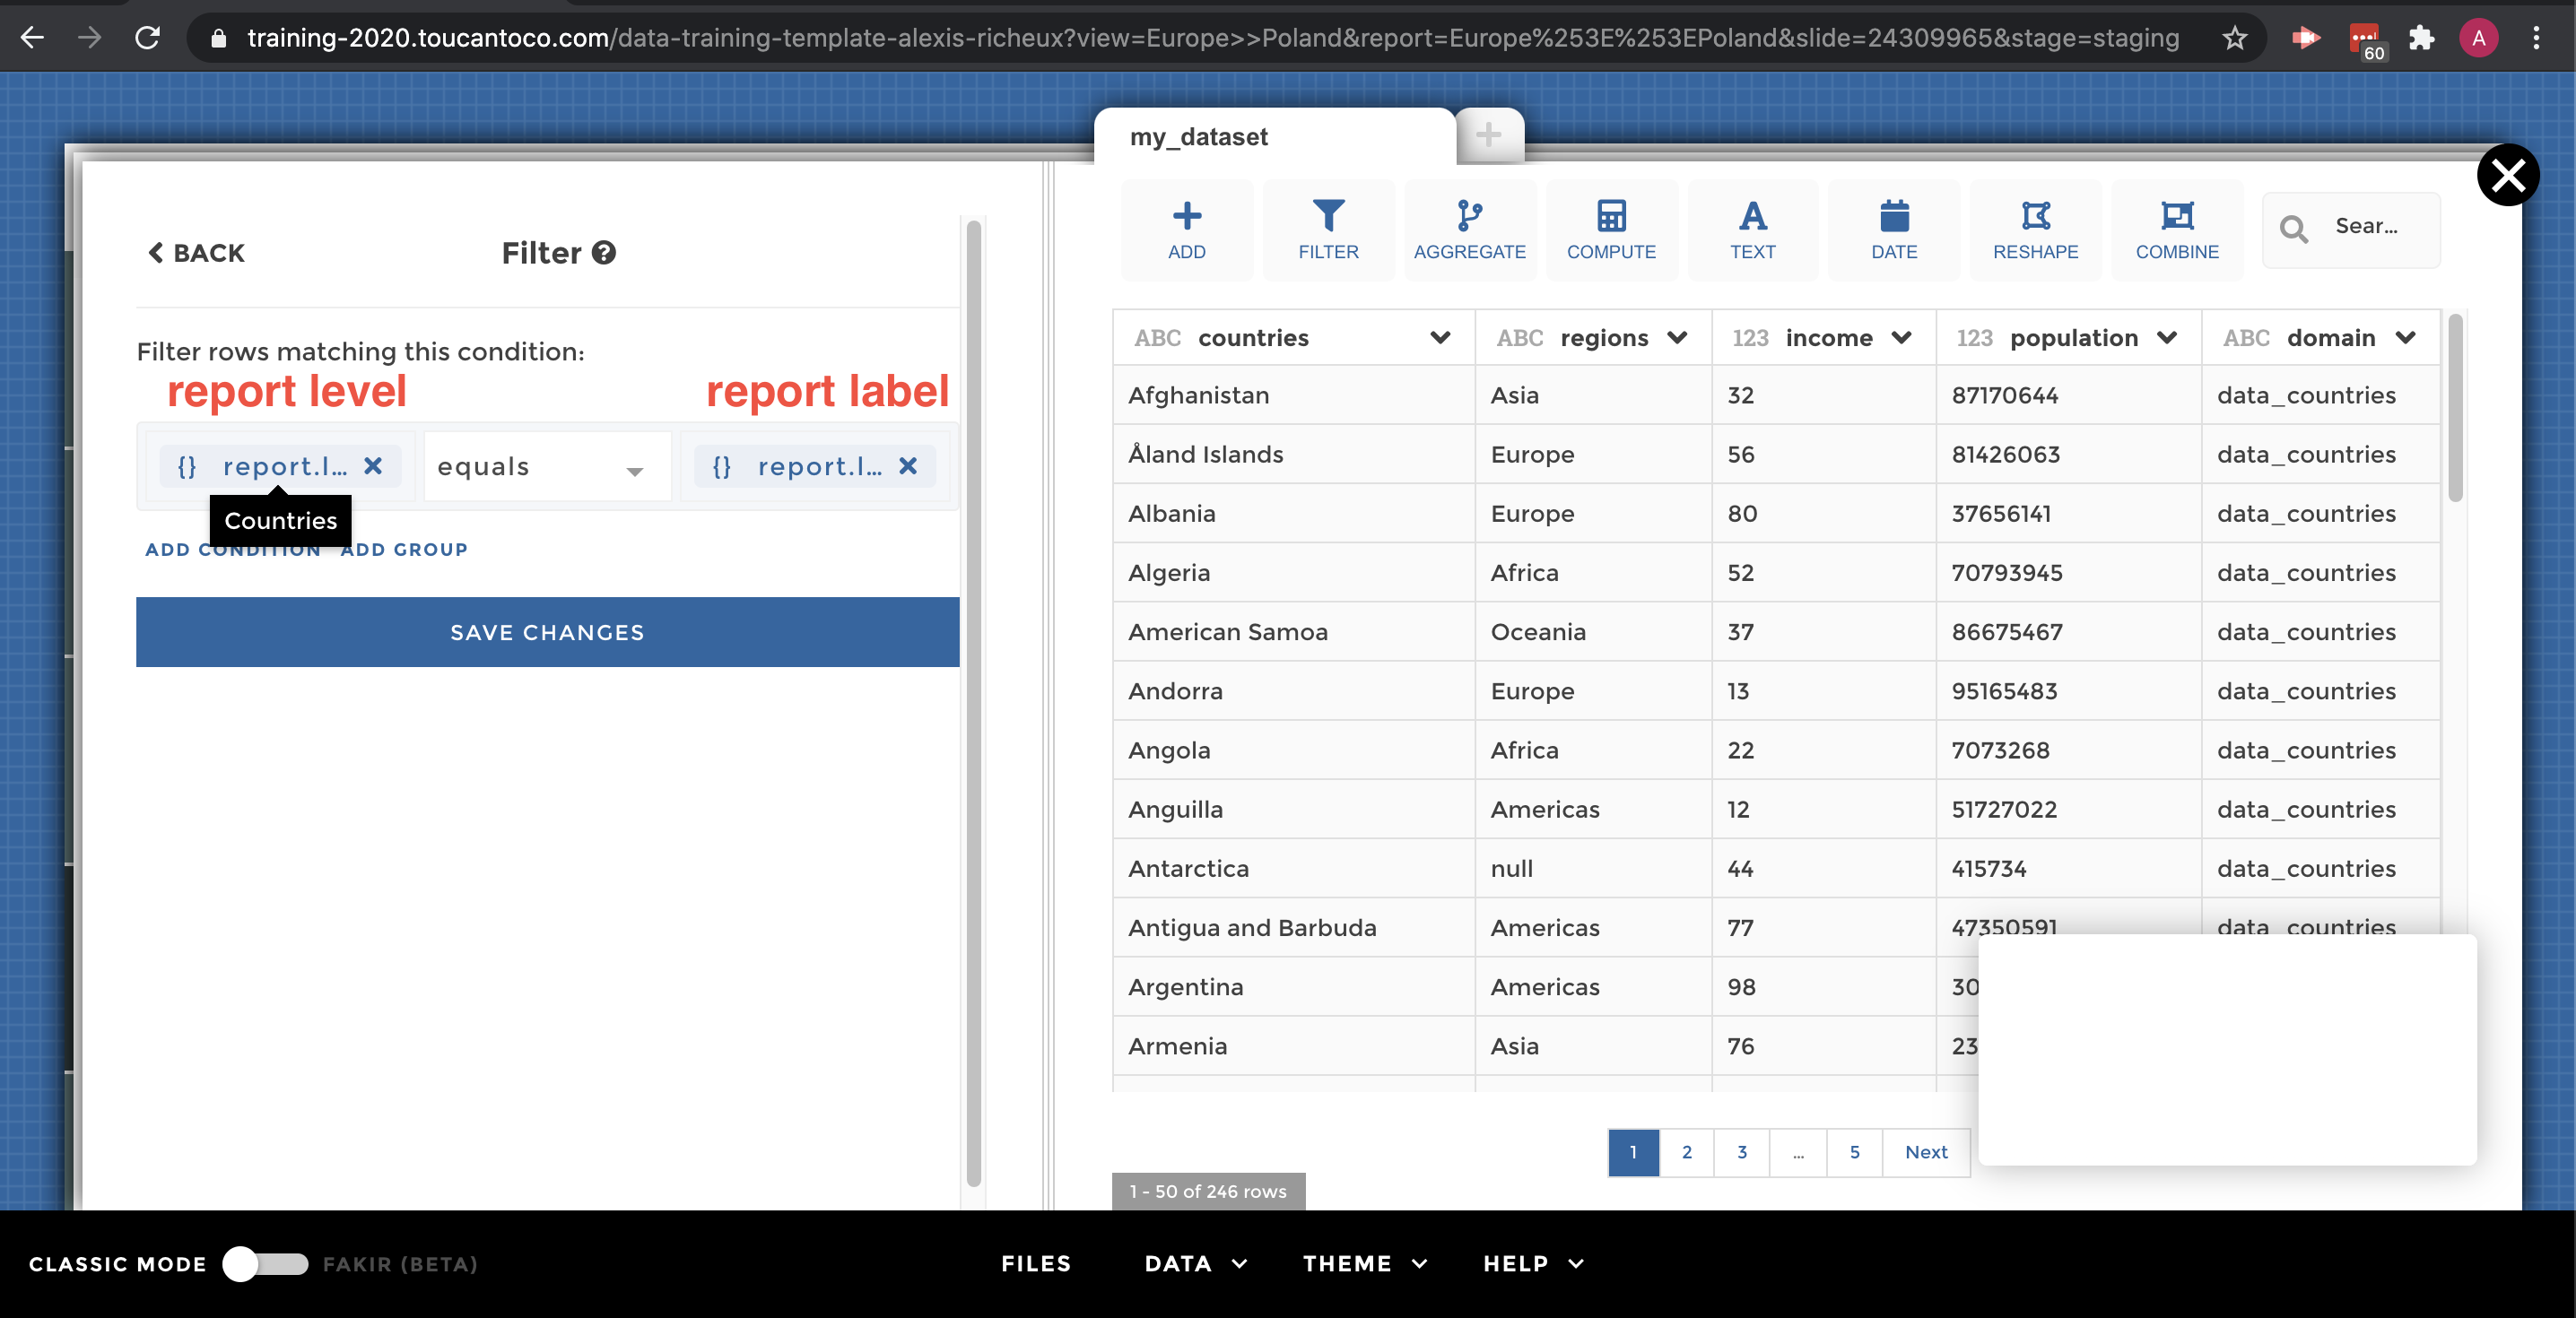
It’s a really powerful tool!!! In fact, if you’re selecting Europe (regions level) on your appRequesters then this step will filter the column regions (level of your appRequesters) with Europe (the label of your appRequesters). And if you’re selecting France on your appRequesters you will filter the countries column (level of your appRequesters) on France (label of your appRequesters)
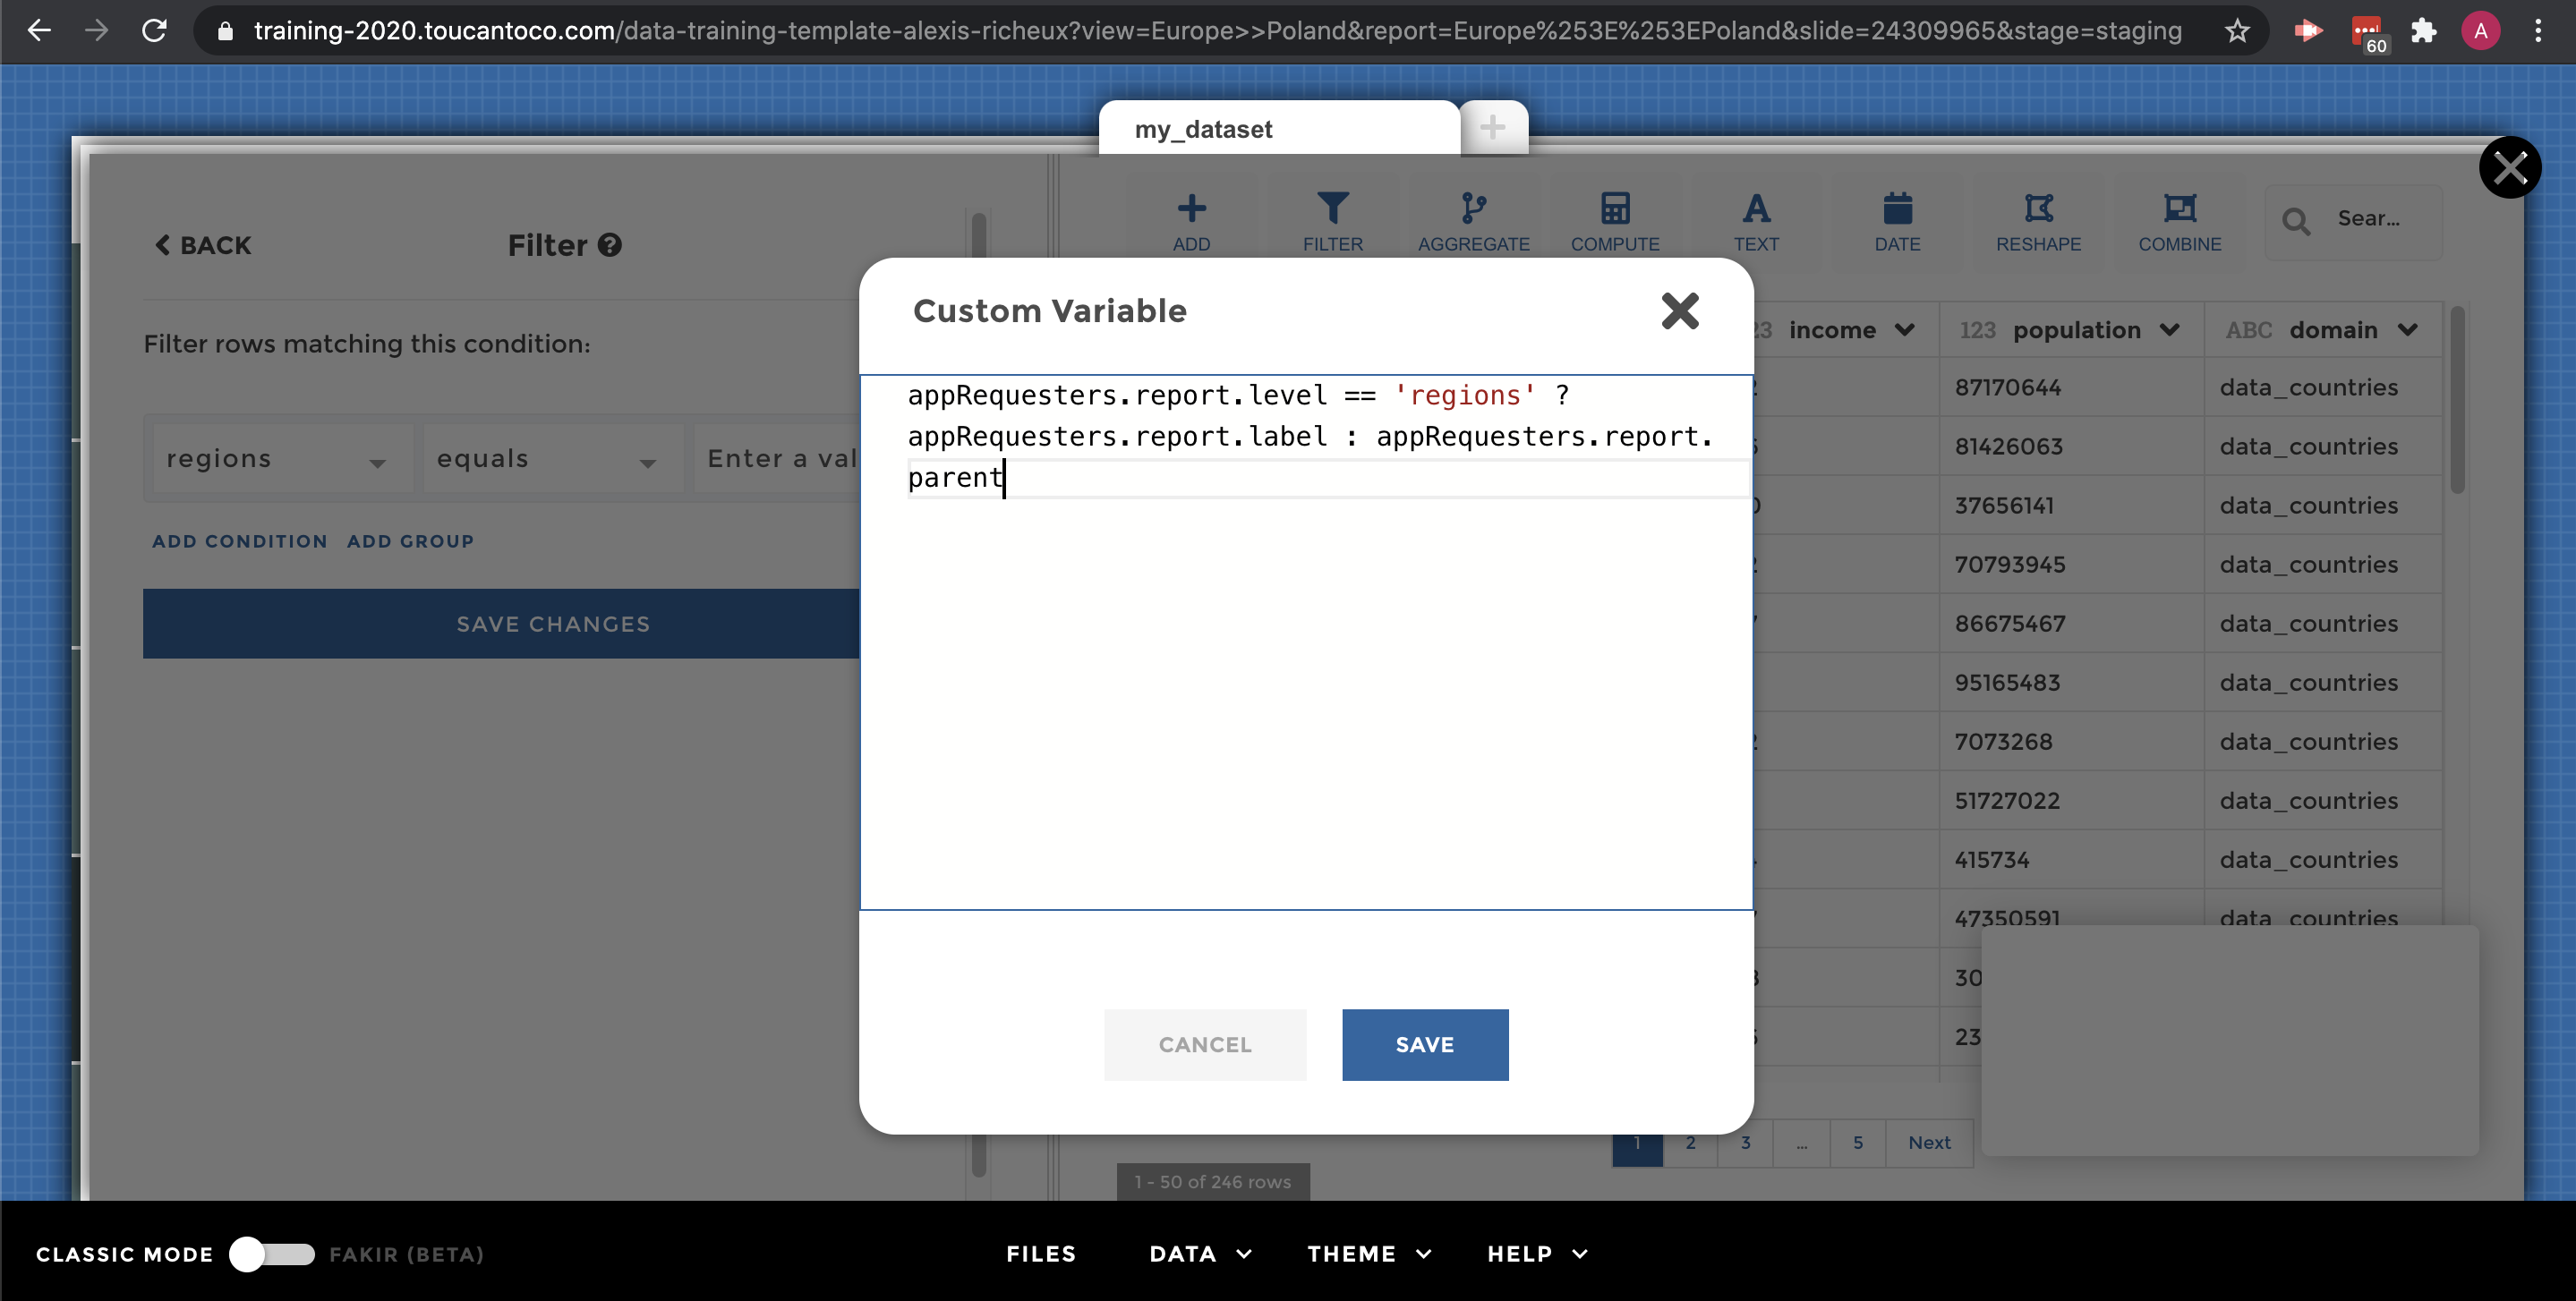
You want to filter only your regions column but your appRequesters could
contain some countries value… You can add an Advanced variable. ==> I
could filter the regions column with the following variable :
appRequesters.report.level == 'regions' ? appRequesters.report.label : appRequesters.report.parent
you will find more explanation about this syntax at the bottom of this
page. But just to let you know, you could interpret that syntax like
this “If my report level = region “If my report level = regions then I’m
filtering with the value of my report label else i’m using the parent’s
report value”
advanced_variable_ternary.png
Dates variable in toucan
Important
When using all your YouPrep™ step, you will find the button {} on
the right of your tab to call some variable on your story By clicking on
{}, you will find some dates variable (Today, Yesterday…)!!!
If you want to create a column containing one of this date variable you can create a formula column with the following syntax:
- “<%= dates.today %>”.
- “<%= dates.yesterday %>”.
- “<%= dates.thisWeekMonday %>”.
- “<%= dates.lastWeekMonday %>”.
- “<%= dates.thisMonth %>”.
- “<%= dates.lastMonth %>”.
- “<%= dates.thisQuarter %>”.
- “<%= dates.lastQuarter %>”.
- “<%= dates.thisSemester %>”.
- “<%= dates.lastSemester %>”.
- “<%= dates.thisYear %>”.
- “<%= dates.lastYear %>”.
Display data from a requester’s selection in code mode
Overview
There are 3 types of requesters:
appRequesters: date and view/report selector- requesters in stories
- requesters in settings (not supported by the studio yet)
The requester can be used to query a specific subset of data or it can be use in all the context elements of your story by displaying the value selected in your:
- sources
- narratives
- tips
The Percentage syntax <%= %>
To use the result of a requester, you need to use percentage syntax
The percentage syntax can be used everywhere : dashboard, stories, postprocess, etc. This syntax will simply be replaced by a string after it has been interpreted.
📝 For example, if I’m on the France view, the result of<%= appRequesters.report %>isfrance
Turning the “Make all columns available” (or completeObjectMode in
code mode) option of your requester to true will allow you to use
multiple columns from your report dataset. You will have to add the name
of the column you want to use to your templating.
Warning
Keep in mind that your column name should not contain some specific
characters such as -, /, ` `. Rename your column before using
the percentage or dollar syntax in code mode. Nonetheless you can use
this syntax if you forgot to do it: <%=
appRequesters.report[‘Value-sum’] %> or <$= my_dataset[‘column with
space’] $>
For example:
for the countries column :
countries: <%= appRequesters.report.countries %> or for the zones
column :zones: <%= appRequesters.report.zones %> or for the date
groups column :date: "<%= appRequesters.date.groups %>"
It is very convenient when you want to use one column with displayed values (nicely written values) and one column with filtering values (not as nicely written but easier to write)
For example : you might want your user to click on a “Evolution” button but to filter the dataset on the column named “evo”, which is shorter to write. You could also use this syntax to filter your dataset on the previous date to the one selected in the date requester like this :
datasets:
  my_dataset:
    query: [
        $match:
            domain: "source"
            date: $in:["<%= appRequesters.date.current_date %>","<%= appRequesters.date.previous_date %>"]
    ]
What those lines mean : filter the date column to make it either the current date or the previous to current date.
On the contrary of the dollar syntax, it concerns any global information
of the app (so basically any requester). So requesters you create on a
story or appRequesters(for the view and date of the whole app).
Note
This syntax replaces your templating with a string value by default
Learn more about the different types of requesters
If you have created a view, you may want to use it to filter the data you’re showing.
📝 In this example, I want the France view to only have access to France data. As the french manager I will only get access to the revenue trend of France
By creating views, you have generated variables that can be used anywhere in your app. Tiles, stories, widget, asset customization, source, narrative etc…
This variable can be used with the parameter
<%= appRequesters.report %>.
📝 In this example, if I’m on the France view, the result of<%= appRequesters.report %>isfrance
⚠️ The result of the variable is coming from the view datasource you have defined earlier. Pay attention to spelling, caps and trailing space. This result should match exactly the view’s datasource and other datasources you will match with it.
This parameter can be used in the dataset editor to customize your dataset and create specific queries.
This variable should be applied to a column from your tile datasource that contains a way to identify data specifically for your user’s view.
view requester
If you have created a date selector, you may want to use it to filter the data you’re showing.
📝 In this example, if I select January, I only want to display January’s data
By creating a date selector, you have generated a date variable that can be used anywhere in your app. Tiles, stories, widget, asset customization, source, narrative etc…
This variable can be used with the parameter
<%= appRequesters.date %>.
📝 In this example, if I’m on the January view, the result of<%= appRequesters.date %>isJanuary
⚠️ The result of the variable is coming from the date datasource you have defined earlier. Pay attention to the date format! This result should match exactly the view’s datasource and other datasources you will match with it.
This parameter can be used in the dataset editor to customize your dataset and create specific queries.
This variable should be applied to a column from your tile’s datasource that contains a way to identify data specifically for your user’s date selection.
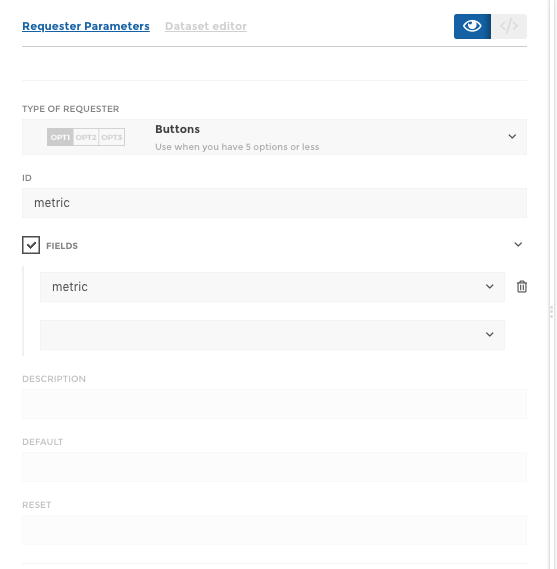
If you have created a requester, you may want to use it to filter the data you’re showing.
This variable can be used with the parameter
<%= requestersManager.lovely_name.column %>.
lovely_name is the id you have filled while creating the requester.
You need to specify the column only if you checked the “Make all column
available” in your requester parameters.
id requester
The Dollar syntax <$= $>
Dollar templating into a story/tile
To use the result of a dataset, you need to use dollar syntax.
The dollar syntax is taking the first value from the dataset and column you’re mentioning
📝 For example, if I’m my_dataset is containing a columnCountrywithFranceon the first row, the result of<$= my_dataset.Country $>isFrance
Dollar templating for assets
Note
You can use the dollar templating syntax to use a dynamical asset into your application.
Display an image from report selection :
<$= assetUrl(appRequesters.report) $> or
<$= assetUrl(appRequesters.report.column_name_containing_my_asset) $>
NB: Check this documentation or this one to understand how to use it
Hope this helps!