How to :: create private embed filtered by user attributes on Live Data
This title length is way too long but it’s exactly what you want to achieve ? You are in the right place! 👌
➡️ This use case is tightly framed but nevertheless very widespread on the OEM market.
💡 Here is a tutorial in order to help you add great guided analytics visualization to your SaaS product or Website! Here is our awesome agenda!
Agenda
- Create an App
- Connect your Data
- Create a Viz with live query
- Generate a token with attributes
- Embed in private
- Filter your data based on attributes
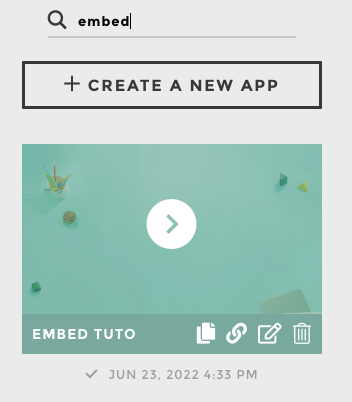
Create an App
Go on your Toucan Platform and Create a new App!
Tip
Remember, you can customize your app thanks to the Theme Tab!
And tada ✨

App Created
Connect your Data
Go in the Datastore > Connectors menu and create a connection to your Database.
We are going to use Snowflake as cloud data warehouse for this tutorial.
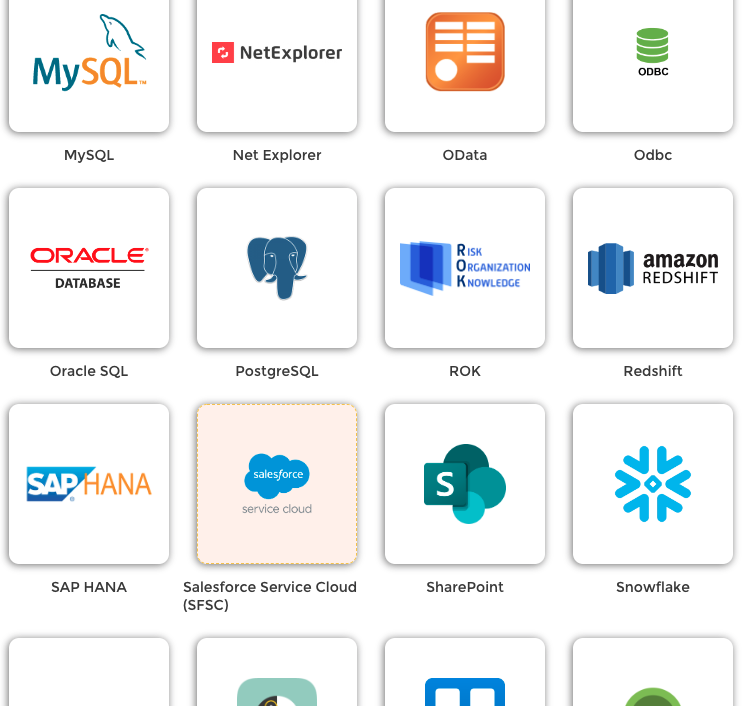
Let’s create a connection with AnyConnect™
Fill the connection form to enable the link between Toucan and your Database.
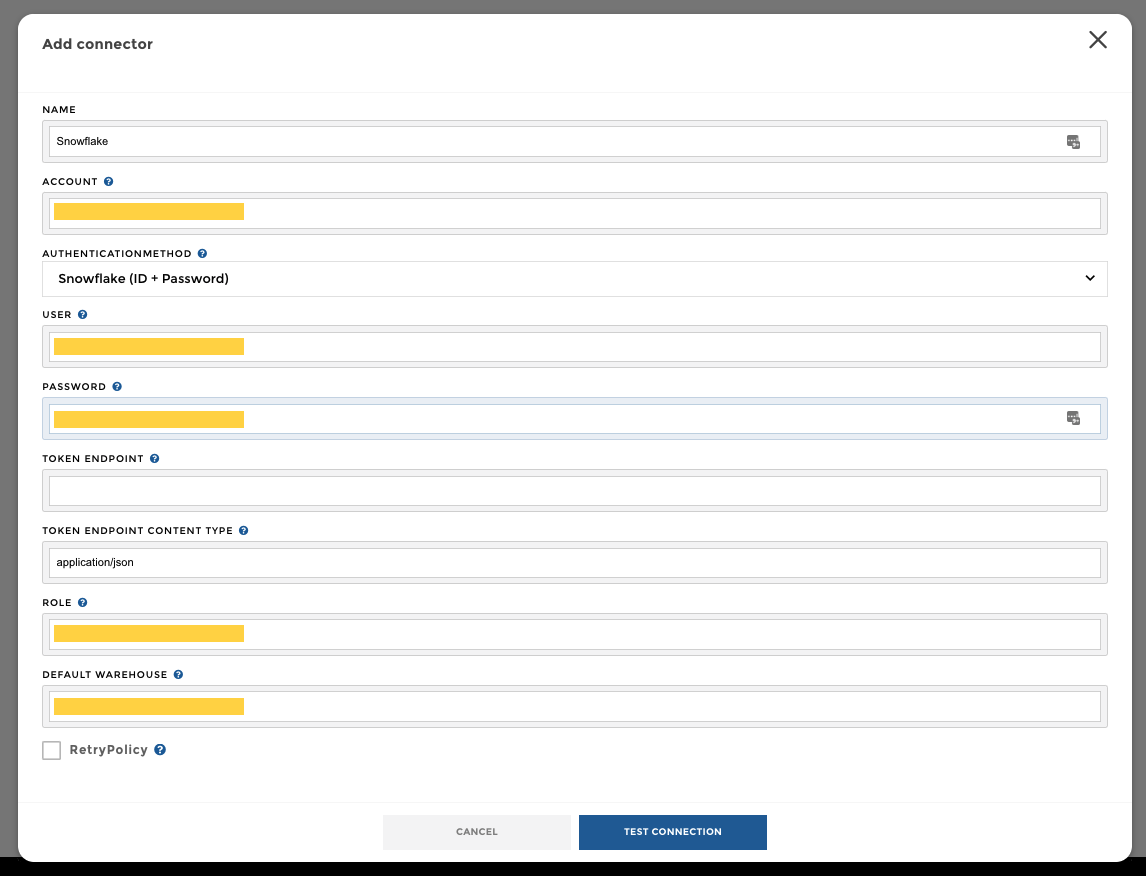
Form
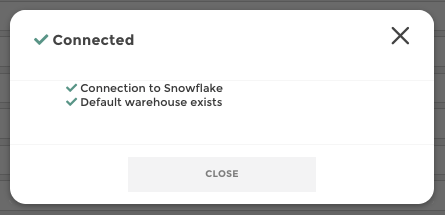
All good 🎉
We will be able to send live queries to the data warehouse from Toucan soon.
Create a Viz with live query
Let’s create an awesome chart together thanks to YouPrep™ to transform the data, and the Data Storytelling Studio to design a perfect Data Story.
Create your chapter and a new chart. 👍
- In the Query Tab, select Live Connections and choose your Datasource (here, snowflake).
- Fill your form to select data or fill your SQL query to get your data.
Below you will find a screen for SQL Graphic Selection we developed for Snowflake Connector.
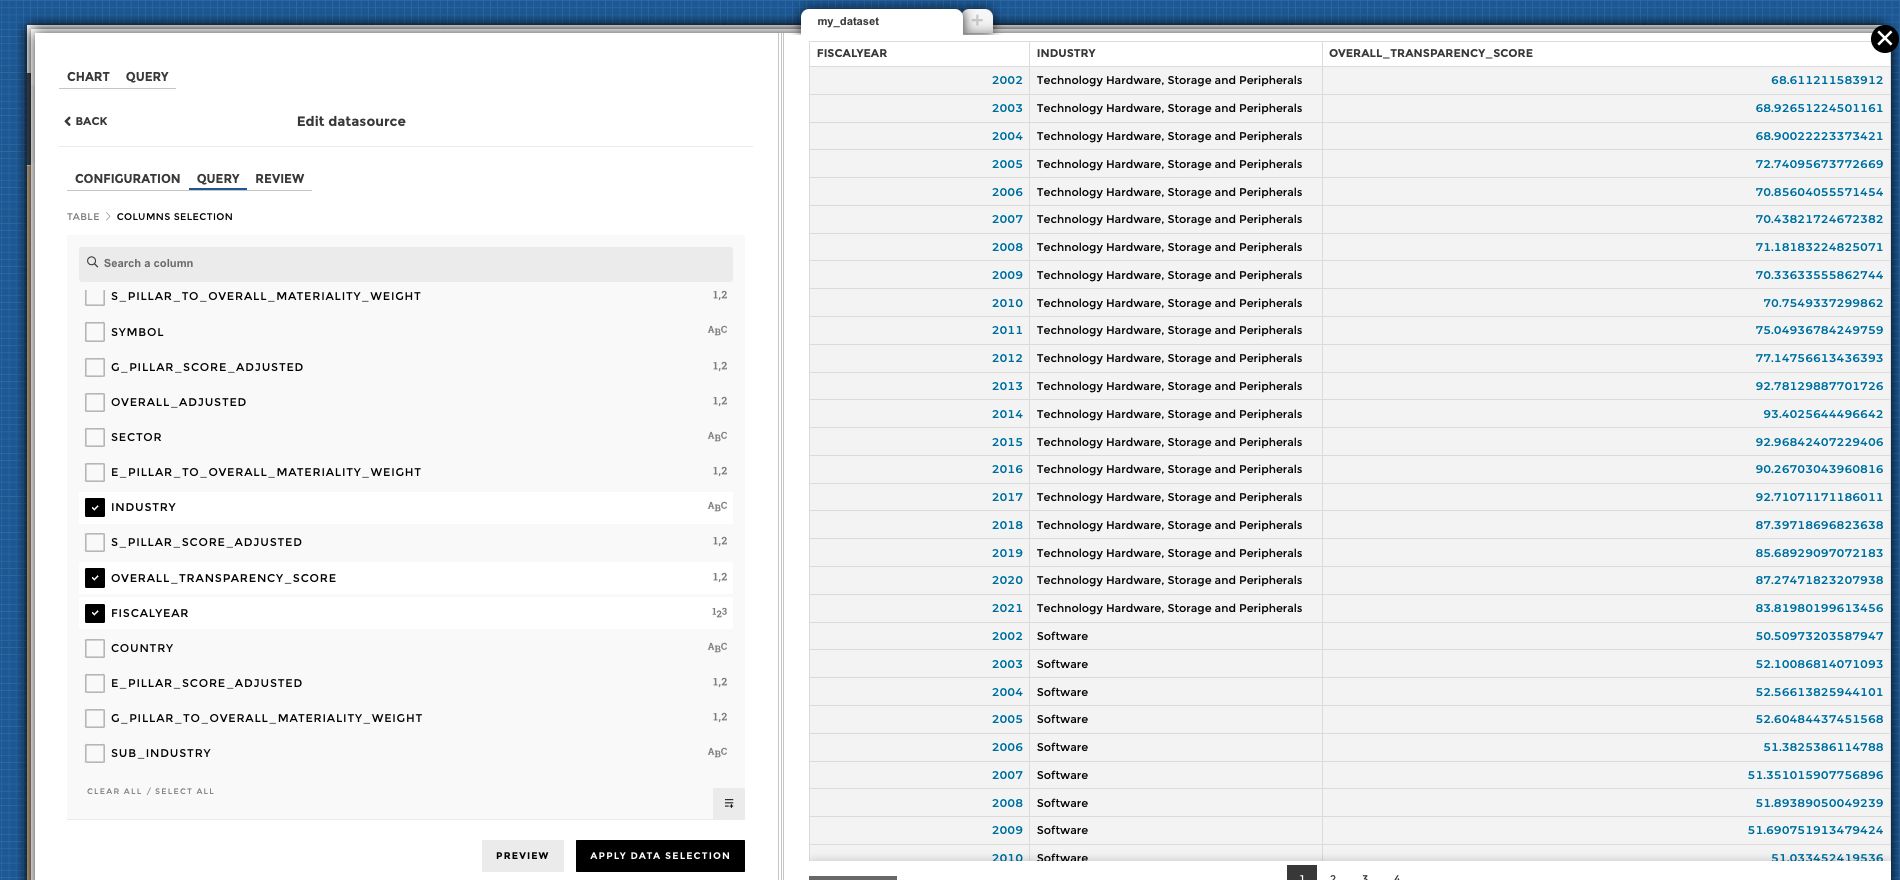
Graphic selection
Add a “sum” data aggregation to group or filter your data and fill your chart!
Let’s create a linechart 📈
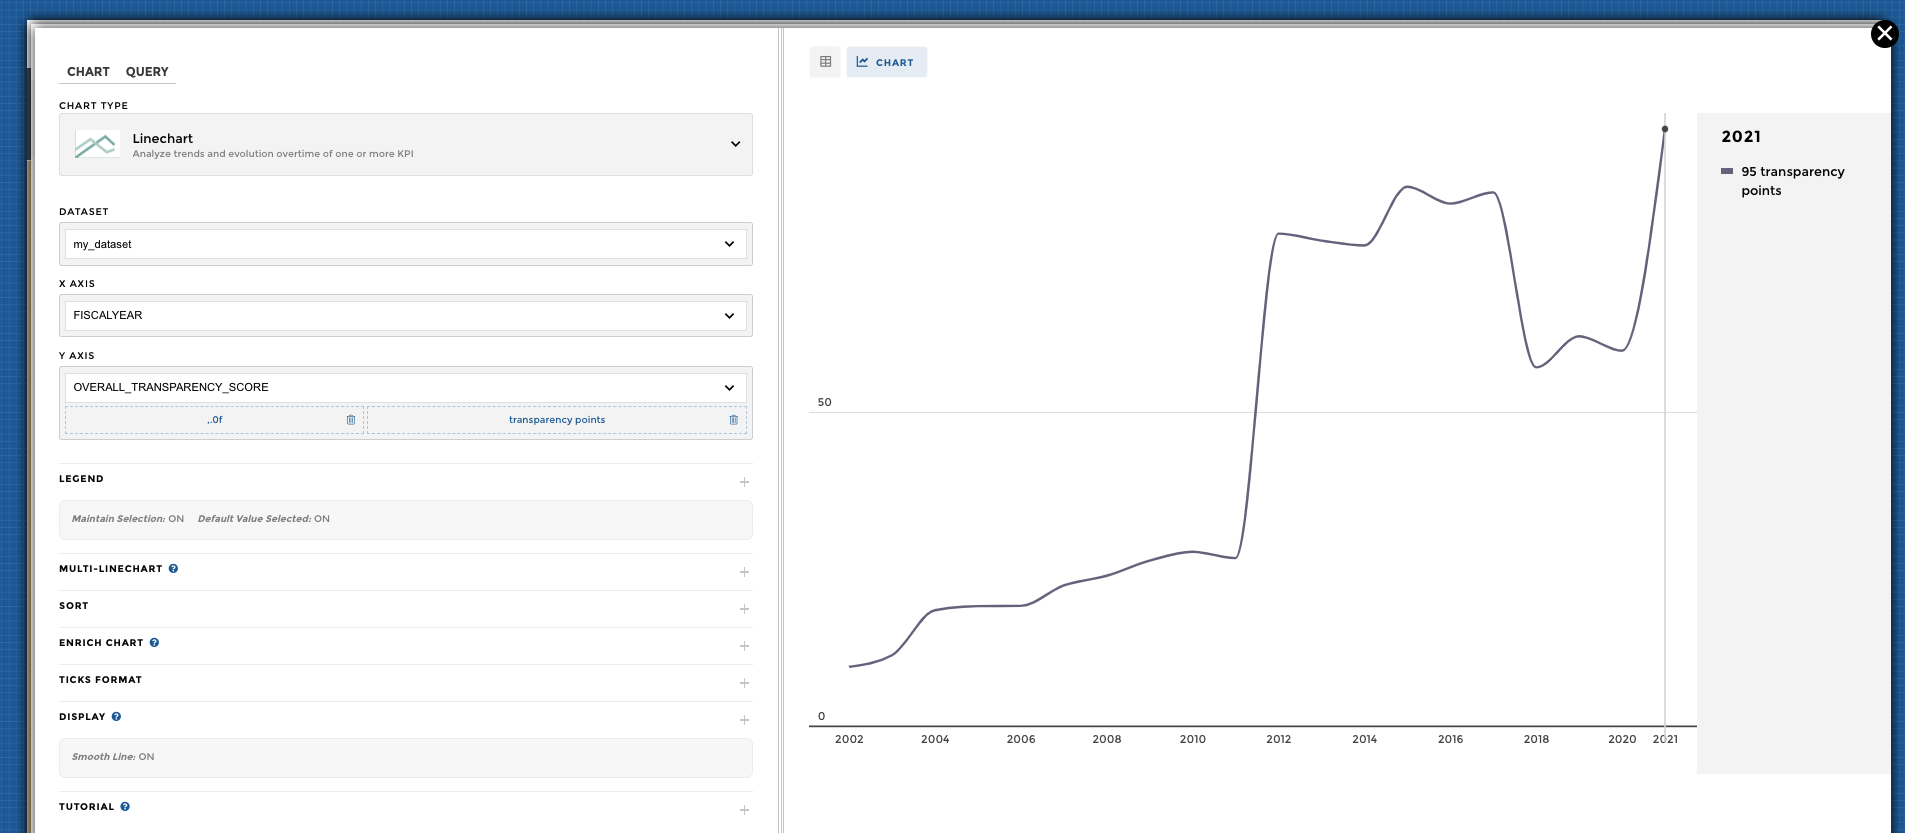
Linechart configuration
Then add a filter on the column you will filter later thanks to the user attribute!
Here I will use the Industry column in my dataset
Linechart configuration 2
Tip
Don’t forget the Narrative and Tips : your’re done! 🙌
⏰ Suuuum up time ⏰
We have just created a brand new guided analytics application, connected a data source, and created an awesome chart in few clicks, right?
- Click on the Publish button or using the eye (👁🗨) button, you will be able to render it for end user.


Now, let’s create a token that will help Toucan to understand the user and it’s attributes.
For this example, I will create a basic user that can access to this simple chart, but only on one Industry.
This user will have an attribute called “industry” and the value will be “Software”.
If it’s not done yet, it’s better to read this doc first to understand the next steps!
Generate a token with attributes
On your Toucan Platform, on the Management Console, you will find a menu called Embed Manager.
In this menu, in the Settings Tab, you will find a lot of cool stuff:
- your private encryption key
- the Toucan SDK link
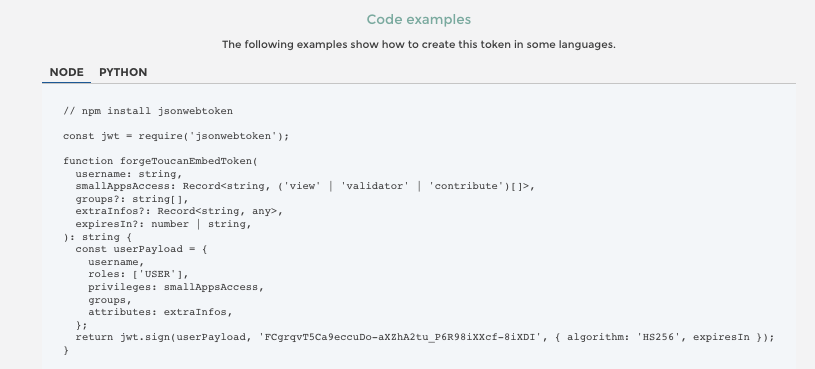
- code snippets to help you to create the JWT token
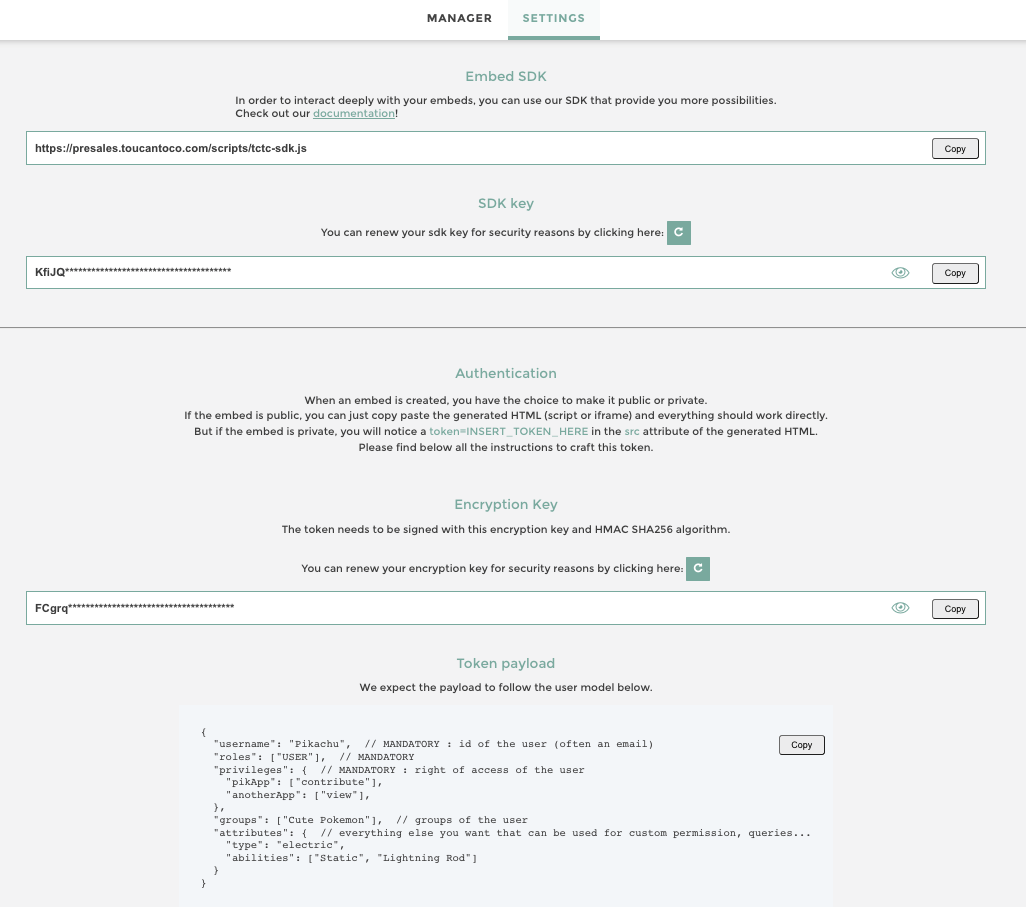
We can use the code snippet to generates a token with the “industry” attributes for our example.
The JWT Token playload will be this one.
{
  "username": "embed-tuto@toucantoco.com",
  "roles": ["USER"],
  "privileges": {
    "embed-tuto": ["view"]
  },
  "groups": [],
  "attributes": {
    "industry": "Software"
  }
}
Warning
In a real industrial use case, this token will be created on your backend side and injected in the embed script dynamically
Ask your favorite developper to generate you this embed if you can’t do it by yourself 👍
Keep the generated token, it will be helpful for the next steps.
Embed in private
Go back in your Embed Tuto Application and verify that your work is well published 👍
In production mode, go on your Story previously created and click on the Collaborative Panel on the right side, then on the Share Tab.
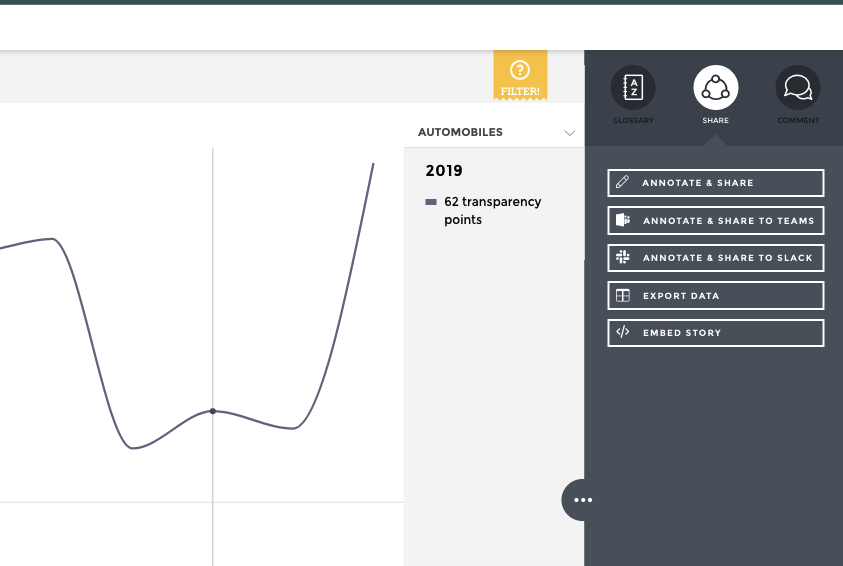
- Click on Embed Story 💥
- Check the different option you would like on your chart (title, side panel, alias…) and click on Generate Embed.
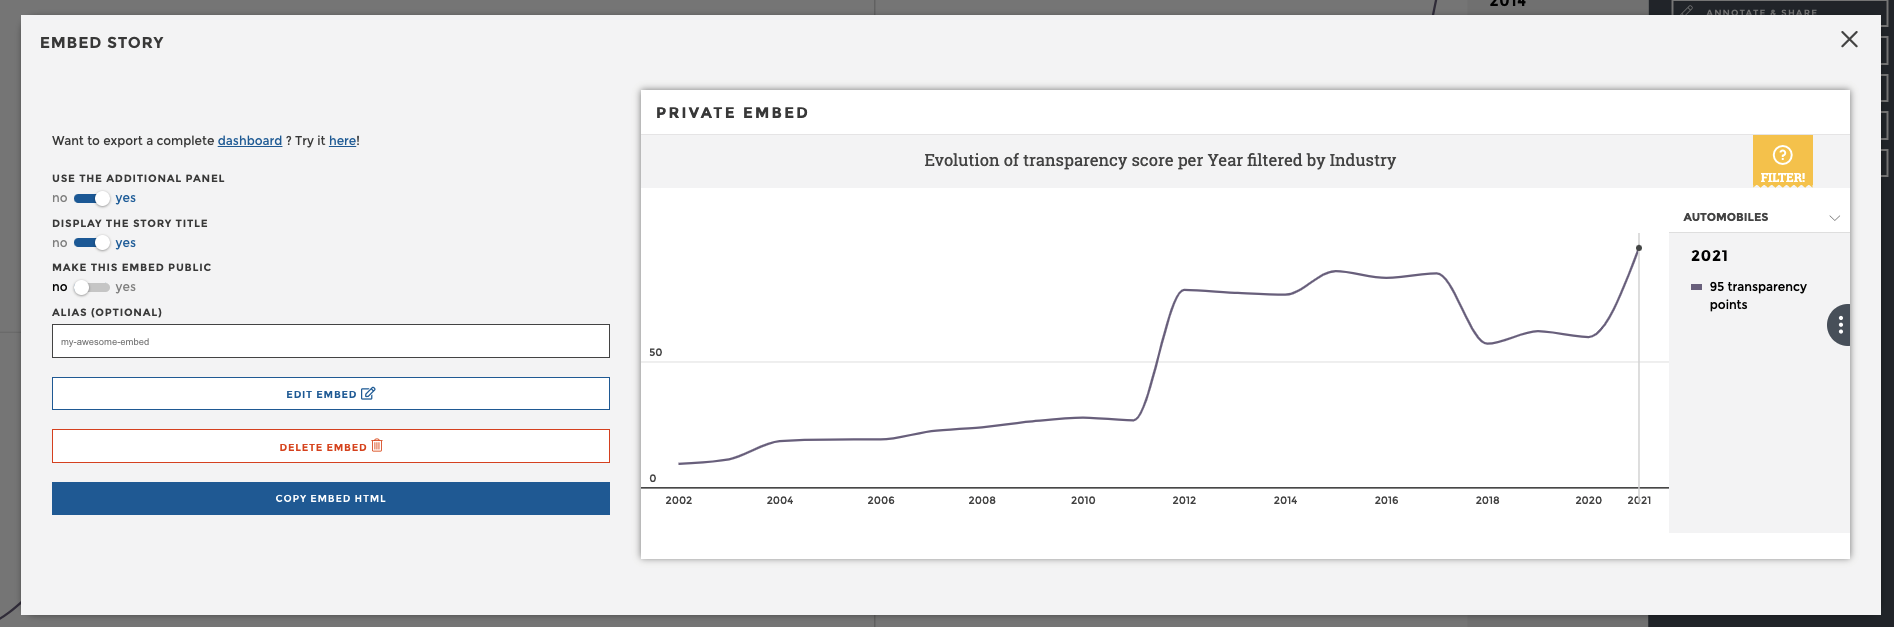
Export Modal
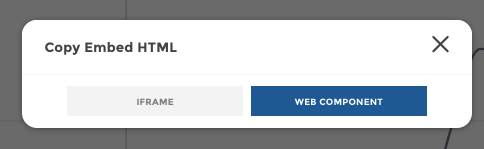
- Click in Copy Embed HTML and choose your favorite technology. (check our integration doc for more infos)
Finally go in your favorite HTML code editor like Codepen.io and paste your Embed.
<html>
  <body>
    <!-- Paste your Embed Here -->
  </body>
</html>
html {
  height: 100%;
}
body {
  height: 100%;
  margin: 0;
  padding: 0;
}
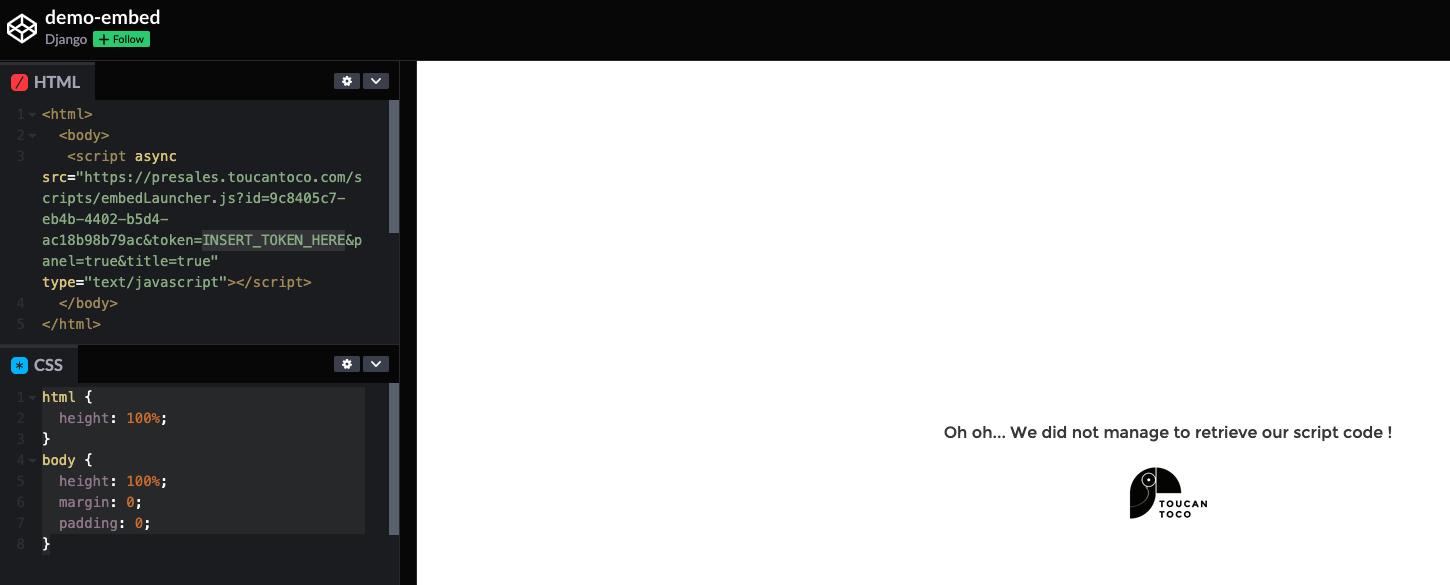
Codepen not working
And it should not work… it’s normal! As the private is embed, the software is waiting for an authorization.
Let’s paste here the previously generated token! 🔥
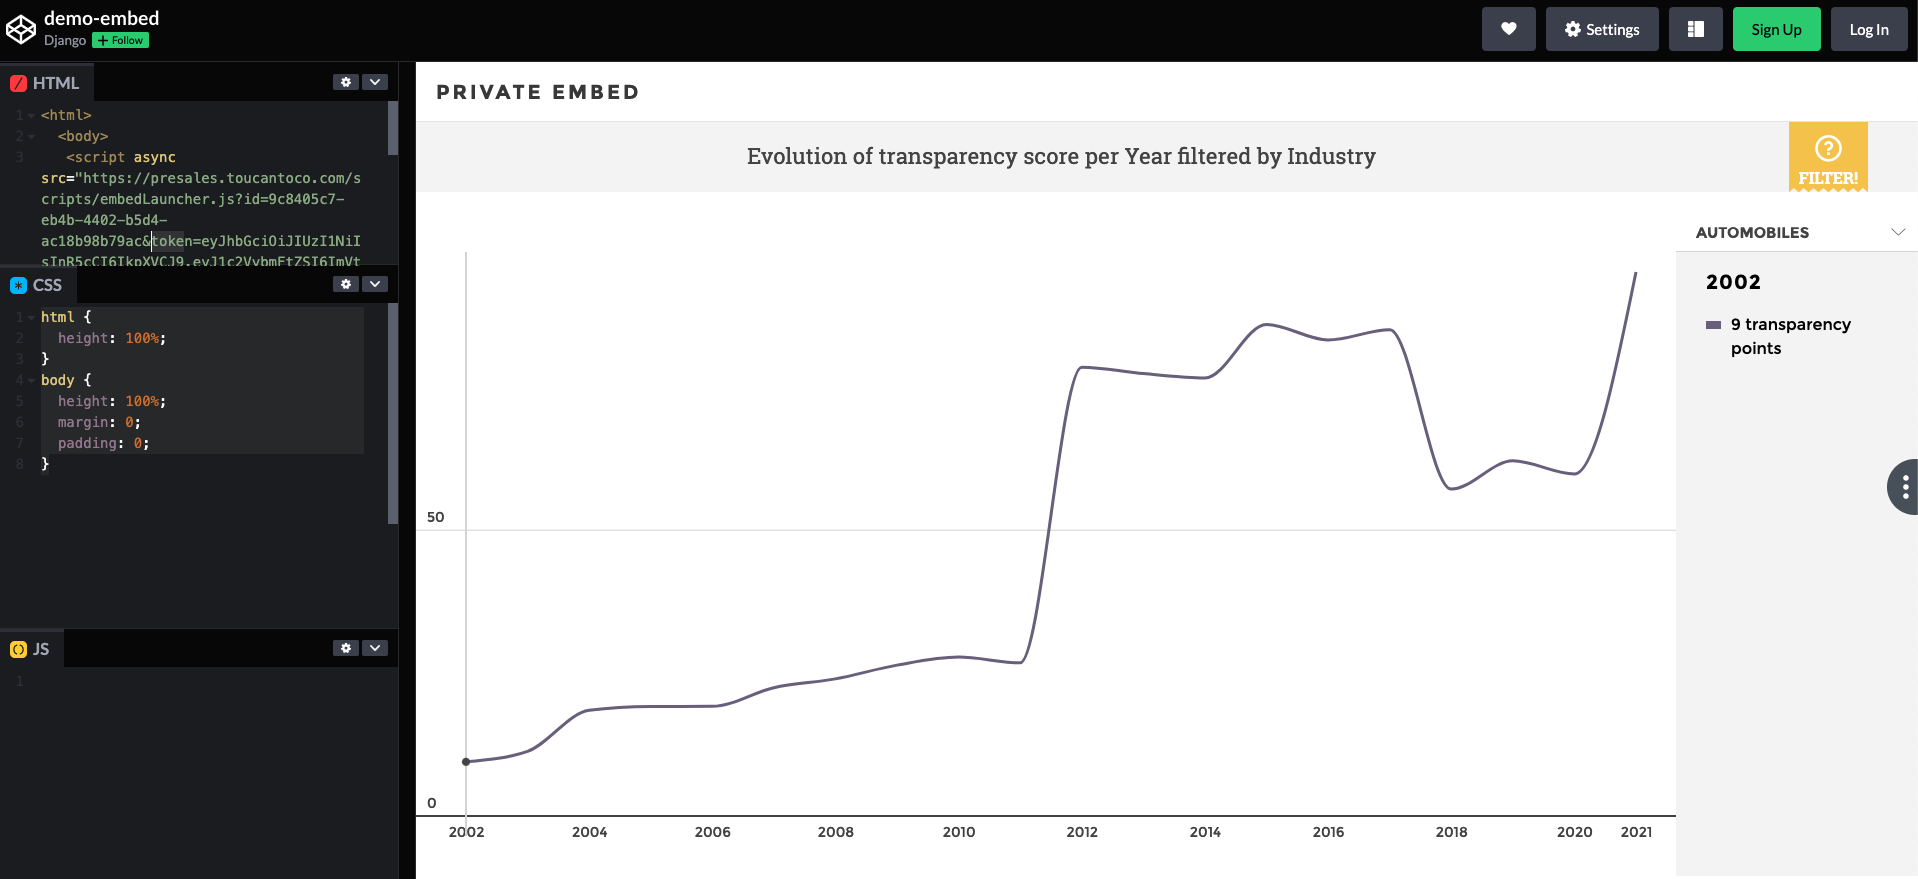
Codepen working
Awesome it works! 🙌
Filter your data based on attributes
Finally, you want to embed this kind of guided analytics, but based on your user attributes.
Good news, we are almost done 👌
The token already contains the “industry” attributes, remember? 🧠
So we juste have one step more to do : adapt the SQL query to filter the data based on the “industry” attribute.
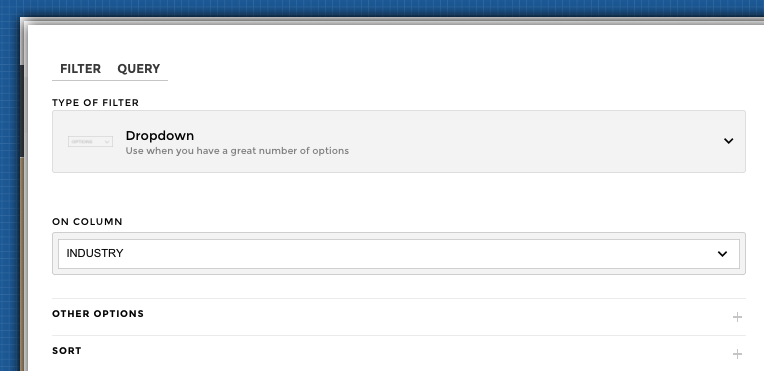
Go back in staging mode in your story edition mode, and go in the Query Tab.
Than click on the little Gear (⚙️) in order to adapt the first Step : the query.
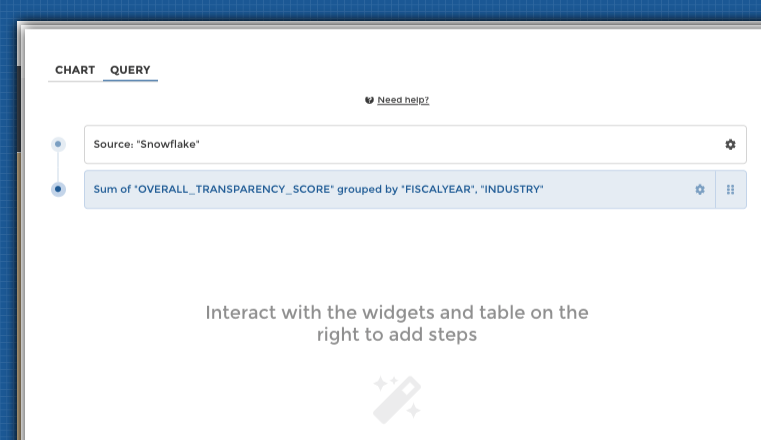
Switch in SQL code mode if necessary and adapt your SQL query by adding the user attribute you want, in the WHERE clause for instance. It will allow the filtering of data based on user attributes.
Tip
Using the jinja {{ attribute_name }} syntax, you can call your user attributes !
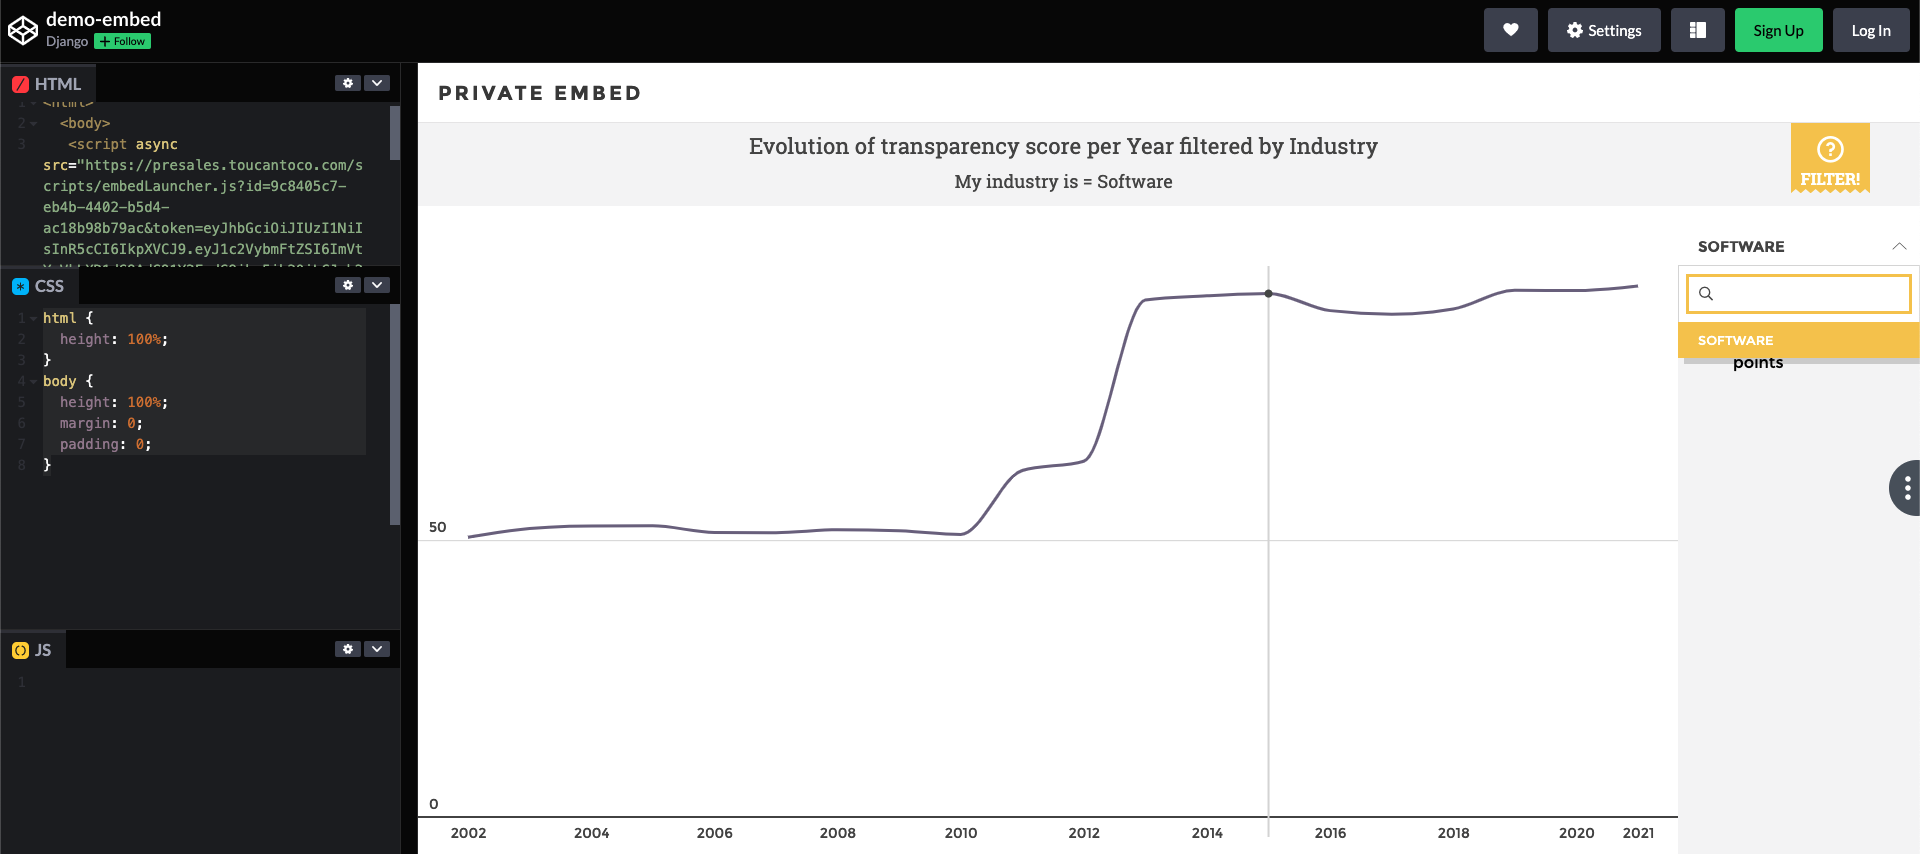
SELECT FISCALYEAR, INDUSTRY, OVERALL_TRANSPARENCY_SCORE FROM "PUBLIC"."DEMO_ESG_SNOW" WHERE INDUSTRY = '{{ industry }}'
Warning
⚠️ Don’t forget to publish your with the Publish button!
You can even use it with the templating syntax like that (check the narrative in the screen below)
My industry is = <%= user.attributes.industry %>
Reload your favorite code editor and it’s dooone 🎯
You user can only see and filter on Software value, his industry. He can’t see other data ✅
You have just embed an awesome story created in few clicks in live data, based on user attributes. 👏
Codepen Live
Thanks for reading, we hope it was all clear 🙏 If not don’t hesitate to send us your feedbacks 🤲 it’s gift for us!
See you soon for another tutorial 👋
Advanced syntaxes
Some advanced syntaxes to help you inject parametrized values in your favorites SQL queries.
What’s the difference between ‘{{ }}’ & ‘<%= %>’ syntaxes?
Variable values to be interpolated can be injected from two different sources:
- the frontend, i.e: values that can be set by the AB/Viewer when editing the app configuration through the studio or when selecting values with a requester or a filter. These variable values are injected with the ‘<%= %>’ syntax.
- the backend, i.e: values that are coming from the Toucan instance’s configuration (such as the instance name) or the user’s attribute defined in their token for example. These variable values are injected with the ‘{{ }}’ syntax.
For string or integer values, coming from the user’s or the instance’s context
This applies for example to user attributes defined in the token used to embed a chart. For string attribute:
WHERE INDUSTRY = '\'{{ string_attribute }}\''
For numeric attribute:
WHERE INDUSTRY = '{{ numeric_attribute }}'
For a Checkbox Requester (array) of strings
You have to use a “IN” rather than a “Equals” ( = ) and in the case of an SQL connector, use the join templating syntax for string values for instance.
SELECT * FROM TOUCANDB.“PRODUCT_SALES”.“FACT_SALES”
WHERE CATEGORY IN ('<%= requestersManager.requester_check.join("','") %>')
This syntax is needed because the output of a requester checkbox is a
Javascript array like ['optionA', 'optionB'] and we need to inject
an SQL array in the query string such as ('optionA', 'optionB').
For a list of string values coming from the user attributes or the instance context
In case when this range of options comes from the user’s attributes (in an embed context for example) the proper syntax is:
SELECT "price_per_l", "alcohol_degree", "name", "cost", "beer_kind", "volume_ml", "brewing_date", "nullable_name" FROM "beers"."beers_tiny" where beer_kind in ('{{ "\',\'".join(user.attributes.beer_kind) }}')
In this example, the attribute beer_kind is
['Blonde', 'Triple']. The injection in query string is coming from
the backend thus we use a Python Syntax. We perform the same
transformation as previously, i.e: ['Blonde', 'Triple'] is injected
as ('Blonde', 'Triple') in the SQL query string.
Let’s decompose what happening with this syntax:
- First,
user.attributes.beer_kindis transformed into the filter’s value ->['Blonde', 'Triple'] - Then
.join()builds the string from the list by joining all values - As we give the
joinfunction a"\',\'"string, it builds the string with a','delimiter - Finally the whole expression is encapsulated with
('&')
The ending result is ('Blonde', 'Triple').
For an array or list of integers
The checkbox filter syntax would be:
SELECT * FROM TOUCANDB.“PRODUCT_SALES”.“FACT_SALES”
WHERE CATEGORY IN ('<%= requestersManager.requester_check.join(",") %>')
The quotes should be omitted. Same for a list of int coming from instance’s context or user attributes:
SELECT "price_per_l", "alcohol_degree", "name", "cost", "beer_kind", "volume_ml", "brewing_date", "nullable_name" FROM "beers"."beers_tiny" where beer_kind in ('{{ ",".join(user.attributes.beer_kind) }}')
For filtering on a string template based on user’s or instance’s context
This case is not so frequent but it can happen that you have to filter on a string template such as: %xxxx% (any string containing xxxx).
In this case the syntax would be:
SELECT "price_per_l", "alcohol_degree", "name", "cost", "beer_kind", "volume_ml", "brewing_date", "nullable_name" FROM "beers"."beers_tiny" where beer_kind like '%{{ user.attributes.beer_kind }}%'
Having beer_kind: 'lon' in this case. it matches 'Blonde' from
our dataset.
For filtering on a string template based on a requester value
If you need to use the same filter based on a request value, the syntax would be:
SELECT "price_per_l", "alcohol_degree", "name", "cost", "beer_kind", "volume_ml", "brewing_date", "nullable_name" FROM "beers"."beers_tiny" where beer_kind like '%<%= requestersManager.beerkind %>%'
For filtering on a a list of string templates based on a requester checkbox values
An either more ‘niche’ case. Let’s say you want to filter on string templates coming from a requester checkbox values. It’s possible, but is it useful?! The syntax would be:
SELECT "price_per_l", "alcohol_degree", "name", "cost", "beer_kind", "volume_ml", "brewing_date", "nullable_name" FROM "beers"."beers_tiny" where beer_kind like '%<%=requestersManager.beerkind.length > 1 ?requestersManager.beerkind.join("%' OR beer_kind LIKE '%"):requestersManager.beerkind[0] %>%'
In input we have ['lon', 'ipl'].
If we decompose the syntax
- The
<condition>?condition True:Condition Falsesyntax is an if else syntax - Here the condition is ‘are there multiple checkbox selected values ?’
- In case there are, apply the syntax to join the values as such:
OR beerkind LIKE '%VALUE%' - In case there aren’t, simply use the the only selected value
For filtering on a a list of string templates based on user’s or instance’s context
Same as previous case but we need to update the syntax a bit:
SELECT "price_per_l", "alcohol_degree", "name", "cost", "beer_kind", "volume_ml", "brewing_date", "nullable_name" FROM "beers"."beers_tiny" where beer_kind like '%{{ ("%\' OR beer_kind LIKE \'%").join(user.attributes.beer_kind) if user.attributes.beer_kind|length > 0 else user.attributes.beer_kind[0] }}%'
Same logic here, if the attribute as only one value in the list, use the
first value else inject all values joined with the
OR beerkind LIKE '%VALUE%' syntax