How to :: Set-up, manage and test permissions
A permission is a security filter applied to data to make sure that any user has only access the data he needs, and no more.
This tutorial will show you how to set-up row-level security (RLS).
Note: The graphical interface intends to cover the most common use cases. If you need to tackle more complex use cases, you may need to use our legacy code mode. Beware that if we support both ways of settings permissions (via the user interface and in code mode), they remain quite independent and you will not be able to see your code mode permissions in the user interface.
How does it work ?
A permission filters the data depending on user attributes, allowing you to restrict access to data depending on your users profile. The most common user attribute that you will use to map your permissions is the list of Toucan Toco user groups a user belongs to, but you can rely on attributes that may come directly from your environment (from your identity provider, see more details further).
Basically, for a dataset that would reports sales by country, a permission can be expressed as “Users who belong to the user group ‘Europe’ will only have access to rows that match the value “Europe” in the column “Continent”.
So setting a permission will consist mainly of two steps:
- Choosing a user group the permission filter will be applied to - Filtering the data to keep only rows this user group should be allowed to see
If a user belongs to more than one user group, he will be able to see the union of all rows allowed by the permissions attached to his user groups. So let’s say a user belongs to the user groups Europe and Asia, he will see all the rows allowed for both the user group Europe (say France, Italy and Spain) AND the user group Asia (say China and Japan).
Let’s go into details into how to create permissions, through an example.
Create permissions
In our example, we will set permissions on the views underlying data, as one of the most common use cases for permissions is to define which views can be accessed depending on users in the views dropdown of your home page. This is because this selector is usually the cornerstone of your application.
Keep in mind that you can apply row-level permission to any dataset found in your data explorer.
Let’s say that you are in a retail business. You sell products in several countries and you want to track your KPIs across 3 hierarchy levels:
- Global level (“World”) - Region level (e.g. “Europe”) - Country level (e.g. “France”) - City level (e.g. “Paris”)
Your views data would look something like this:
| view | type | country | continent |
|---|---|---|---|
| World | World | ||
| Europe | Region | Europe | |
| North America | Region | North America | |
| France | Country | France | Europe |
| Spain | Country | Spain | Europe |
| USA | Country | USA | North America |
| Canada | Country | Canada | North America |
| Paris | City | France | Europe |
| Bordeaux | City | France | Europe |
| Madrid | City | Spain | Europe |
| Barcelona | City | Spain | Europe |
| Boston | City | USA | North America |
| New-York | City | USA | North America |
| Montreal | City | Canada | North America |
| Ottawa | City | Canada | North America |
And your view selector will look something like this:
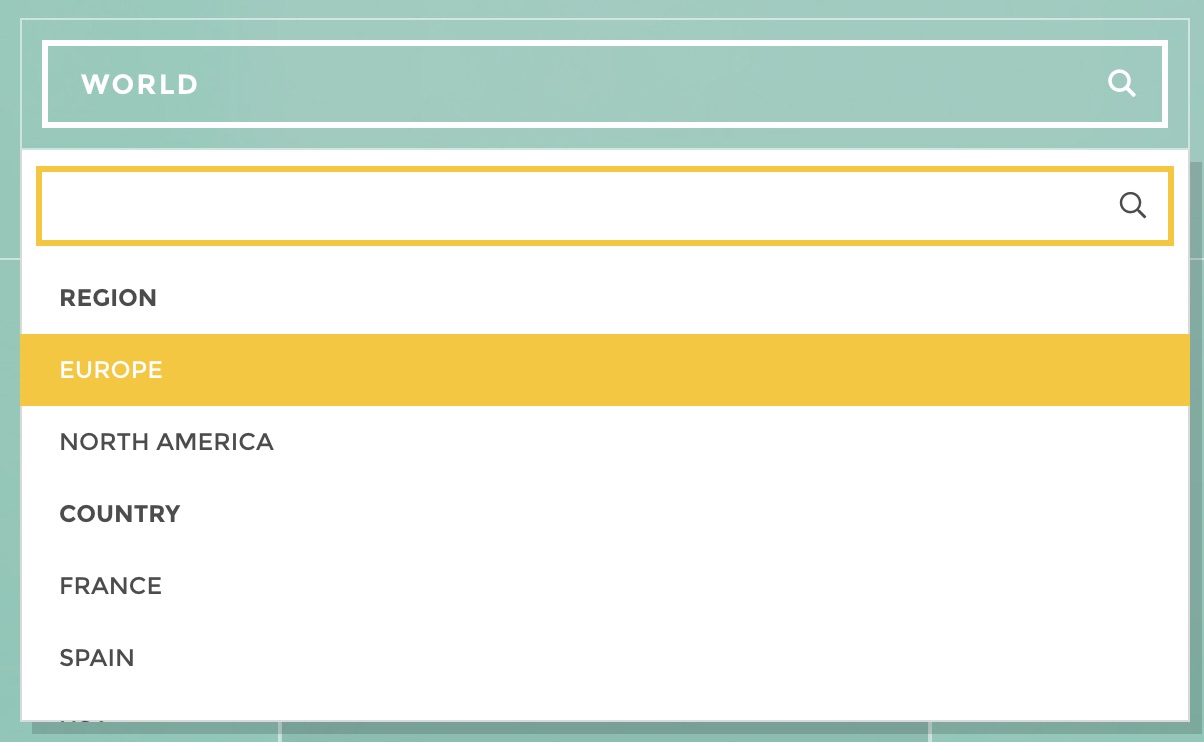
Now, you have several users with different profiles and you would like to restrain their access to the views:
- Comex users should be allowed to see every view - Regional managers should only be allowed to see their region view as well as all the countries and cities views of their region - Country managers should only be allowed to see their country view as well as the cities views of their country - City managers should only be allowed to see their city view
For that purpose, you should have defined one user group per view (a user group “Comex”, “Europe”, “North America”, “France”, “USA”, “Paris”, “Boston” etc.)
Now let’s do it !
Go to your data explorer, find your views data domain and click on “Set permissions” available in the domain options menu:
permissions icon
From there you can:
- Define a default permission that will be applied to any user if no other custom permissions rule applies to him. It can be set to allow either all rows or no row at all. - See the list of existing custom permissions if any, else you will be invited to create one - Create a new permission - See the preview of your dataset on the right
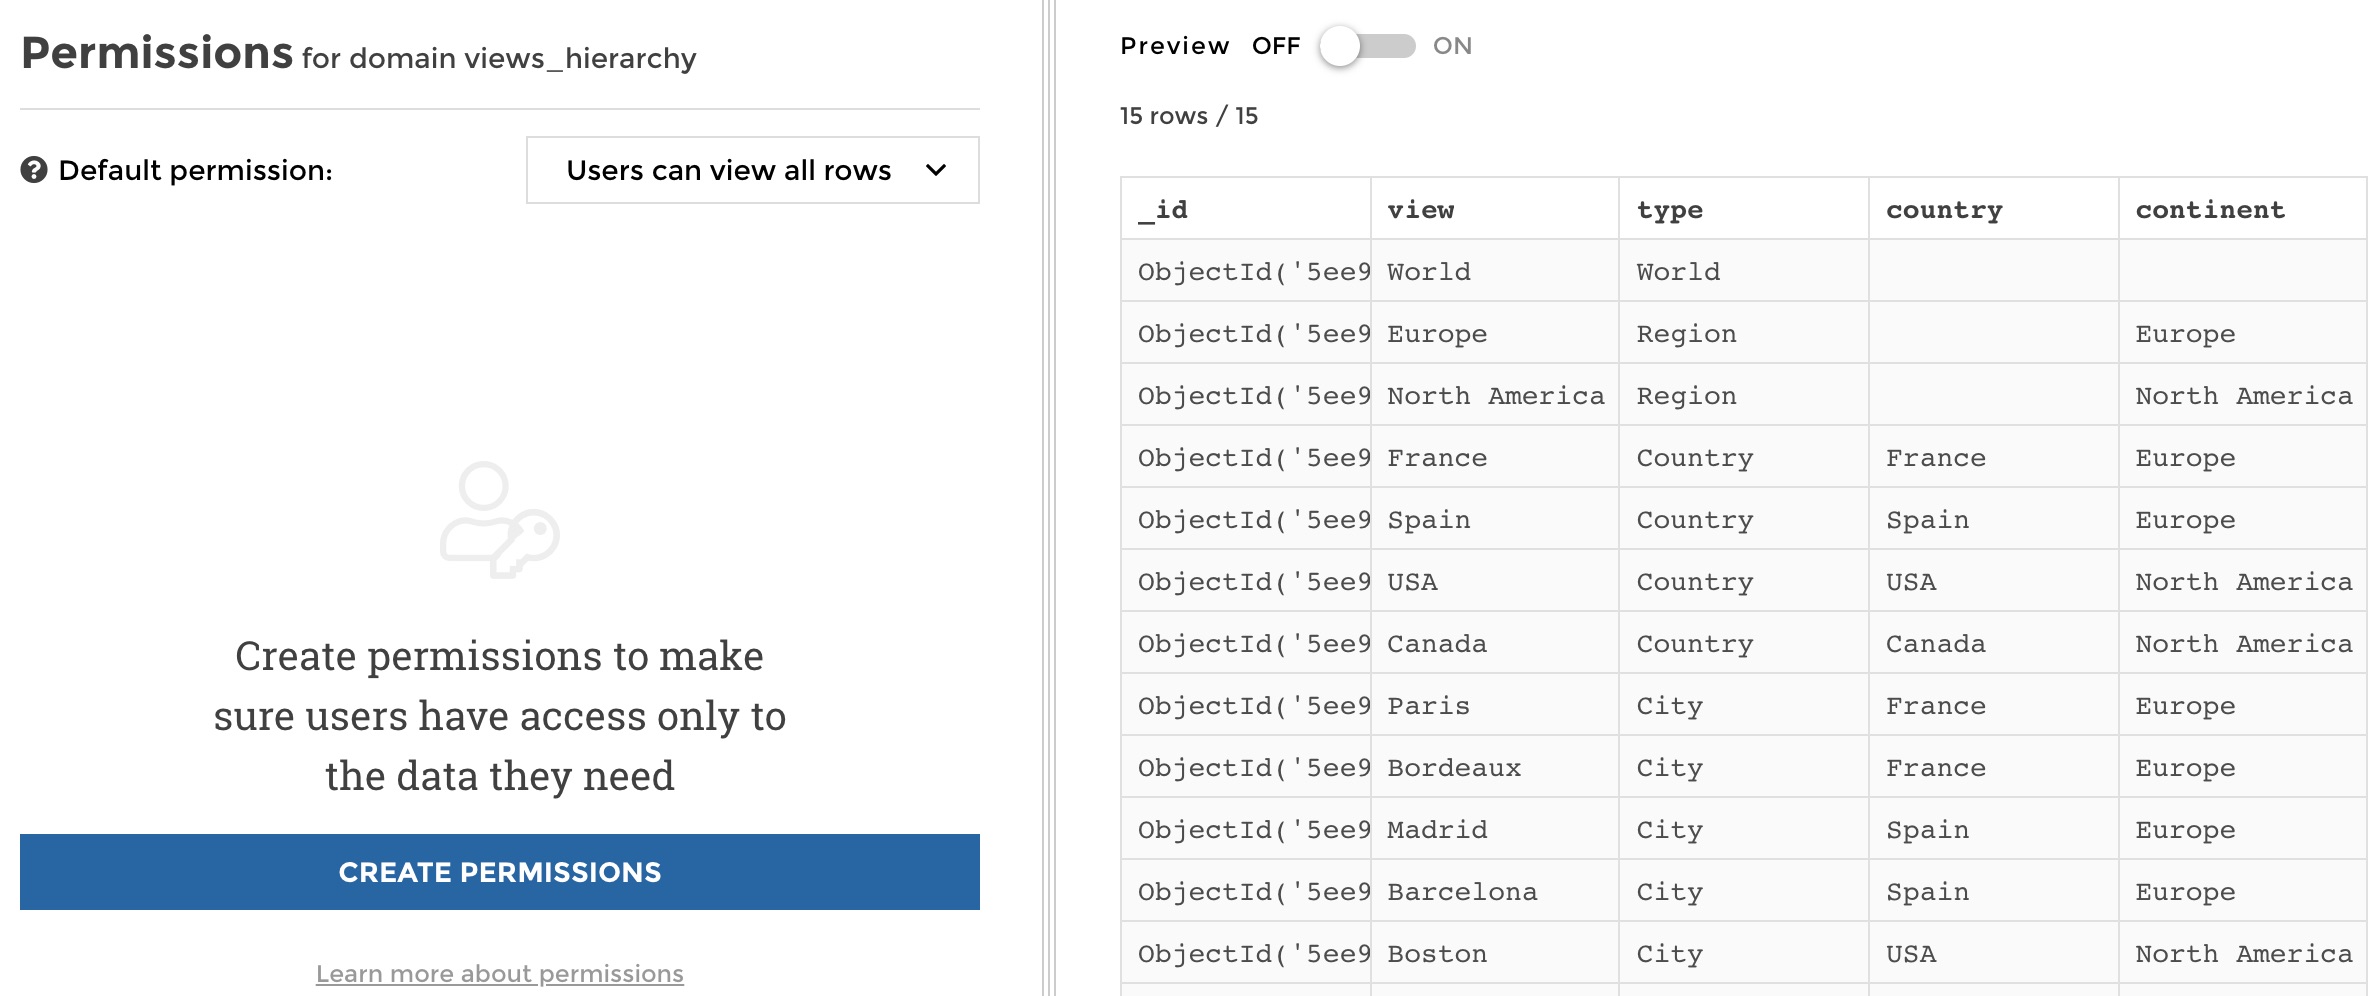
manage permissions
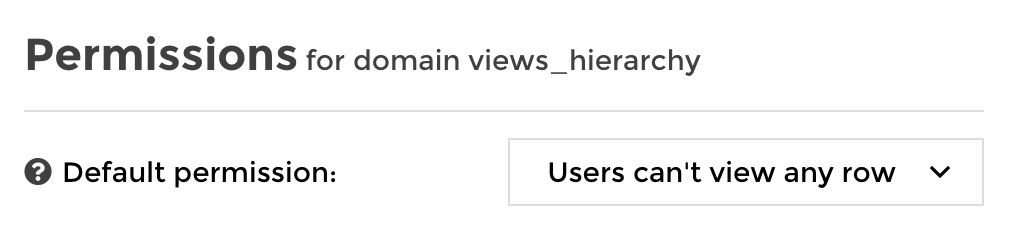
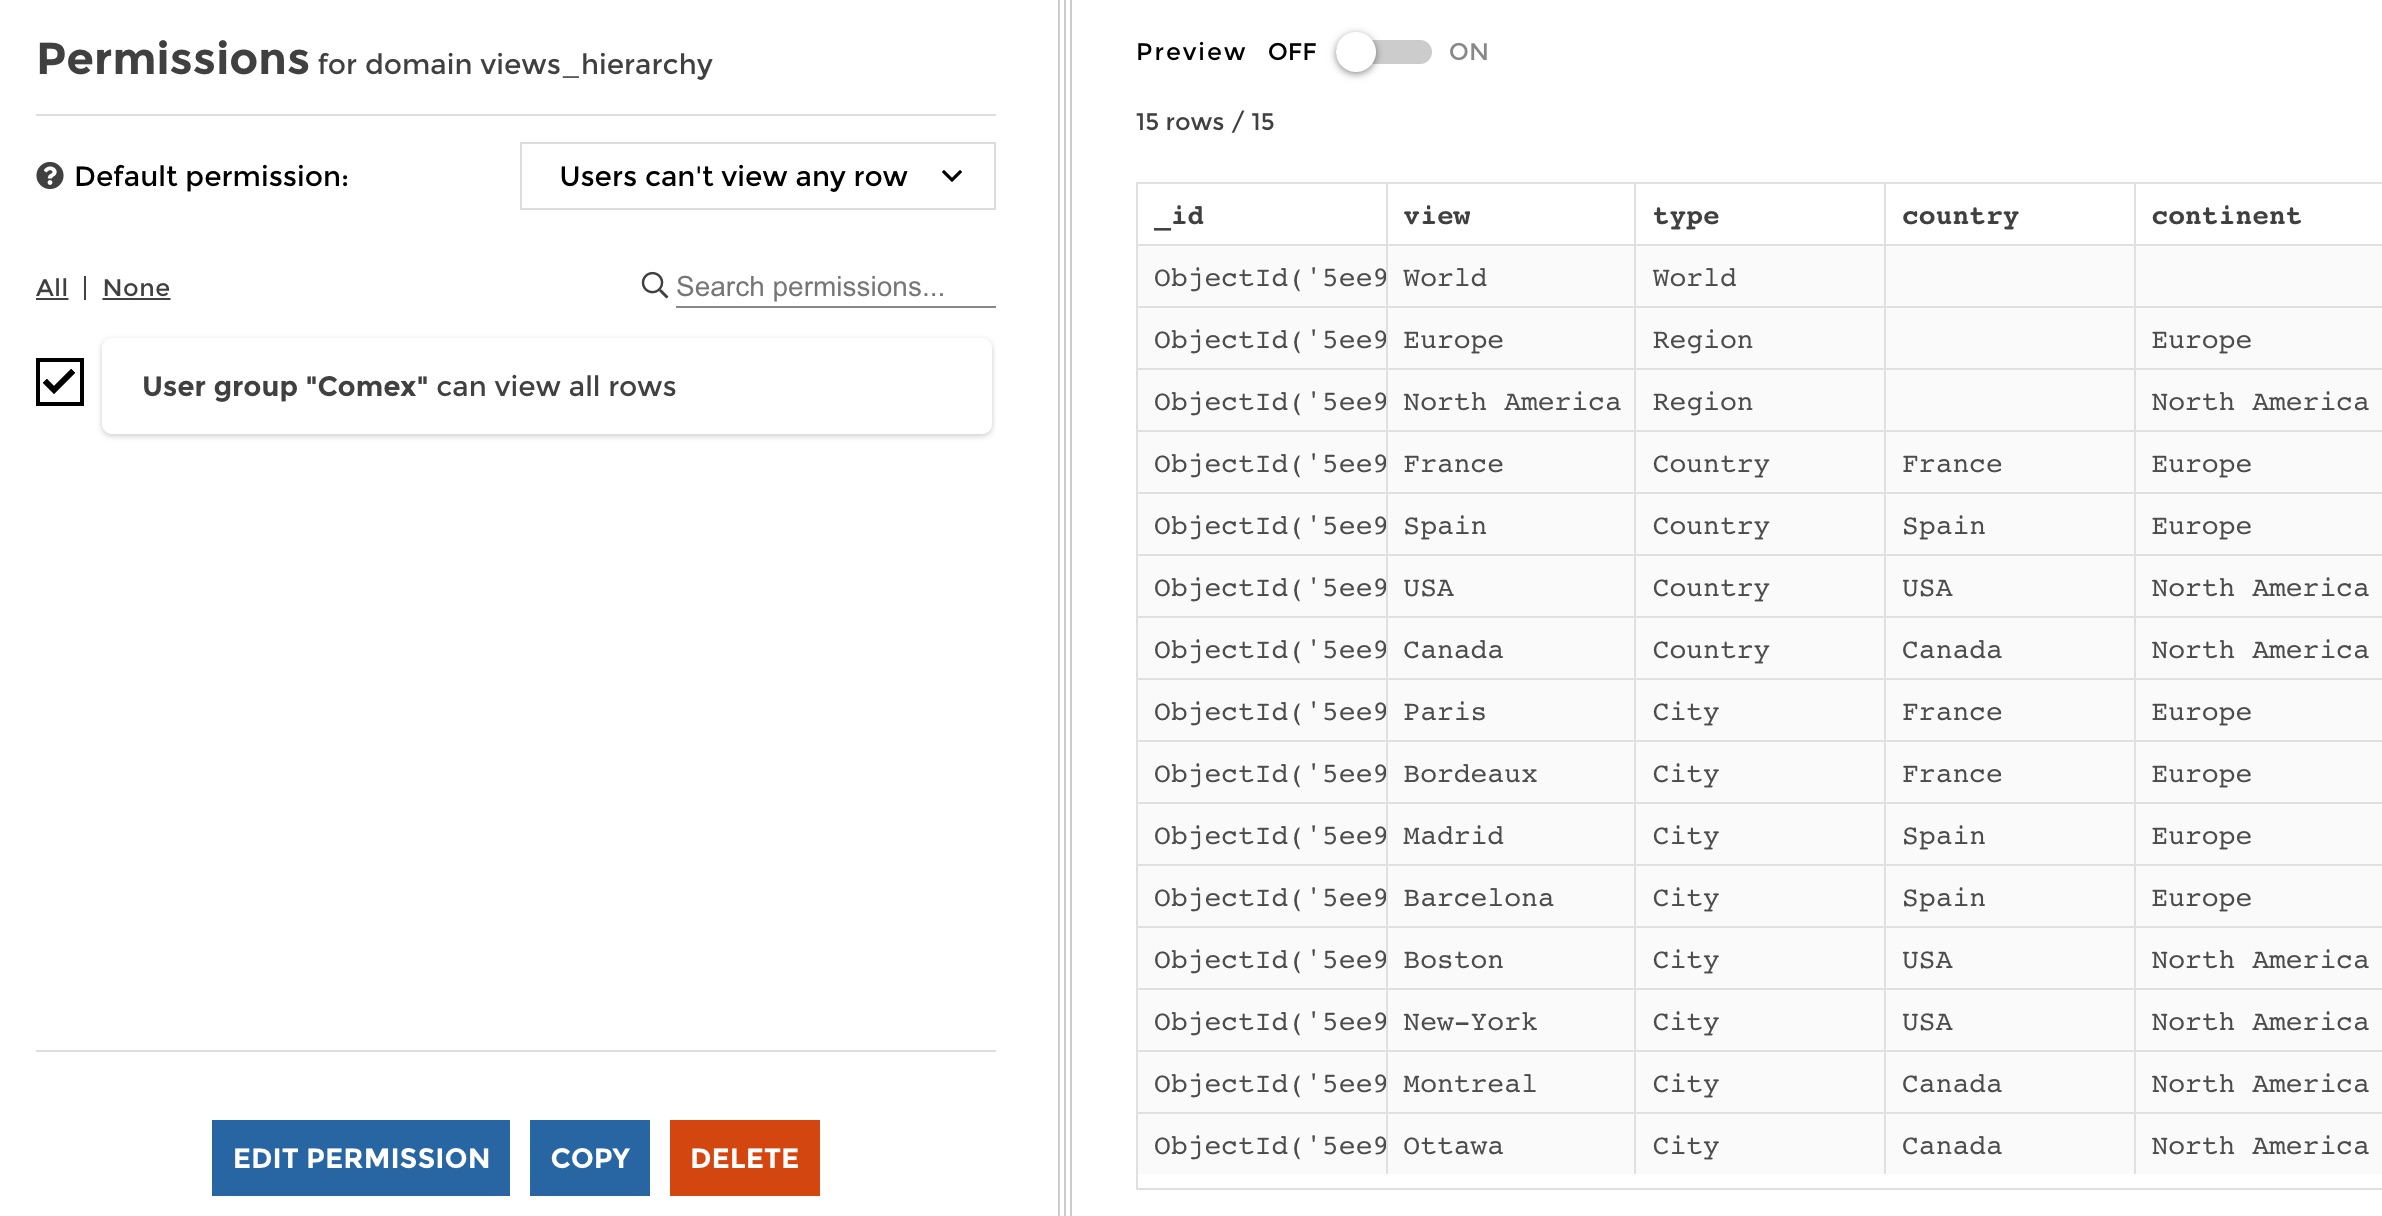
Let’s go now! First we will change the default permission to prevent access to any row by default. It means that if a user cannot be applied any of the custom rules that we will define, he will not see anything by default.
Then, we want the “Comex” user group to acess everything. So let’s define this very basic permission. Let’s click on “Create permissions” on the left panel. From there you must:
- Select a user group the permission will be applied to - Define whether the selected user group will be allowed to see all rows, specific rows or no row at all.
So for our Comex user group it simply looks like this:
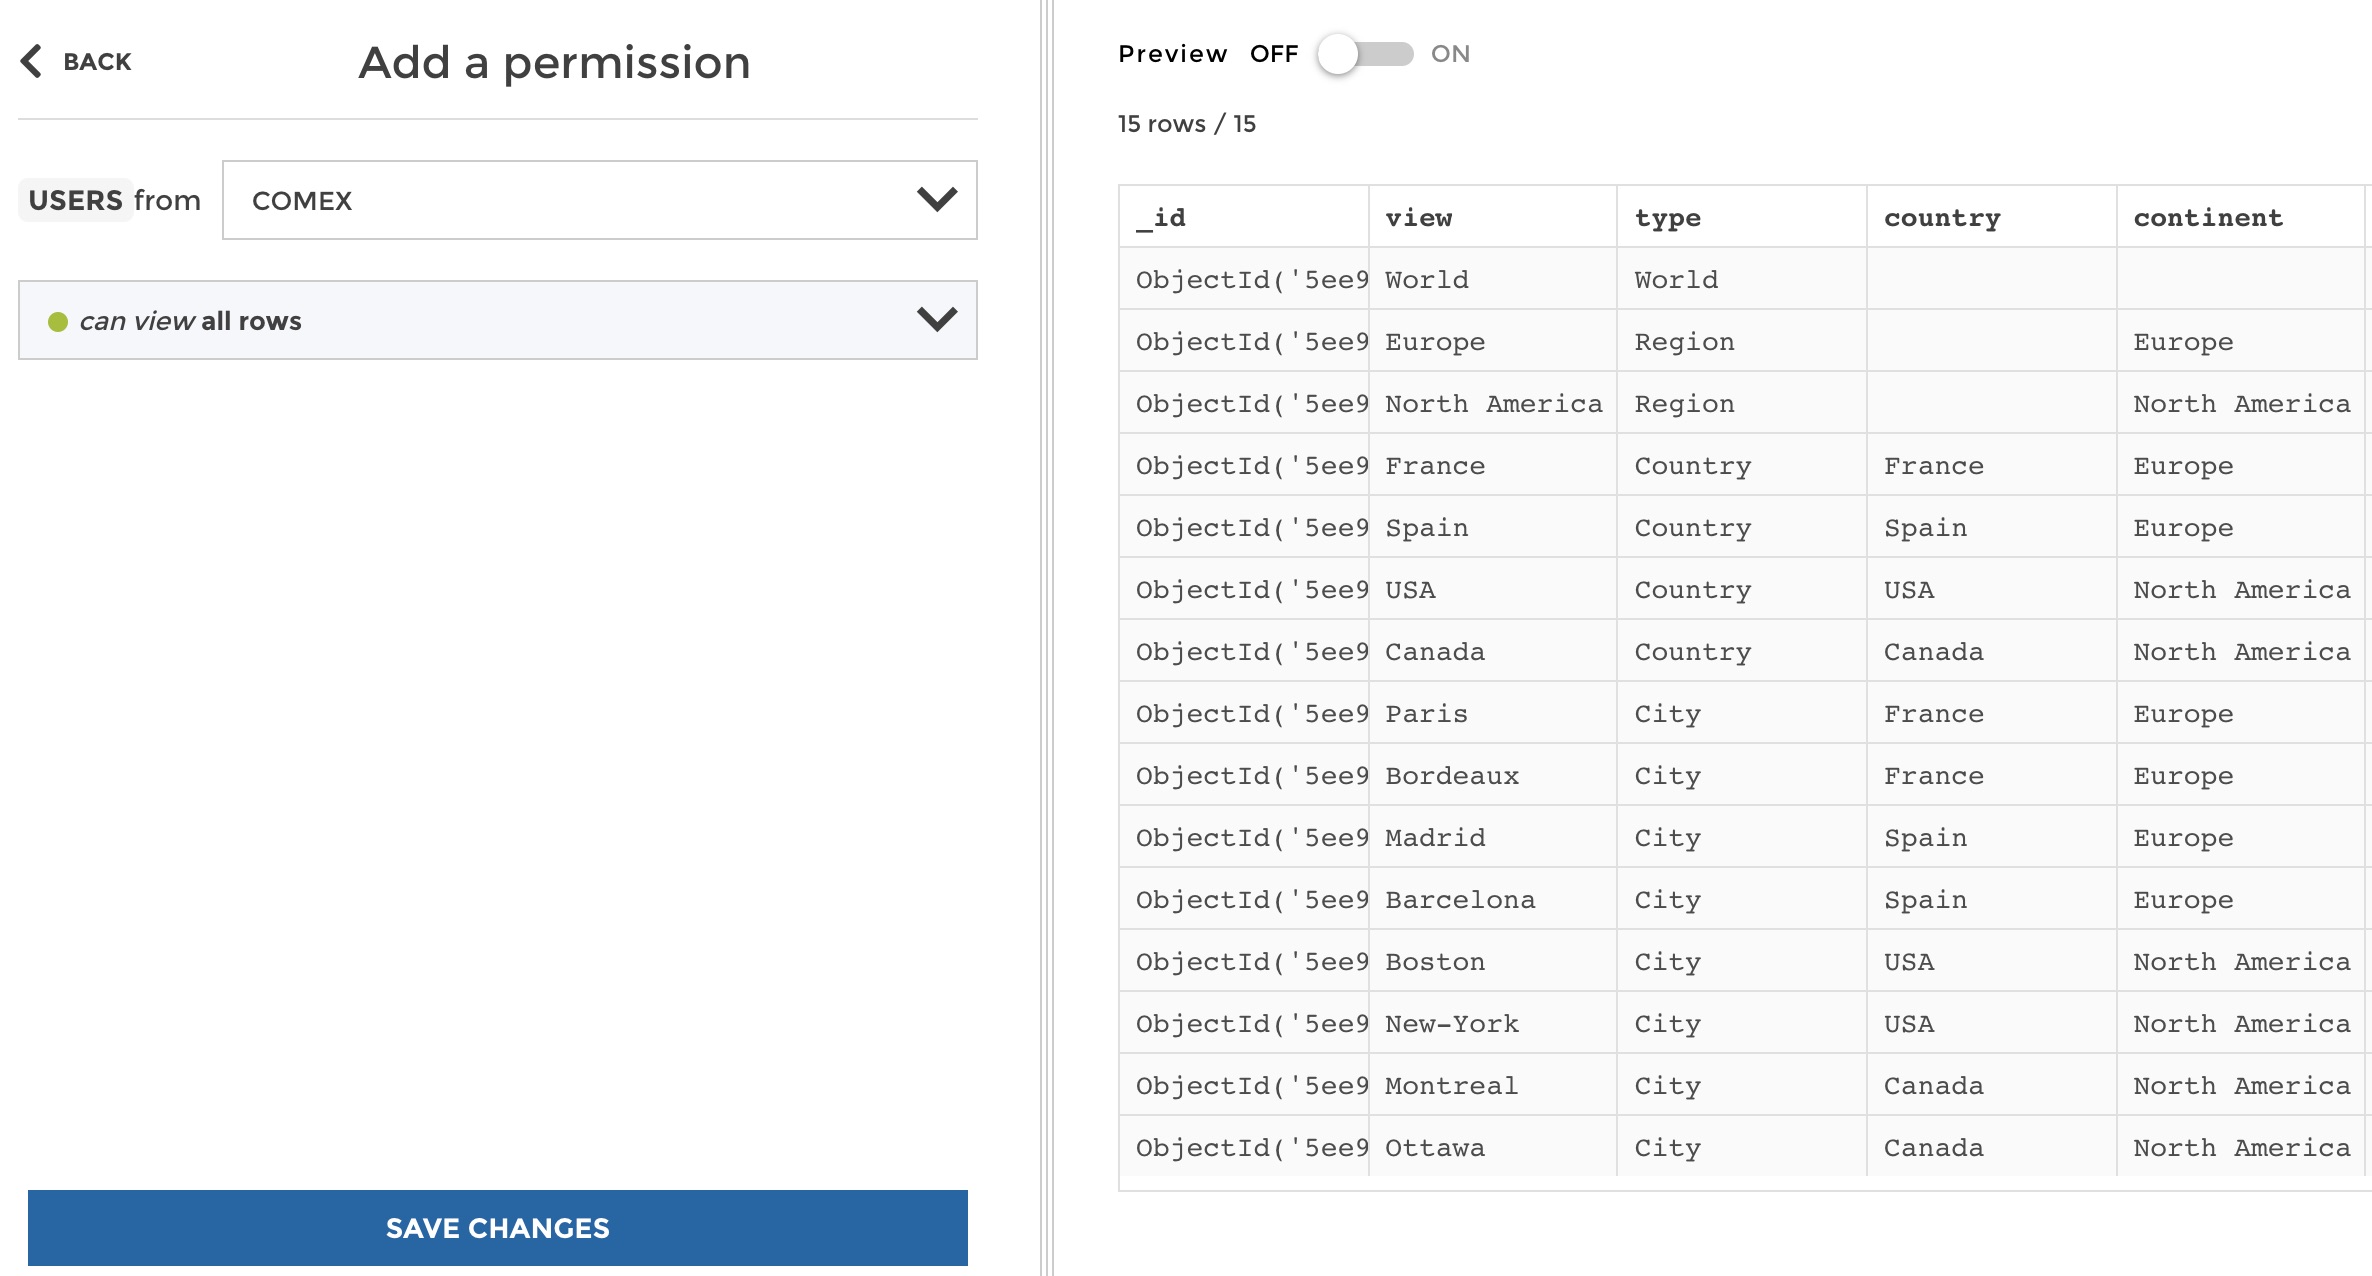
create permission
Now you can save, and you see that your new permission rule is now available. It is easy to delete, edit it or even copy your rule to another dataset.
manage permissions
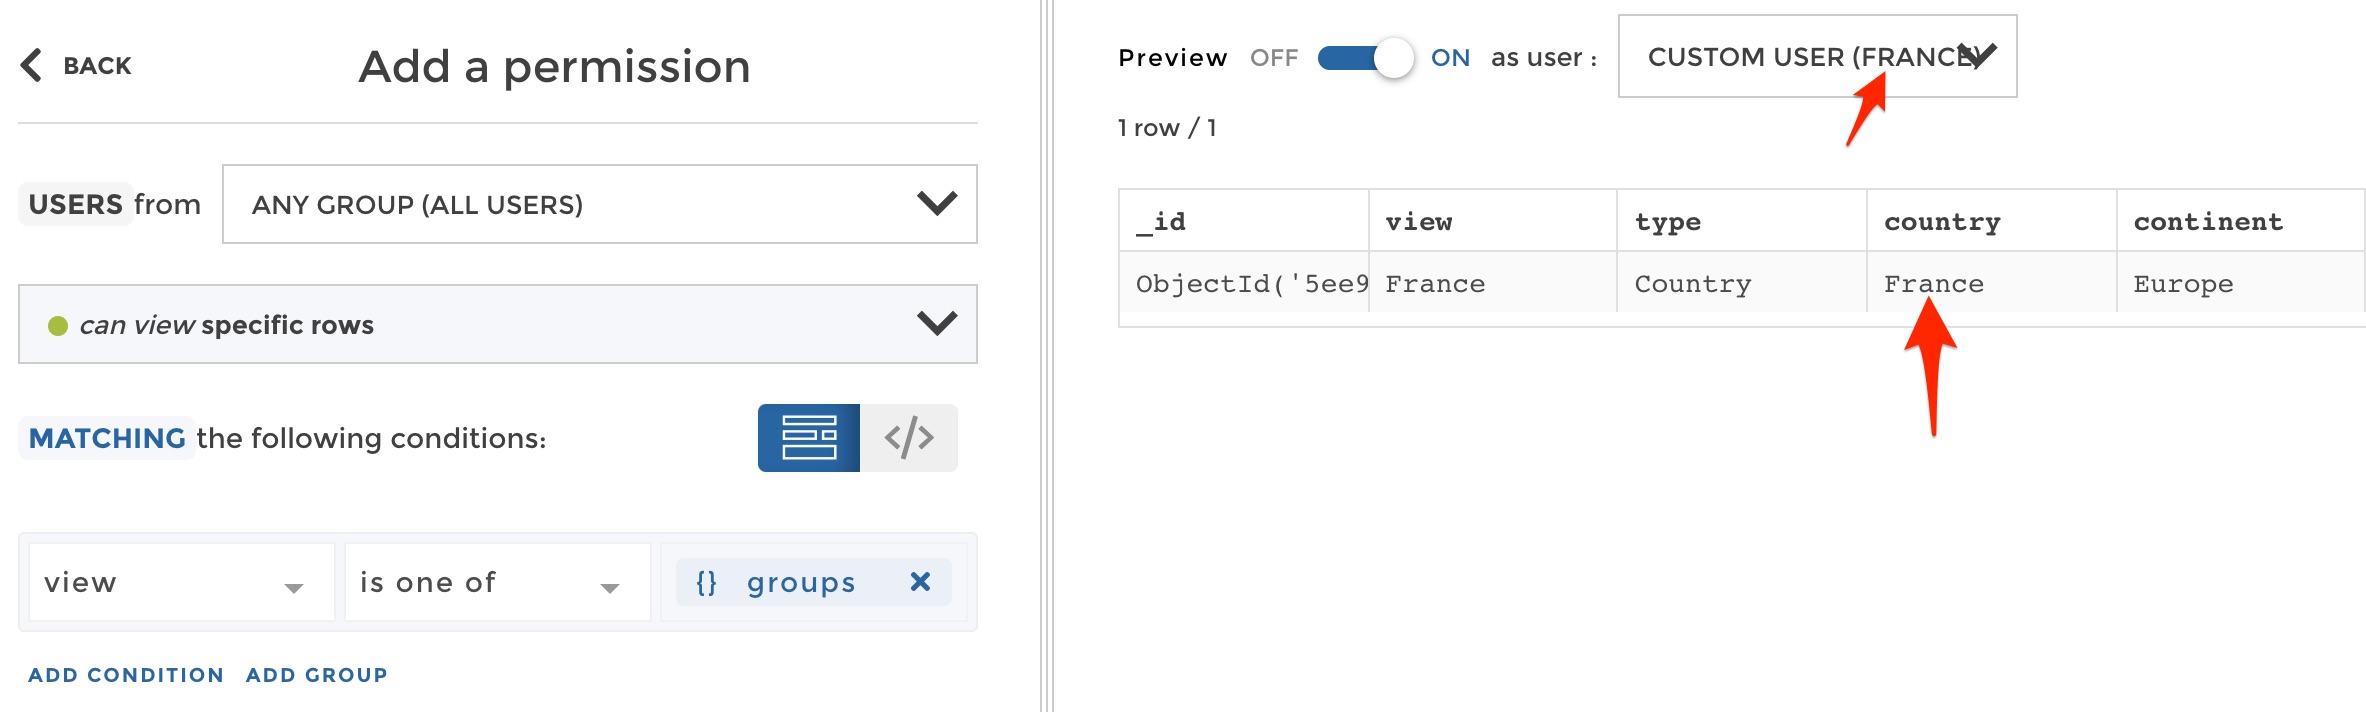
Now, let’s define a new permission for the “Paris” user group, who should see only the row matching “Paris” in the “view” column. So create a new permission, select the “Paris” user group, and this time this group should see specific rows. From there you need to setup the data filter that will be applied to keep only the required rows. It looks like this:
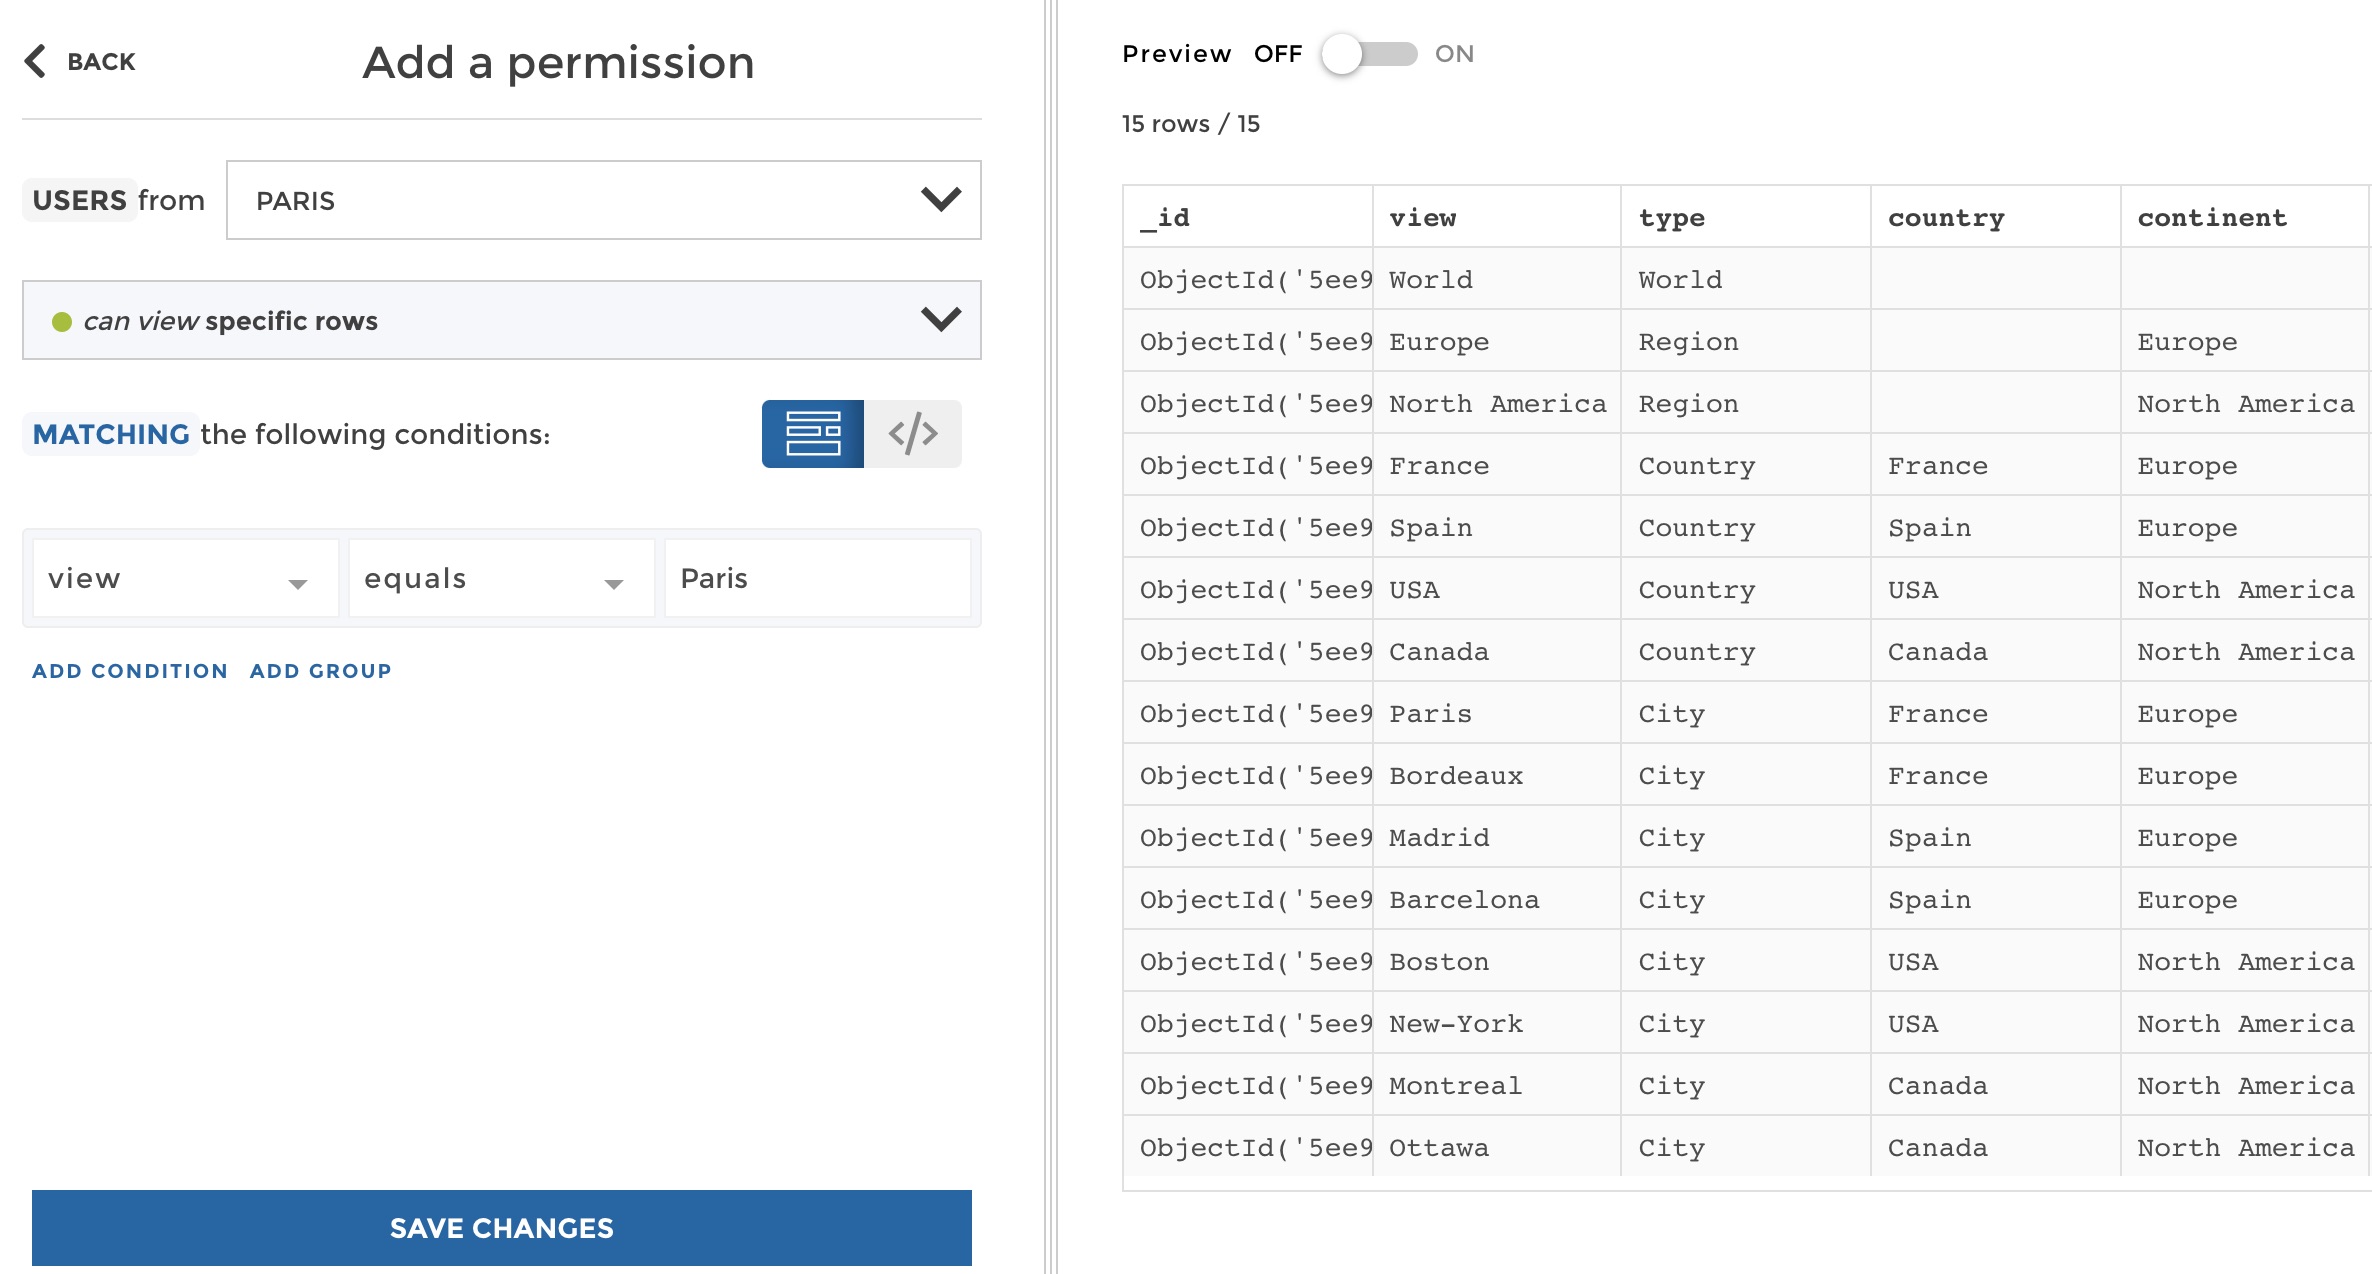
create permission
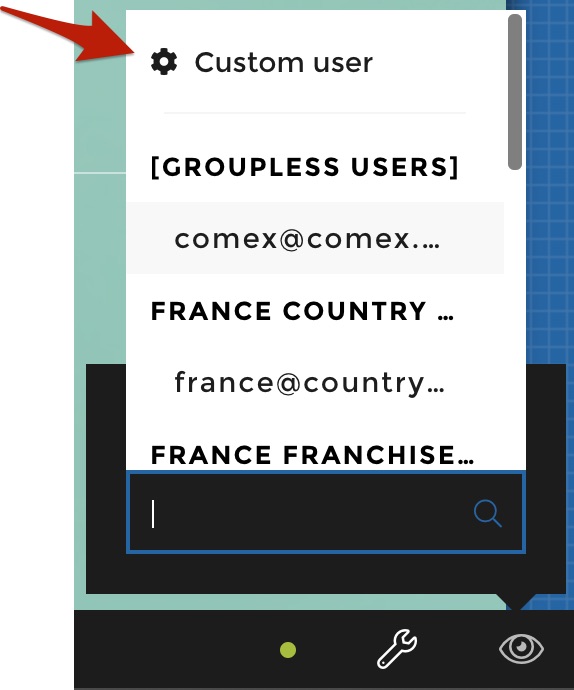
Don’t you want to check that it does what you expect? Switch the preview mode on and click on custom user:
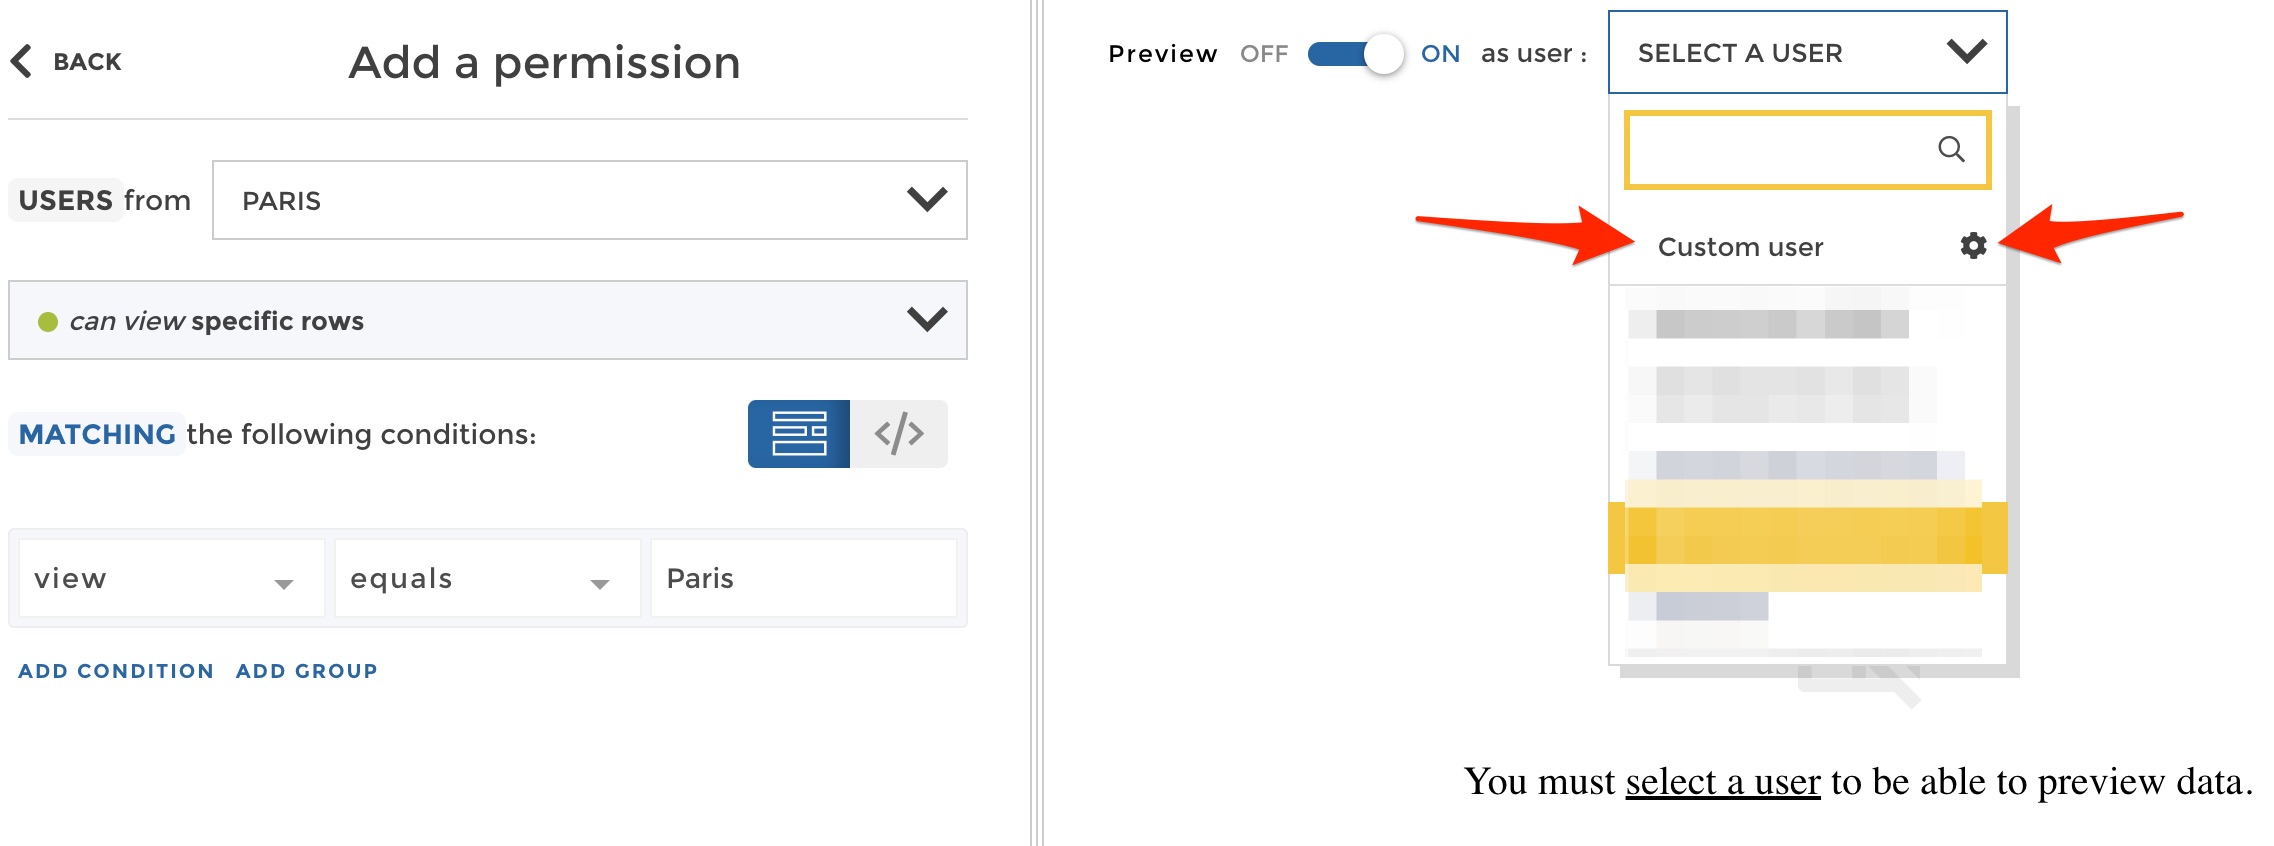
preview permission
From there you can define a custom usergranting him user groups on the fly. Grant the “Paris” user group to your user:
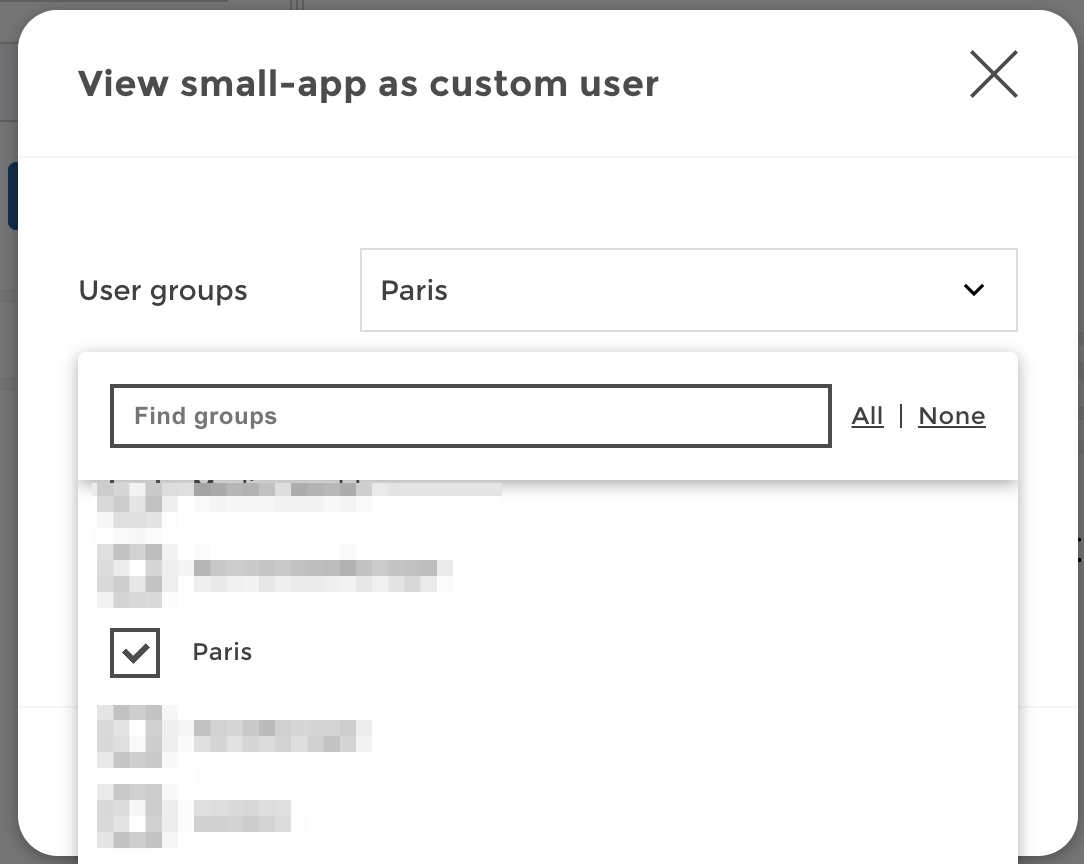
Now save these settings, and you can check that everything is working just fine. A user with the user group “Paris” only acces the corresponding row:
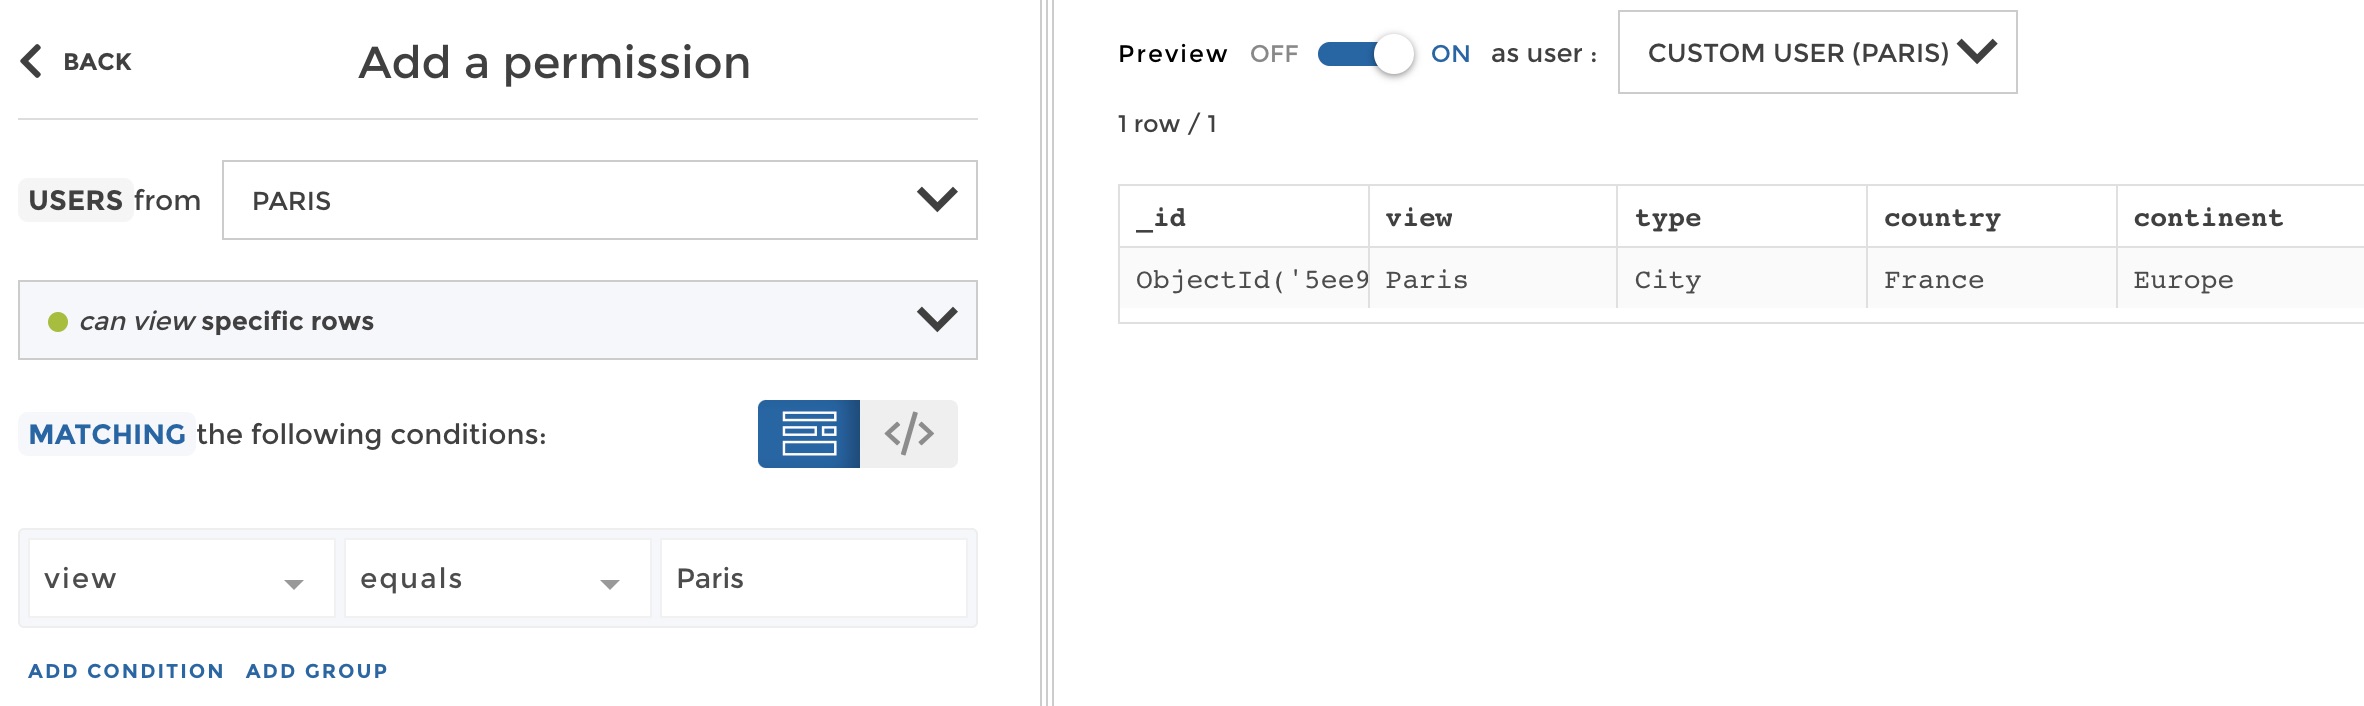
preview permission
So you can save your permission. But imagine doing this for every user group, one by one. In our example you would have 15 rules like these to setup:
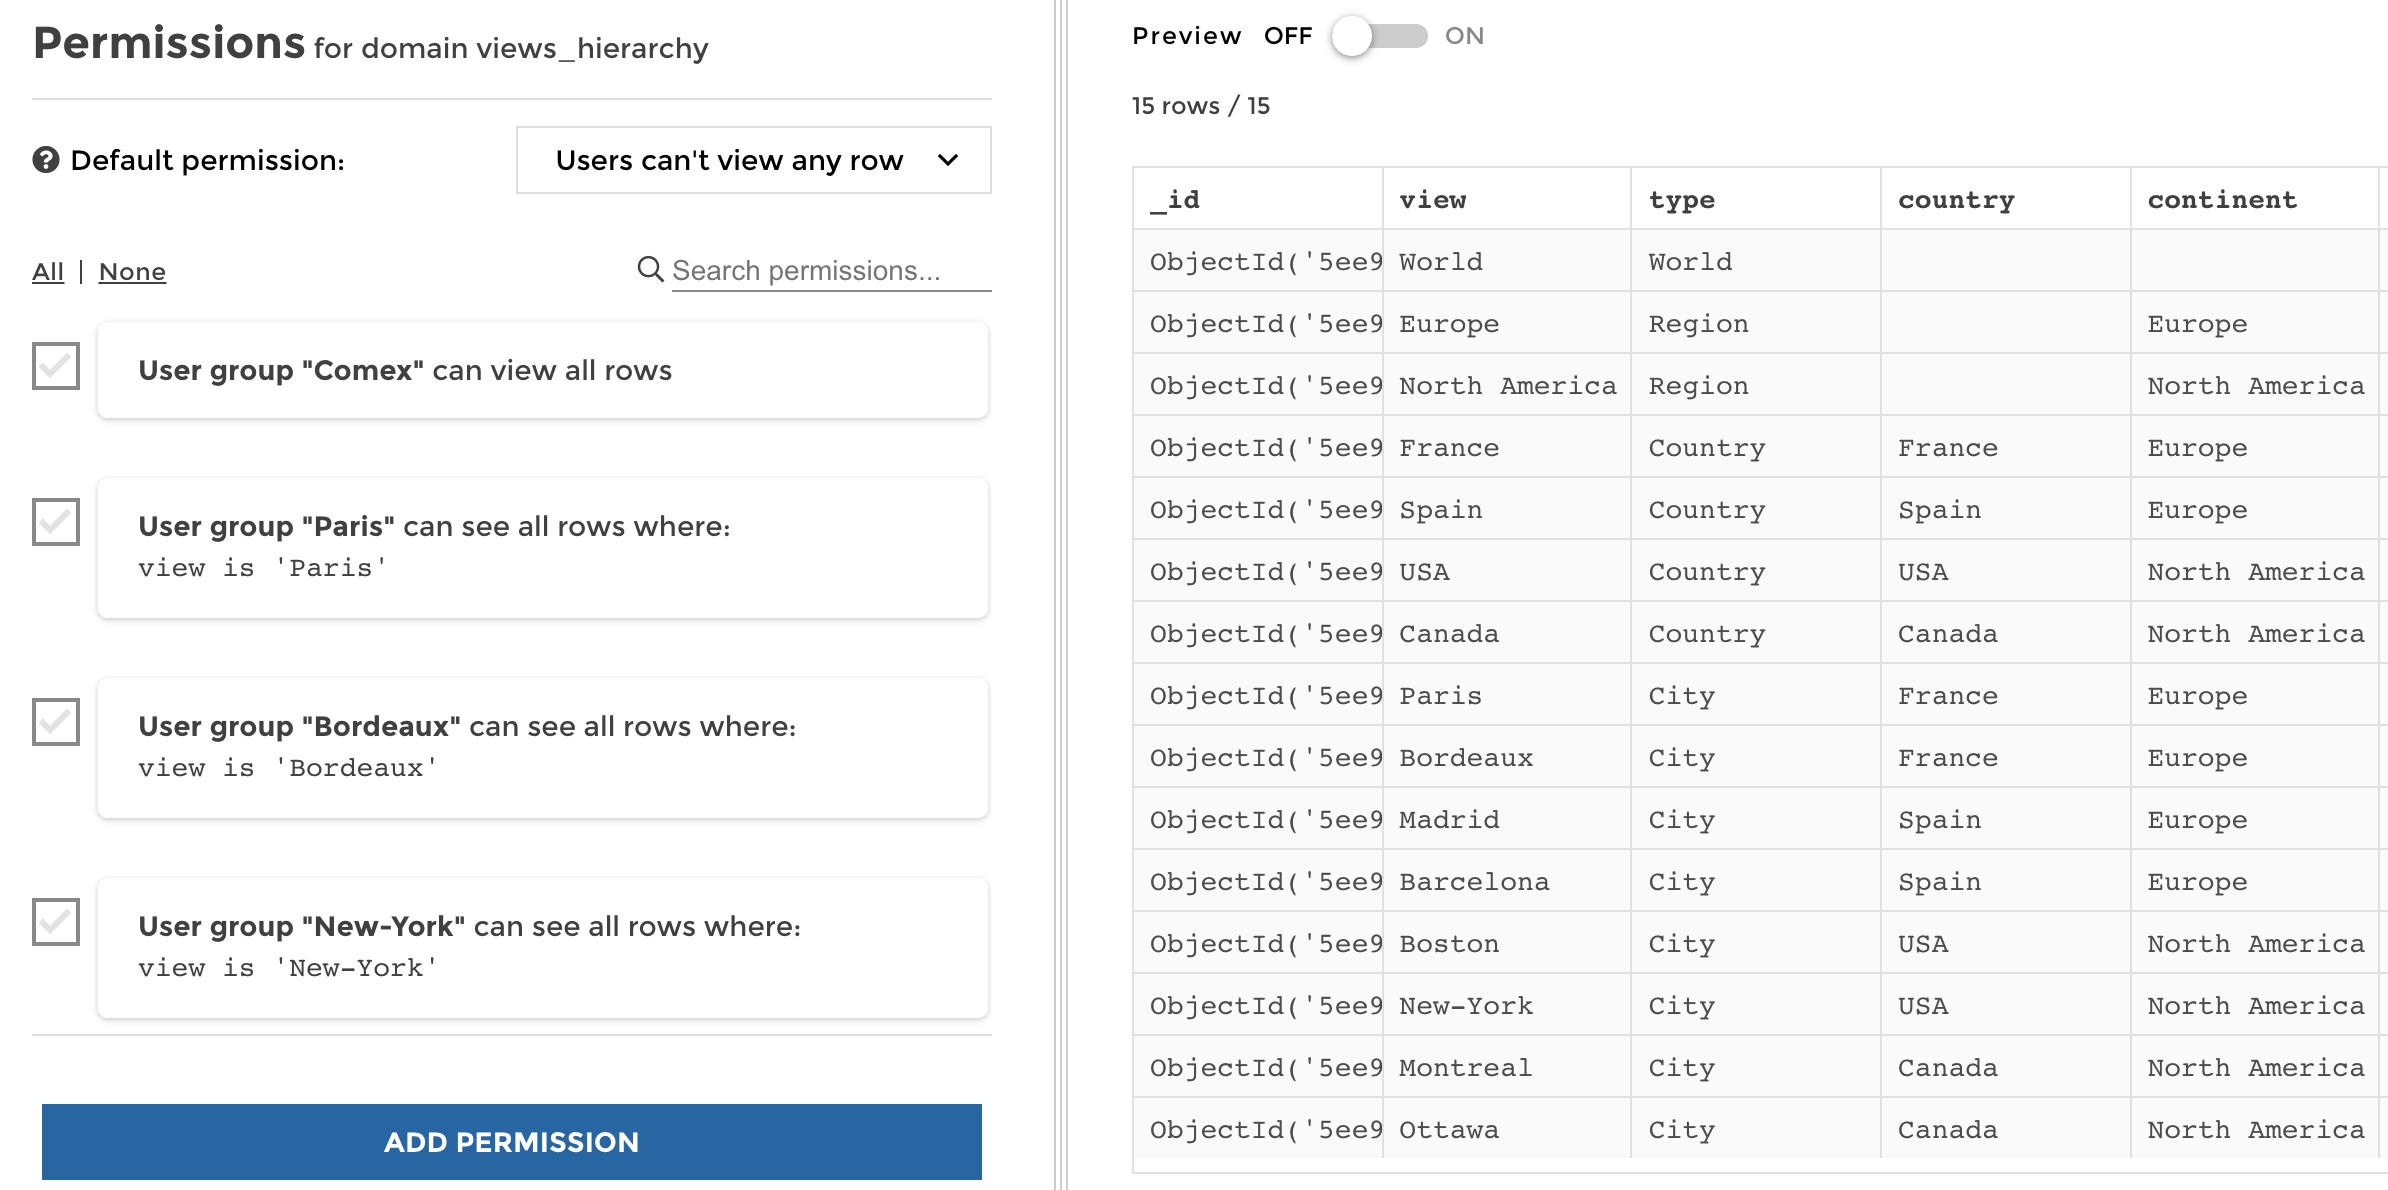
manage permissions
Those 15 rules could easily turn into hundreds in the real world…
Dynamic filtering based on user attributes
Actually in many cases, you want to apply one rule that applies to all users, and that will apply a dynamic filter depending on users attributes. For that purpose, you will need your user attributes to match your data. In our example, the user group “France” match exactly the value “France” in the columns “view” and “country” of the dataset etc.
So let’s see how to replace multiple rules applied to every user group
independently into 1 dynamic rule applied to all users at once. Create a
new permission, and select users from “ANY GROUP (all users)”. All users
will need to see specific rows that will depend on the user group they
belong to. So we will use a special variable in the filter that you can
access from the variable button {} as shown below:
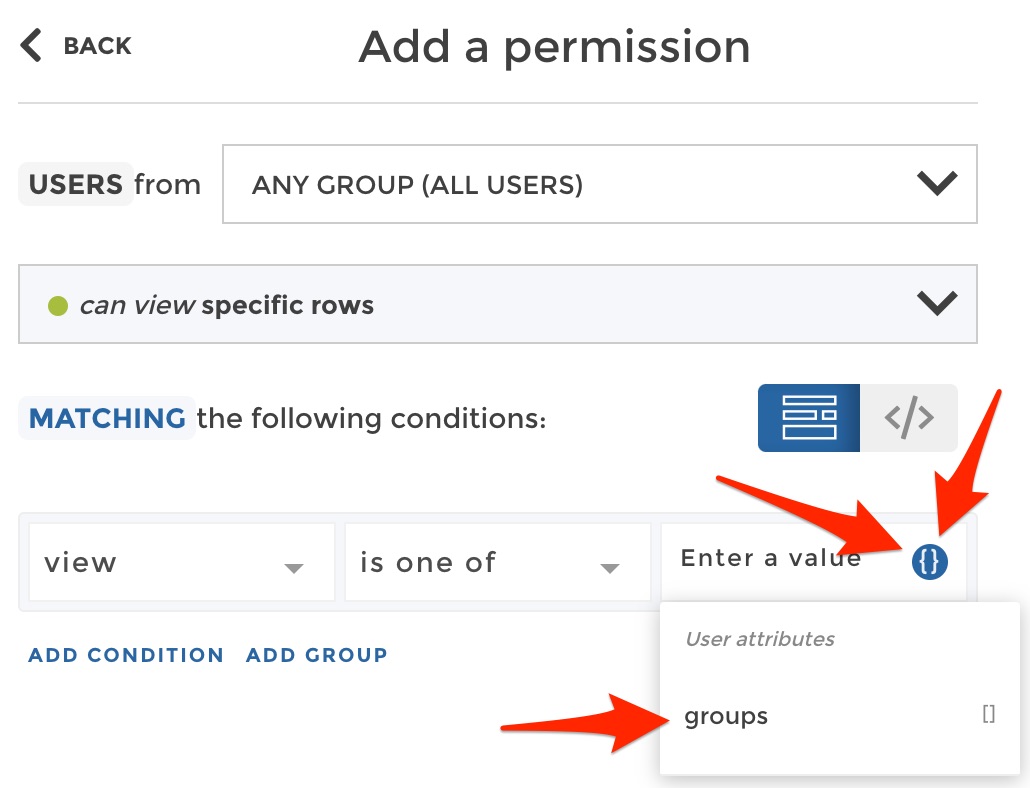
In the dropdown, you can select the variable groups which
corresponds to the list of all user groups a user belongs to. So if a
user belongs to the user groups “France” and “Finance” for example, the
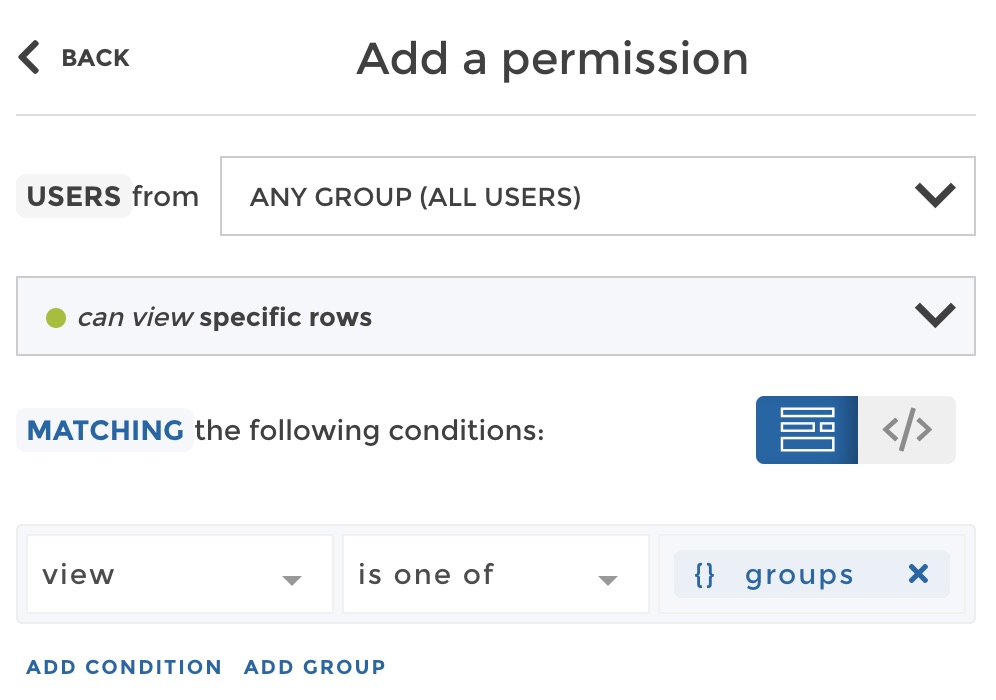
variable will have the value ['France', 'Finance']. As it is a list
of values, you must use this variable with the operator is one of or
is not one of in your filter. Here is the result in our example:
Now you can play with the preview to check that with this only rule, any user group accesses exactly the right row. For example, let’s check that the user group “France” only sees the row matching “France in the “view” column:
preview permission
All good! But hey… Remember that actually the “France” user group should also access cities in France? If it’s not the case at this stage, this is because our filter only searches a match in the “view” column. But in lots of cases you will have a hierarchy, and if it is properly modeled as in our example (with one column per hierarchy level), then our filter can search for a match in every column of the hierrarchy. We will use an “OR” between several conditions to search for the user group value in either the “view” column, the “country” column or the “region” column:
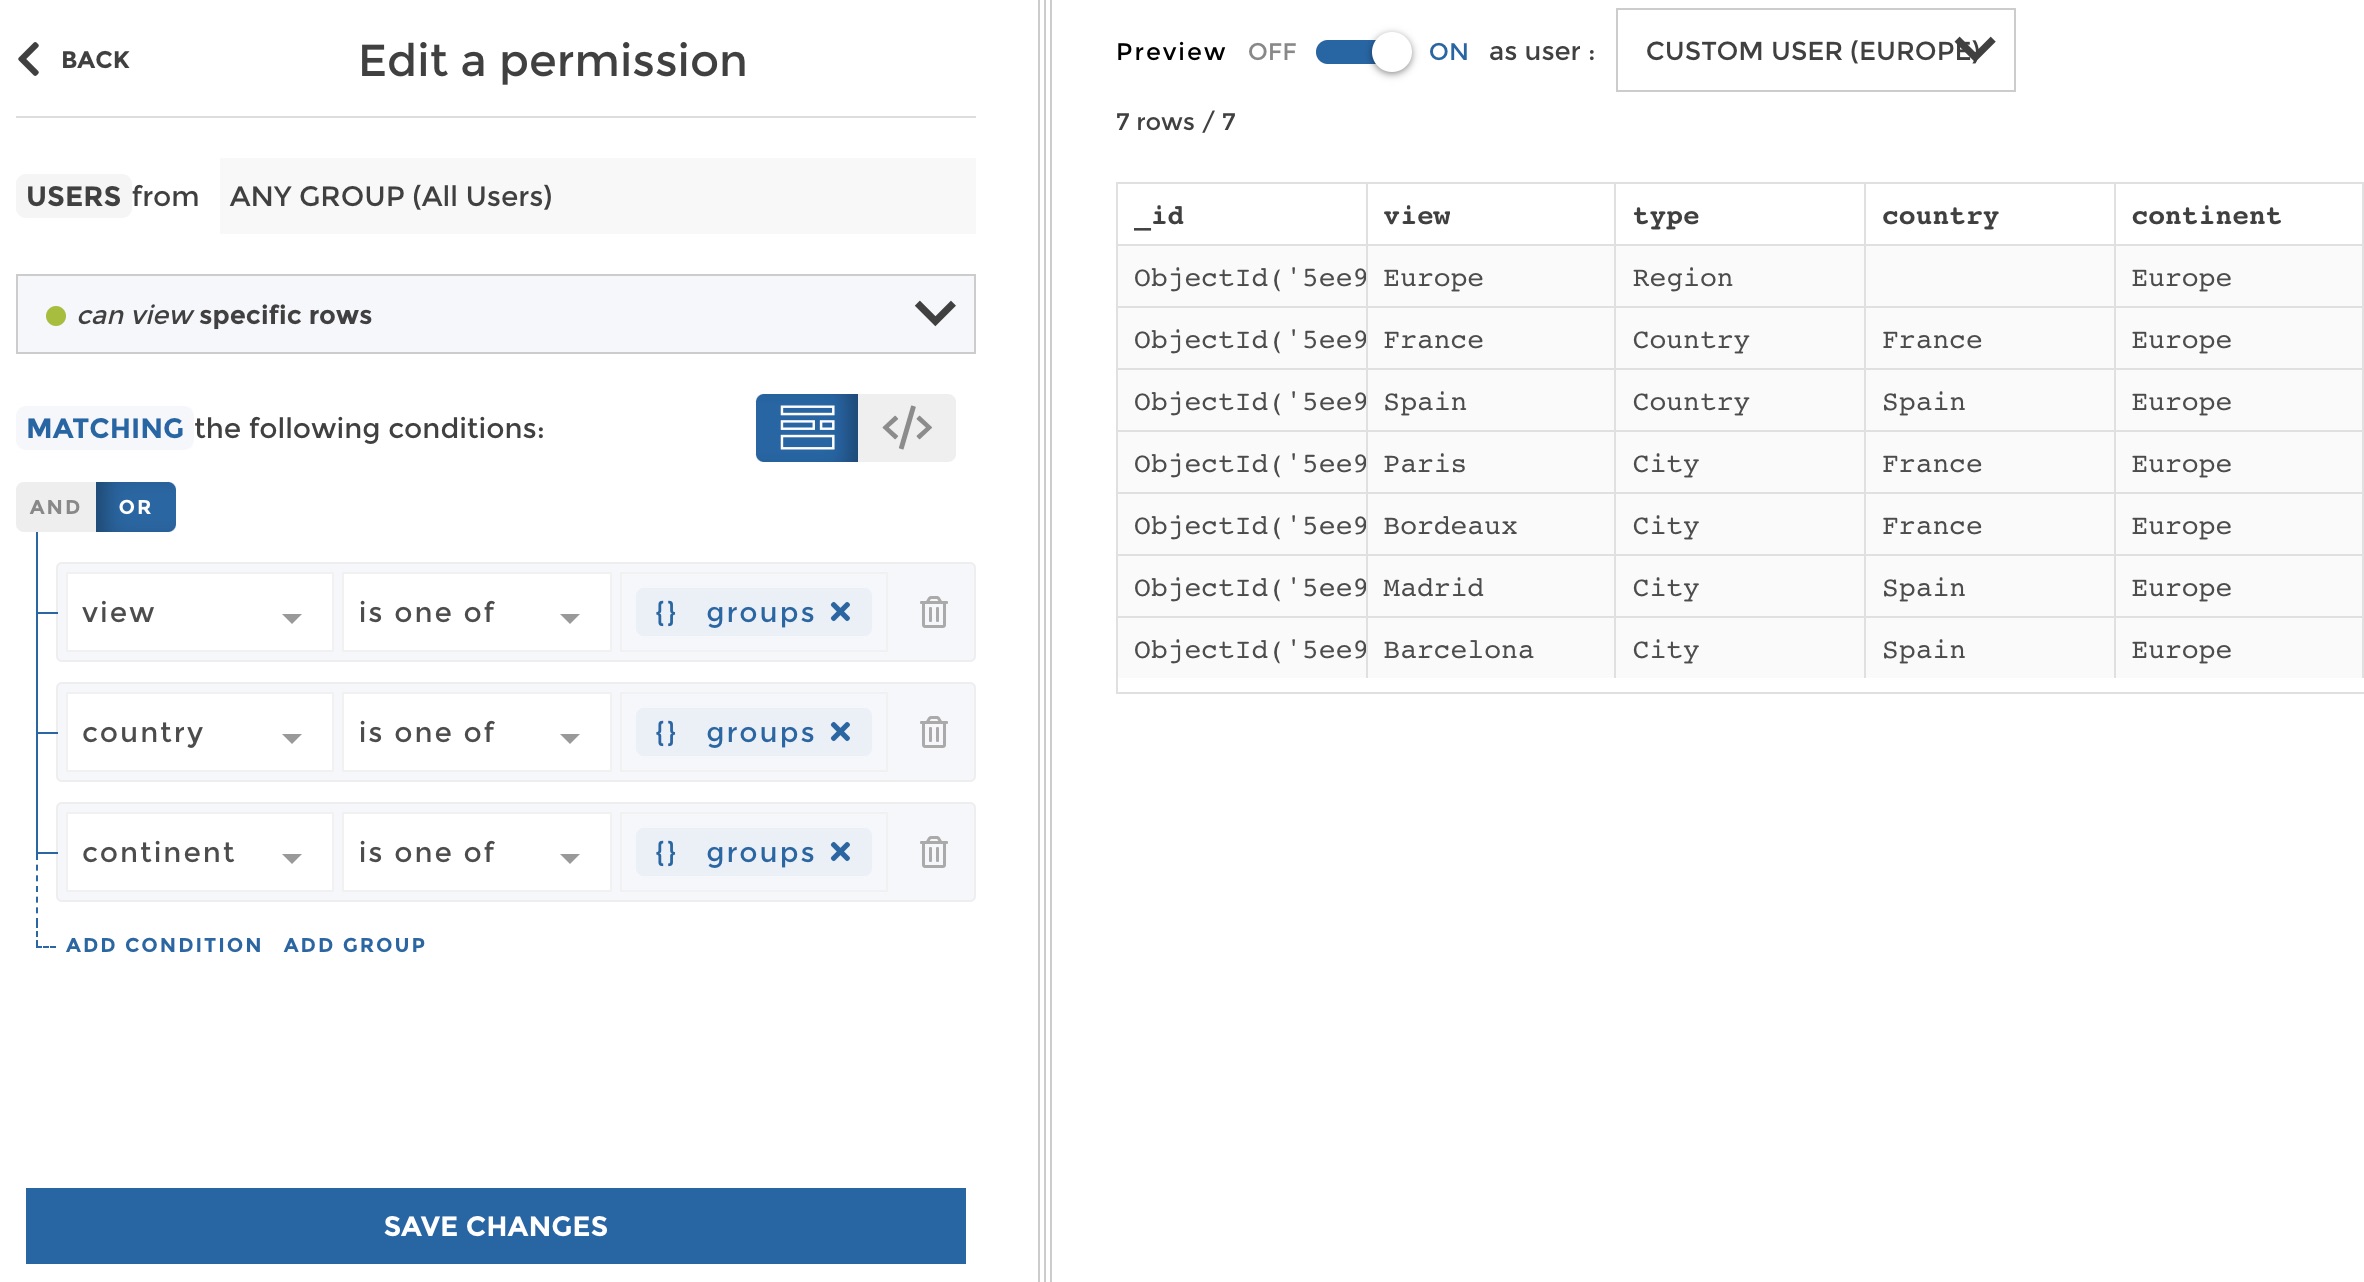
create permission
See the preview on the right? The user group “Europe” can see the view “Europe”, but also the views of all countries and cities located in Europe. You can play with the preview and check that we tackled every case in just one rule! Now your list of permission looks just like this:
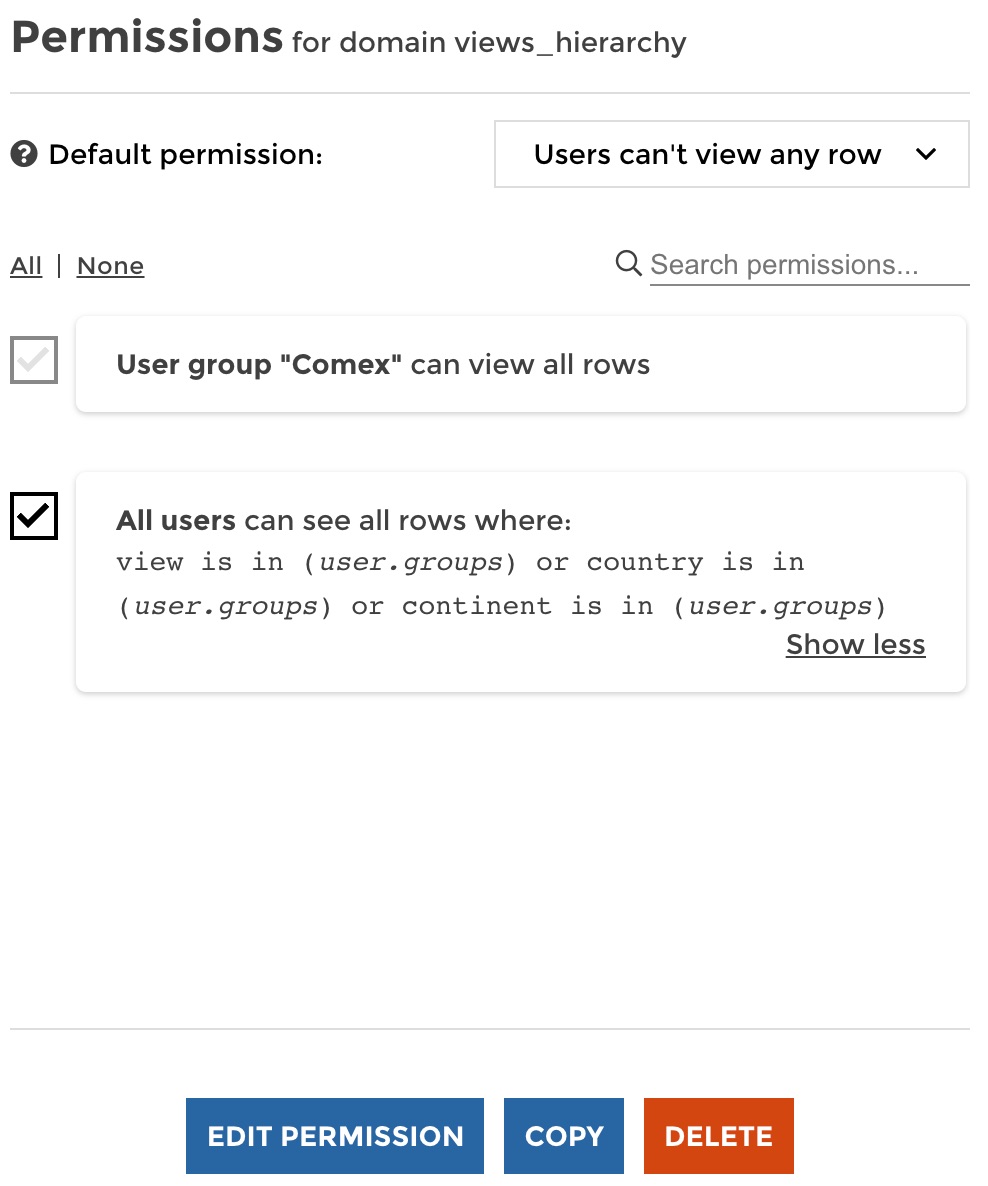
Easier to setup and maintain right?
Leverage your identity provider attibutes through SSO
You may want to pass some user attributes through the single sign on process. That way you can define permissions based on the information provided by your identity provider directly instead of creating user groups in Toucan Toco.
Please see this documentation for more information on authentication and the usage of user attributes.
So let’s say, in our example, that when a user gets authenticated to
Toucan through your SSO, we get an attribute view that fits our
need. So a France country manager’s view attribute will be equal to
“France” for example.
You can use custom user variables in your permission filters by using
the following syntax: {{ YOUR_VARIABLE_NAME }}. In our example, it
will be {{ view }}. If you use the right syntax in the input text,
the string should be converted into a variable block like this:

So in our example the same permission that we setup above, but this time
mapped on the view attribute recevied from the SSO, looks like this:
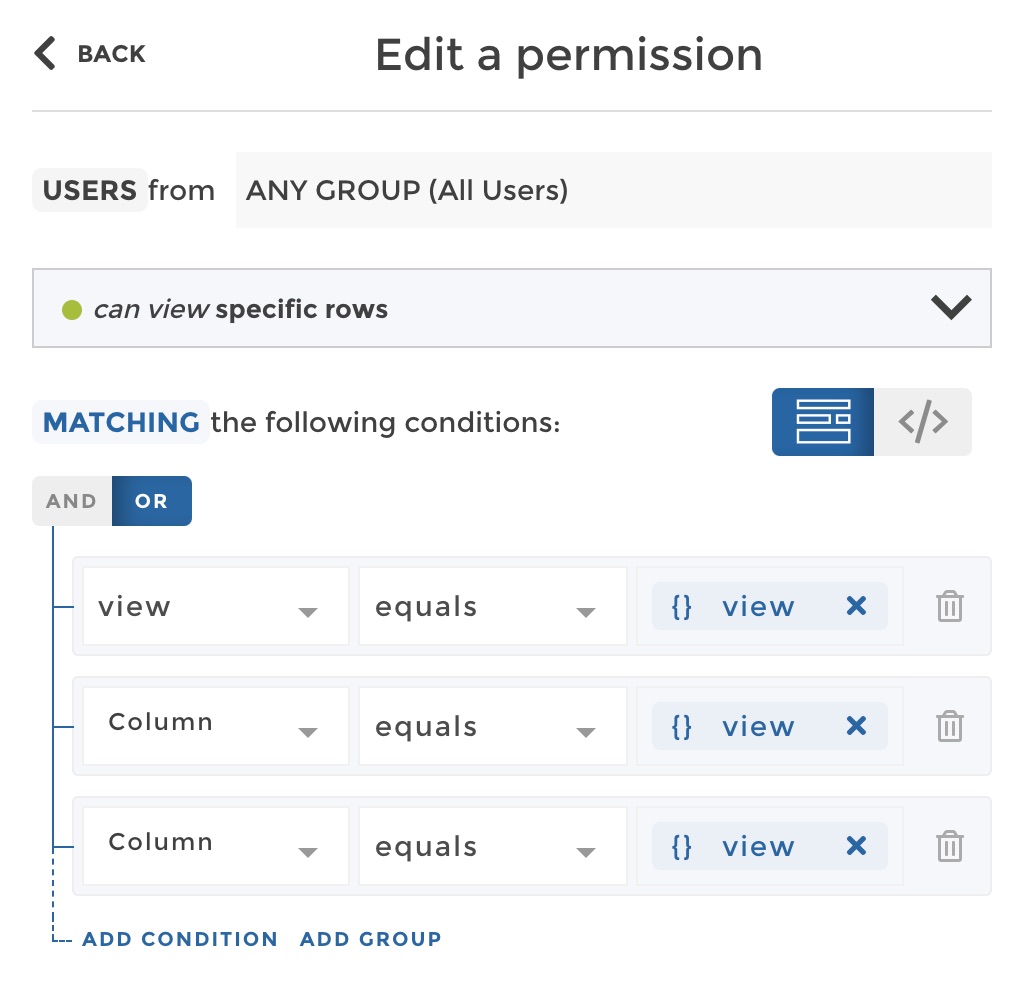
(Note that the operator filter is equals here because we compare to
a string, not a list.)
Now you can preview which rows would see a user that has a custom
attribute view equal to “Europe” for example. For that purpose you
need to define your custom variables in the code editor (JSON format) as
shown below:
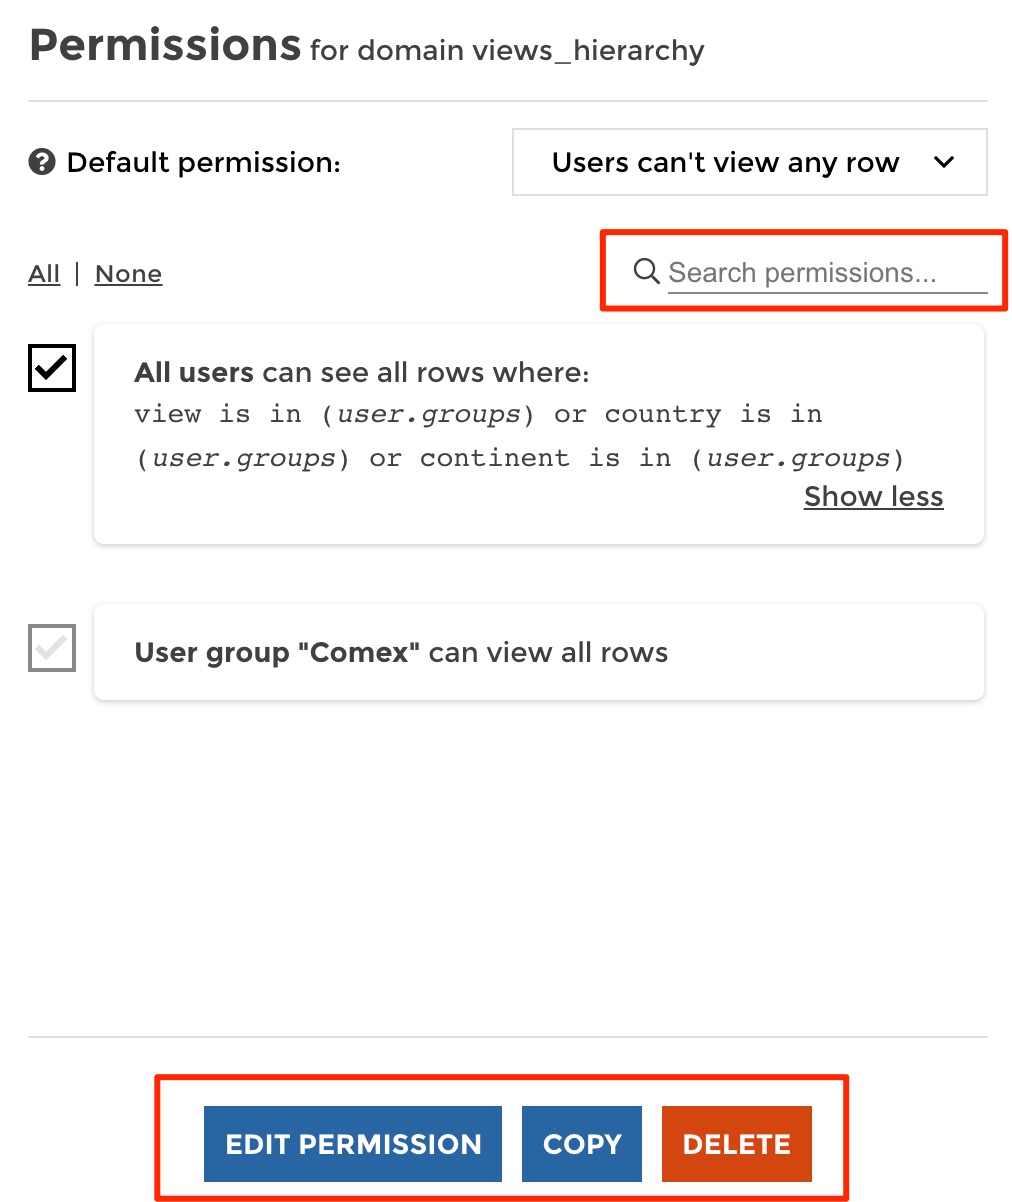
Manage permissions
From the list of permissions of a dataset, you can easily:
- search for permissions - edit a permission - copy on or several permission from the current dataset to on or several other datasets of your data explorer - delete one or several permissions - preview the data as a user (same principle as described in the section “Create permissions” above)
Test permissions
Aside from the data preview already presented in the above sections, you have a very useful feature to easily test permissions: you can view the app as another user, with all its user attributes.
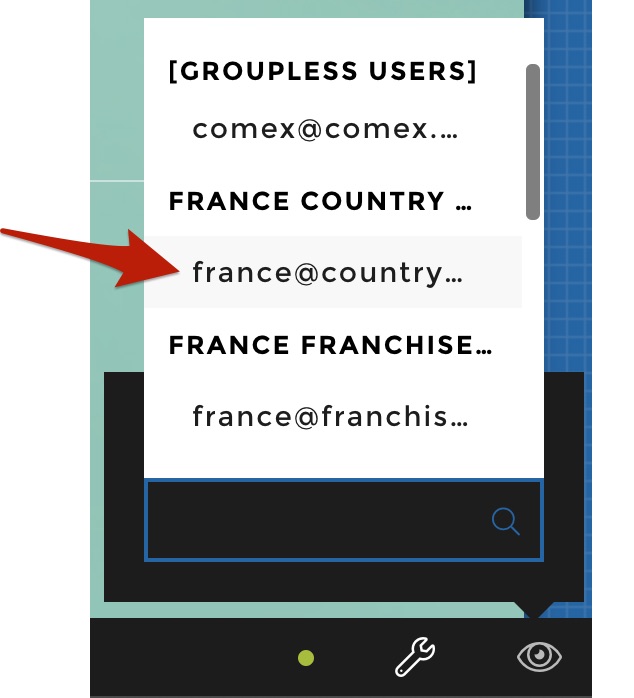
To access this feature you can click on the “View as” icon in the staging toolbar as shown below:
From here if you are Admin you have access to the list of all users that has access to the app. You can just click on any user to view the app as this user.
In our example, let’s select the France country manager:
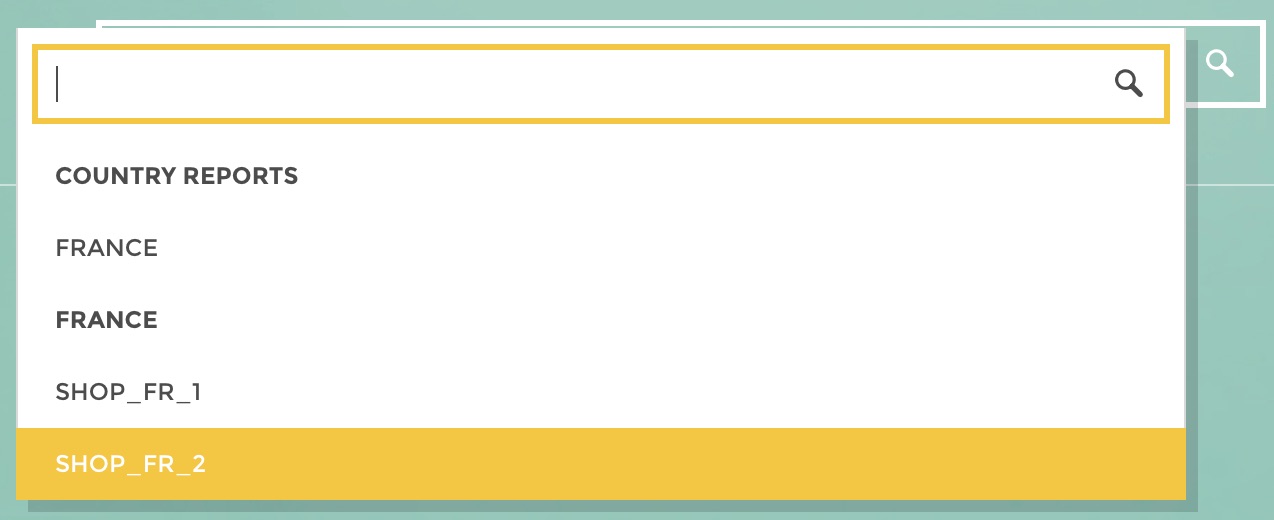
Once you have selected a user you switch to a new mode where the staging toolbar now indicates you that you are currently viewing the app as a specific user. You can validate from our example that the France Country Manager user group only has access to the France consolidated view as well as to the French shops views ! Validating permissions has never been so quick and easy !!
If you want to quit the view and get back your staging toolbar, just click on the cross on the right of the staging toolbar as shown below:

Now if you are conceptor, you will not have access to the list of users. Instead when you click on the “View as” icon it will open directly an interface where you can design a fake user to test your permissions. You can attach to this user the user groups that you want to test:
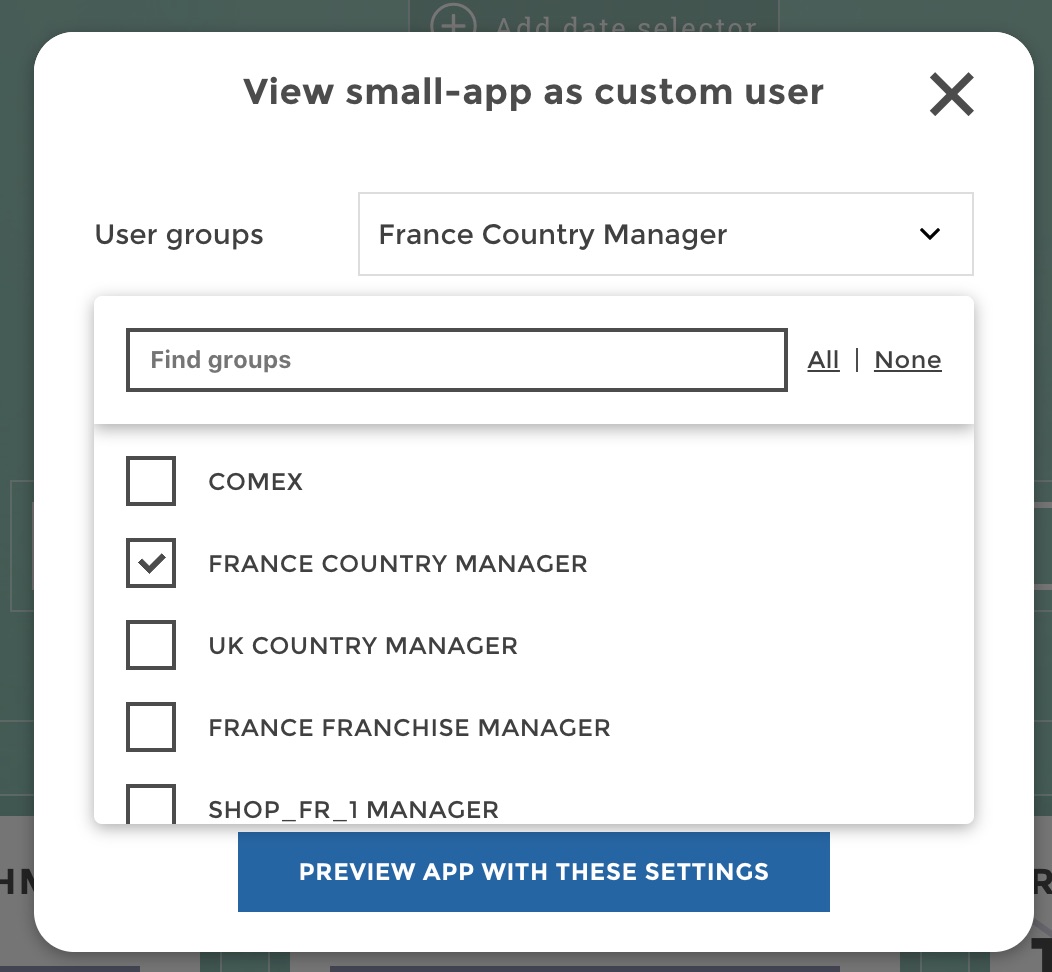
Note that the ability to design a custom user on-the-fly is also accessible to admin as shown below:
This can be very useful when you need to think ahead and define rules based on user groups before having real users attached to those user groups.